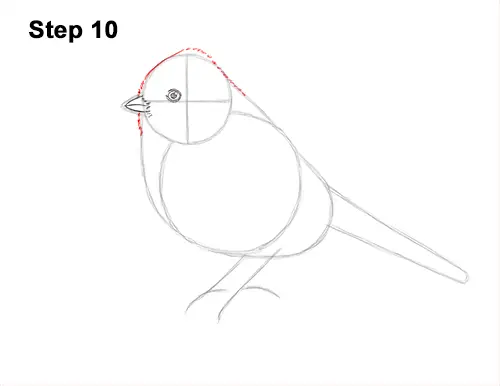
Step 10: Darken the initial circle using a series of short strokes for the feathery shape of the bird's head. At the top, curve the shape higher than the circle to create a short crest. Don't curve the shape too much or the blue tit's crest will be too big. Keep it short. Use short strokes to darken the path of the initial lines on the sides for the fluffy neck.
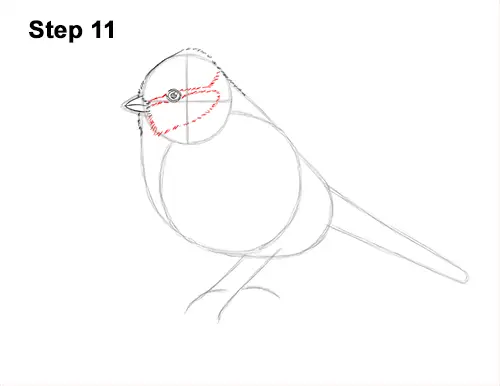
Step 11: Use short strokes to draw the feathery pattern across the Eurasian blue tit's head. The first part of the pattern consists of two lines across the eye for the stripe on the bird's head. Below that, draw a curved line that meets up with the stripe on the right end.
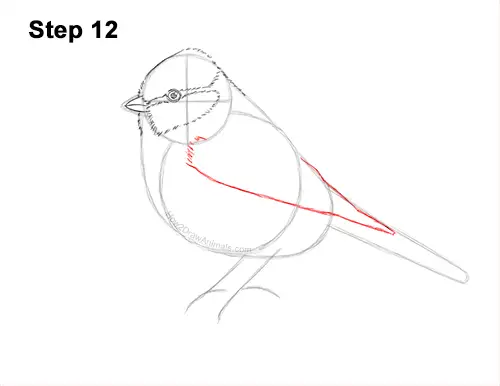
Step 12: Lightly sketch a long line across the body that slopes down to the tail for the blue tit's folded wing. When you get the position of the wing right, darken the line. Curve the bottom tip a bit. At the top, draw a few short strokes for some of the bird's fluffy feathers.
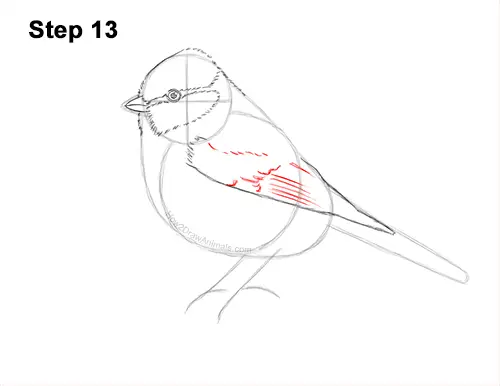
Step 13: Draw a few more short strokes across the shape of the wing for more detail on the bird's feathers. Add some short, U-shaped lines in the middle for more feathers. Draw a few longer lines toward the bottom for longer feathers.
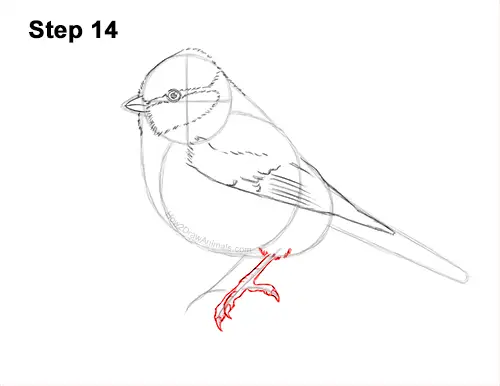
Step 14: Draw a few short strokes along the top part of the foot on the right for the feathery base. Draw the shape of the foot around the guide line. At the bottom, draw the claw as a curved, pointy tip. Use the short line on the right as a guide to draw the toe pointing back. Give it a claw too. Use wavy lines to draw the shape of the blue tit's foot. Add another toe on the left. Not all of the bird's toes will be visible from this angle.


