Page 3 of 4
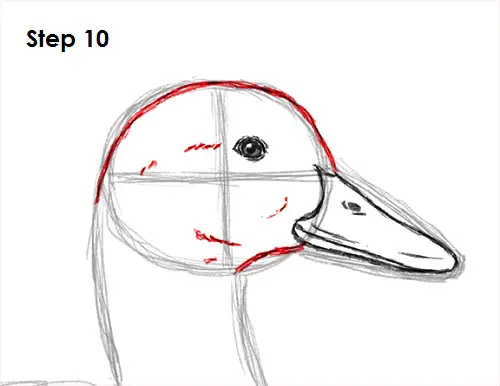
Step 10: Darken the outer portion of the circle to form the duck's head. Draw a few quick, short strokes inside for extra detail.
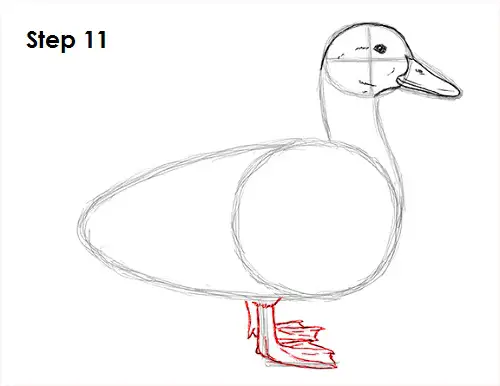
Step 11: Use the L-shaped line as a guide to draw the feet. Draw lightly at first to get the structure right. When you like what you have, go ahead and darken it. Ducks have flat webbed feet, so first draw three individual toes, then attach the webbing in between using curved lines. Draw the visible portion of the leg on the other side the same way.
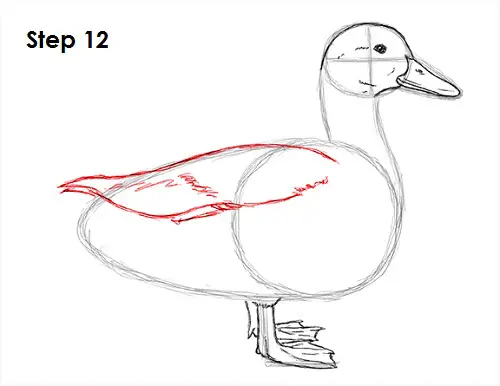
Step 12: Use the top half of the body as a guide to draw the duck's folded wing. The end of the wing sticks out and comes to a point. The bottom portion is made up of curved lines. Break up the bottom portion into smaller curved lines instead of one continuous line. Draw another point on the left side for the other wing.
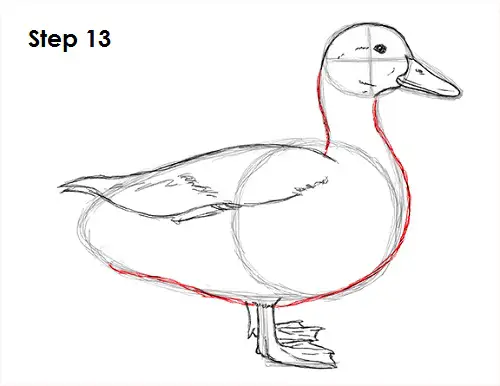
Step 13: Use the initial lines as guides to draw the duck's neck and body. Draw the chest sticking out more as you darken the lines. Be sure not to draw over the feet.
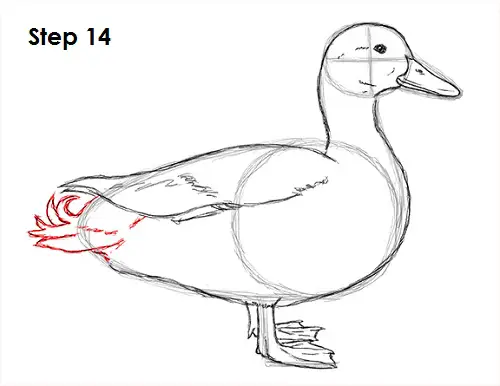
Step 14: Draw a series of curved and pointy shapes for the duck's tail on the left side. Use quick, short strokes throughout the tail to represent the feathers.


