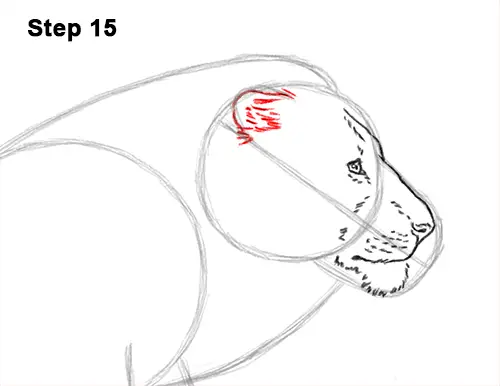
Step 15: Darken the small arc on the top, left side for the lion's ear but make the shape wavier. Draw a few longer strokes across the bottom of the ear for the part of the mane that covers it.
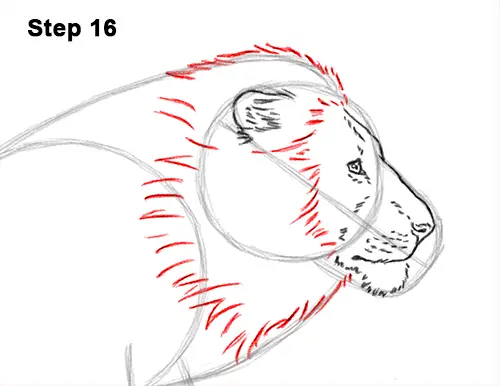
Step 16: Draw a series of long strokes from the top of the head to the chin for the inner edge of the lion's mane. Make the strokes in the middle longer and farther to the left. Use a series of strokes along the top guide for the main part of the mane. Curve the strokes to the left to emulate the mane flowing in the wind as the lion is running. Add strokes directly on top of the lower guide to create the mane at the bottom the same way. Continue to add strokes across the guides toward the top to close off the front shape of the mane.
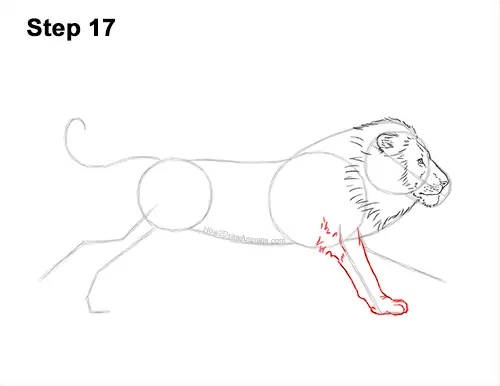
Step 17: Use the second line from the right as a guide to draw the running lion's first front leg. Follow the path of the guide and lightly sketch the shape of the leg around it. When you get the shape of the leg right, darken the lines. At the bottom, draw a couple of short, curved lines for the creases on the foot and for the toes. The top of the leg should be thick and gradually get thinner toward the bottom. On the top, left side, draw a few longer strokes for the fur found at the joint.
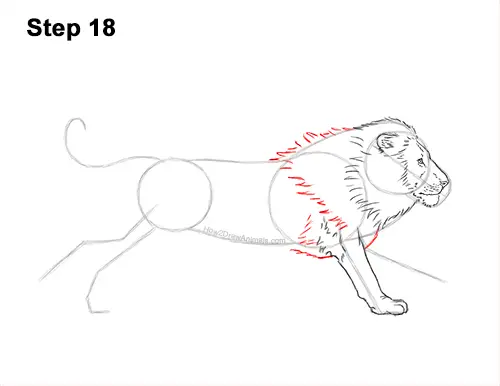
Step 18: Use the lines that connect the head to the body as guides to draw the rest of the mane. Draw a series of short strokes directly on top of the guide line to create the shape of the mane. Draw the strokes across the first circle guide. At the bottom connect the strokes to the fur on the joint.
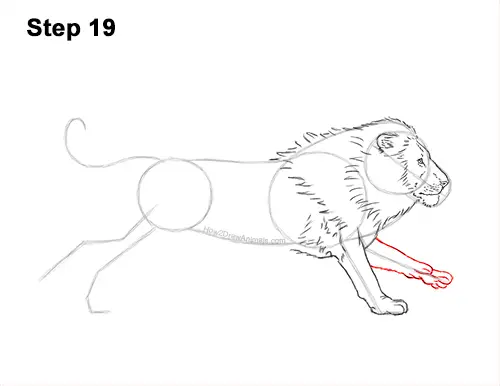
Step 19: Use the sloping line on the right as a guide to draw the other front leg the same way. Lightly sketch the leg around the guide. Make the top part wider than the bottom. The lion's paw will be stretched out. At the bottom of the shape, draw a couple of curved lines for the toes. Make the bottom part of the foot wavy for the thinner joint that connects the paw to the leg. Draw a couple of curved lines under the toes for the padding on the paws.


