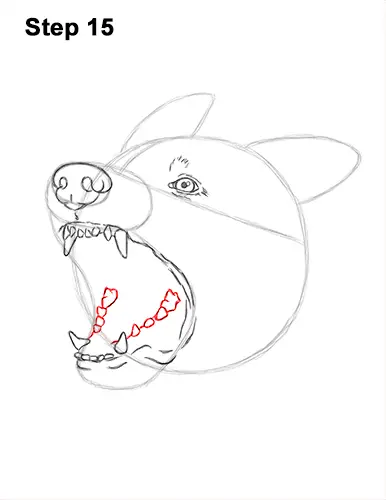
Step 15: Lightly sketch a line from the lower canine to the right as a guide for the placement of the German shepherd's molars. Draw a series of small hill-like shapes on top of the sketched line for the molars. The molars should get bigger the farther to the right they are. Draw the molars on the left side the same way. Start with a lightly sketched line. Now add the molars on top of the sketched line. The molar farthest back should have two bumps at the top.
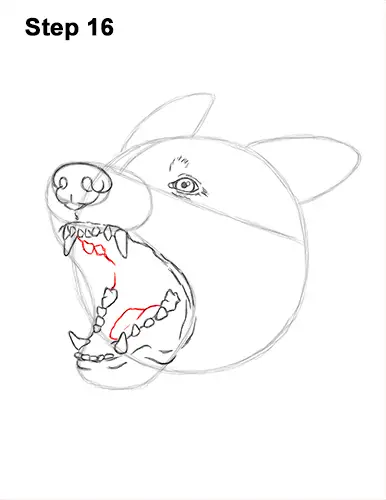
Step 16: Starting at the molar on the left, lightly sketch a line that curves to the top, left side. Now draw a couple of small, curved shapes for the top molars. Darken the sketched line for the gums. Notice how the top molars slope to the lower right. Inside the mouth, on the lower half, draw the tongue using a couple of curved lines.
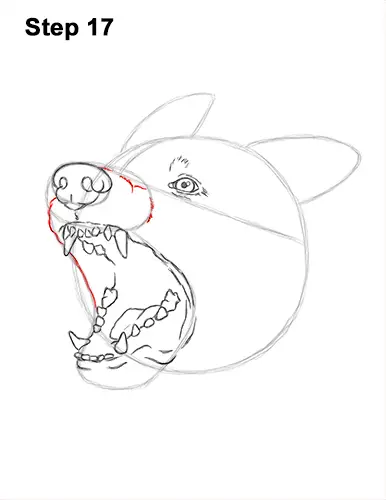
Step 17: Use the oval at the top as a guide to draw the rest of the German shepherd's muzzle. Follow the path of the oval and connect the nose to the top, left canine to close the shape of the dog's muzzle. Draw a series of short, curved lines along the path of the oval for the wrinkles on the snarling muzzle.
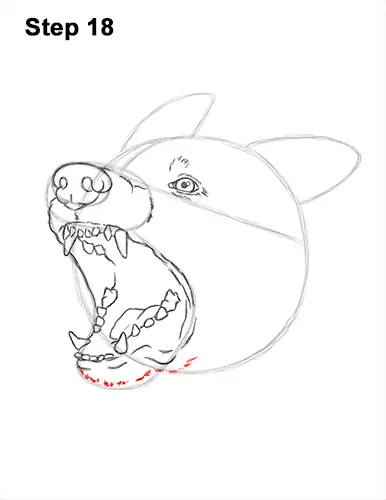
Step 18: Draw a series of short strokes along the curved guide at the bottom to create the German shepherd dog's furry chin. Add a curved line made up of short strokes on the right for loose skin.
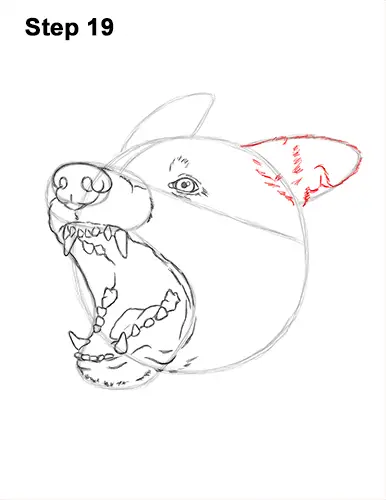
Step 19: Darken the triangular shape on the top, right for the German shepherd's first ear. Make the lower edge wavier. Add a series of short strokes inside the shape for the folds of skin and fur.


