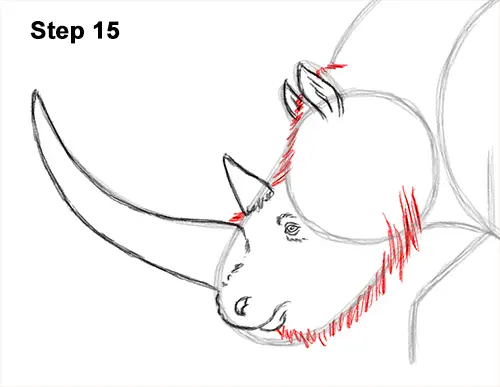
Step 15: Use the Initial shapes as guides to draw the rest of the woolly rhinoceros' head. Draw a series of short strokes along the outer edges of the guides to create the furry shape of the head. Don't overlap the shapes of the horns as you add the fur to the top. Use longer strokes for the shaggier fur found along the underside of the head.
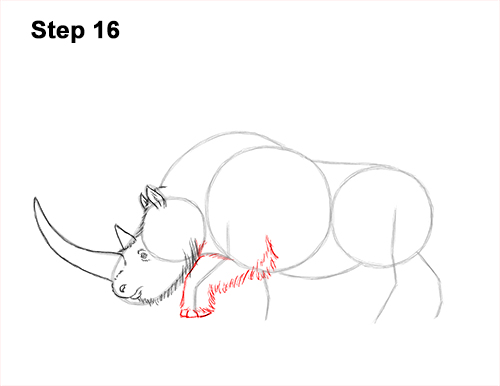
Step 16: Use the angled line on the left as a guide to draw the first front leg. Follow the path of the guide and lightly sketch the shape of the leg around it. Make the leg thick. The leg should be especially wide at the top. When you get the shape right, darken the lines. Draw a couple of short arcs at the bottom for the woolly rhinoceros' nails. Use a series of short strokes as you darken the right side of the leg for the long fur.
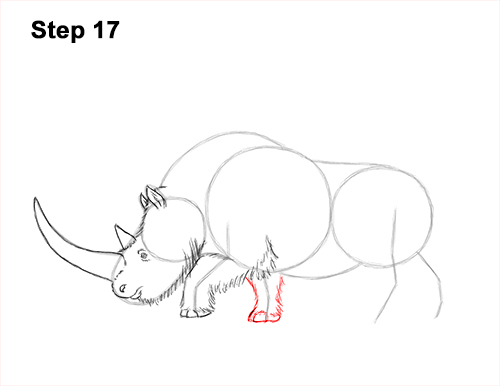
Step 17: Draw a thick shape around the guide line on the right for the second front leg. Use short strokes to create the woolly rhinoceros' fur and add the nails at the bottom using a couple of small arcs.
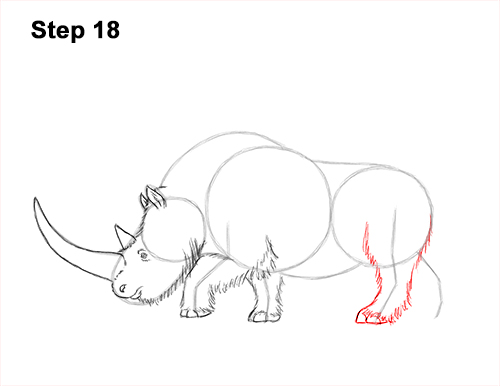
Step 18: Use the long, angled line on the right as a guide to draw the first hind leg the same way. Lightly sketch the shape of the leg around the guide. When you get the shape right, darken the lines. Make the shape of the leg thick. Use short strokes to create the woolly rhino's long fur. Curve the shape to indicate the joints. Draw a couple of short arcs at the bottom for the nails.
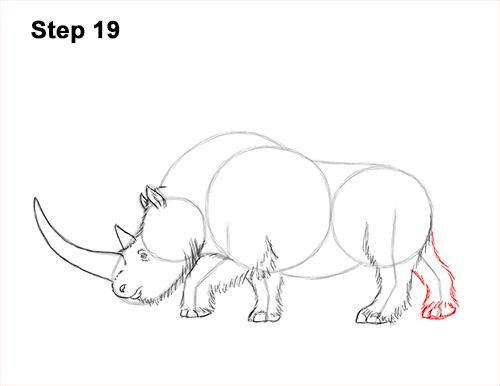
Step 19: Draw a series of short strokes around the angled line on the right to create the other hind leg. The very top of this leg will be behind the woolly rhinoceros' body, so don't draw it. Don't forget the nails at the bottom!


