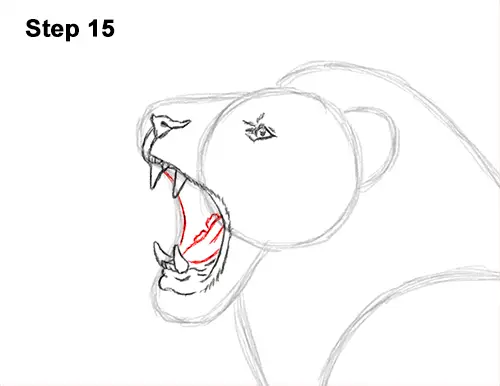
Step 15: Darken the left edge of the initial guide line to close the shape of the open mouth. Inside the shape, draw a curved line for the roaring lion's tongue. At the top, draw a spiky shape for teeth.
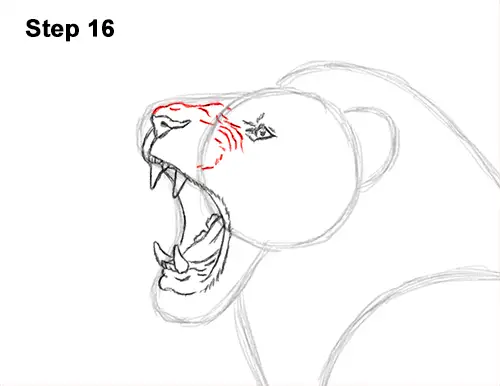
Step 16: Darken the line above the nose to create the bridge of the muzzle. Add a few short lines between the lion's nose and the eyes for wrinkles. Draw lines of different sizes mainly close to the eye to emphasize the roaring face.
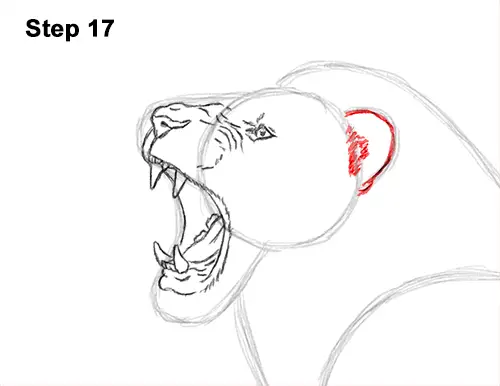
Step 17: Darken the arc on the right for the lion's ear. Add some short strokes inside the shape for fur.
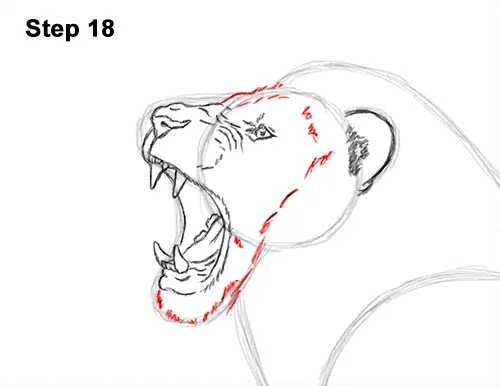
Step 18: Darken the top part of the initial circle for the roaring lion's head. Draw a series of short strokes between the mouth and the ear for the inner edge of the mane. As you add the strokes for the mane, use the same slope as the lower jaw. Darken the lower curved guide using short strokes to create the furry chin.
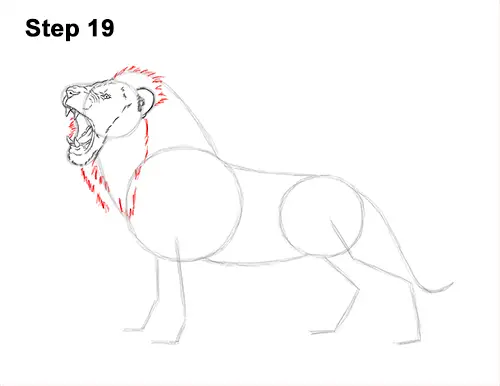
Step 19: Use the curved lines around the head as guides to draw the first part of the roaring lion's mane. Darken the top part of the guide using short strokes to represent the hair on the mane. Continue drawing short strokes in a vertical line under the ear. Draw short strokes along the path of the guide under the chin. Add a few more strokes to the left to make the lion's mane fuller.


