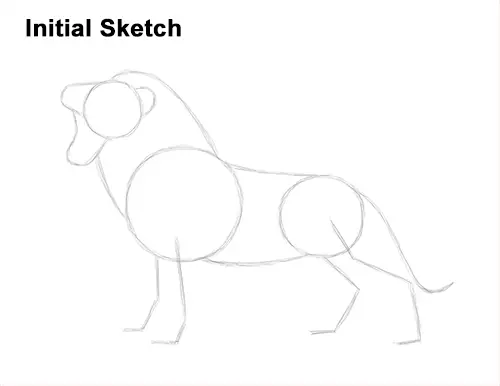
That's it for the guides! From this point on, press harder with your pencil for a more defined drawing.
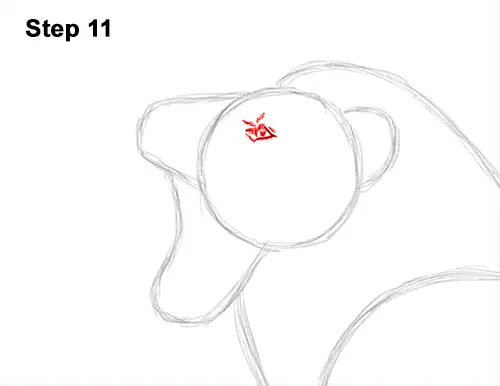
Step 11: Inside the lion's head, near the top, draw a line similar to a greater-than sign (>) for the eye. Close off the shape on the left side with a short, curved line. Inside, add a dot for the pupil. To the left, draw a thick, pointy line for the corner of the lion's eye. Draw a series of short lines around the eye for wrinkles. Pay attention to the size of the eye in relation to the rest of the head.
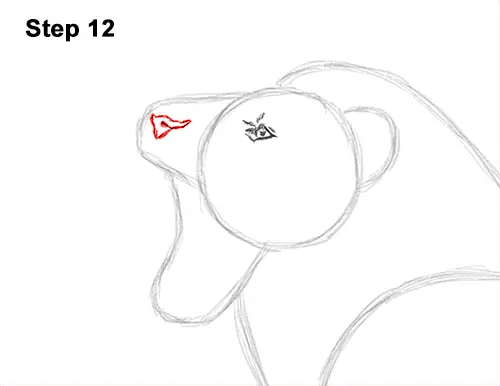
Step 12: Inside the muzzle, near the tip, lightly sketch a small triangle for the lion's nose. When you get the size and position right, darken the shape but make the corners thinner. Curve the right edge inward to create the nostril. The top edge should be a bit wavy.
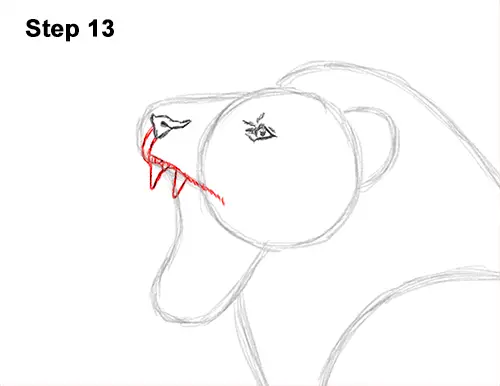
Step 13: Use the initial arc as a guide to draw the top part of the roaring lion's open mouth. Darken the lower edge of the initial arc and extend the line inward to make the mouth bigger. Under the line, near the right, draw a small, V- shaped line for the lion's first canine tooth. To the left, draw a few more small shapes for the front teeth. To the far left, draw another V-shaped line for the lion's other canine.
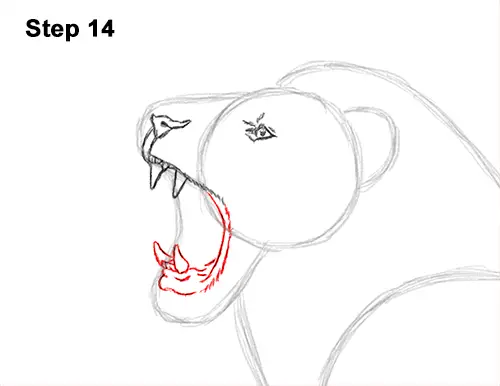
Step 14: Use the curved line at the bottom as a guide to draw the roaring lion's open mouth. Extend the top line downward and then curve it to the left to create the open mouth. Add a parallel line to the left to create a thin shape for the lips. Above the lower line, draw two small, triangular shapes for the lower canines. Draw a few short lines under the canines for the detail on the lion's gums and lip.


