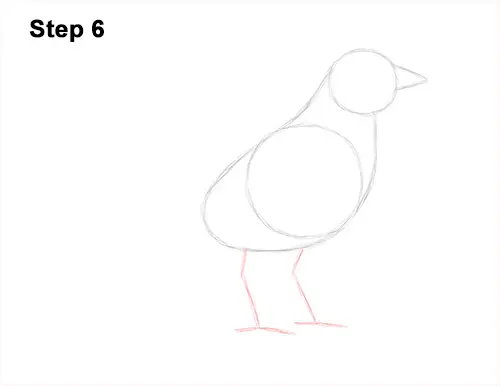
Step 6: Under the robin's body, draw a long, vertical line as a guide for the first leg. Notice how the line bends at the top then slopes a bit. At the bottom add two shorter lines as guides for the toes. To the right, draw a similar set of lines as guides for bird's the other leg.
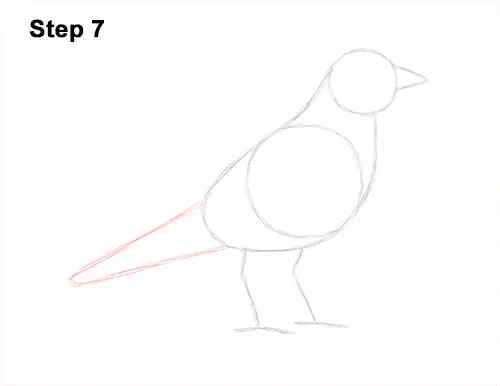
Step 7: On the lower, left side of the body, draw a long, thin shape as a guide for the robin's tail. The shape should slope to the bottom, left side. The base should be wide and the tip thin, like an arc.
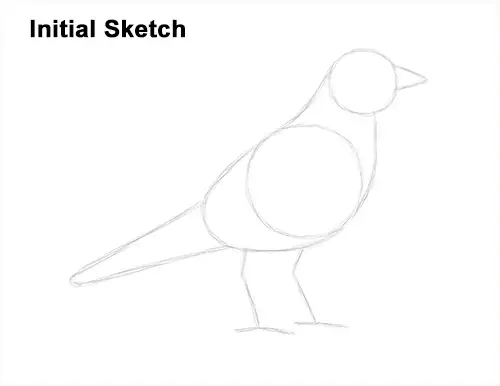
That's it for the guides! From this point on, press harder with your pencil for a more defined drawing.
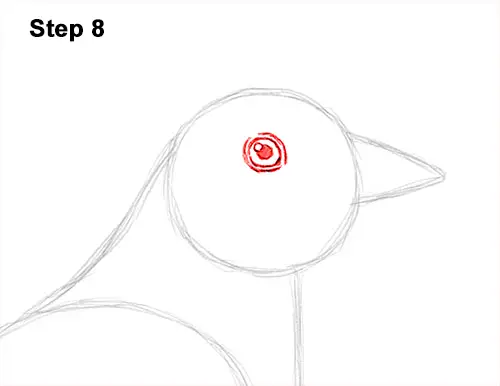
Step 8: Inside the robin's head, near the top, lightly sketch a small circle for the eye. When you get the size and position of the eye right, darken the shape. Inside the eye, off to the side, draw a tiny circle to represent glare and a big dot in the middle for the pupil. When you draw the pupil, don't overlap the shape of the tiny glare circle. Draw a couple of lines around the bird's eye for extra detail.
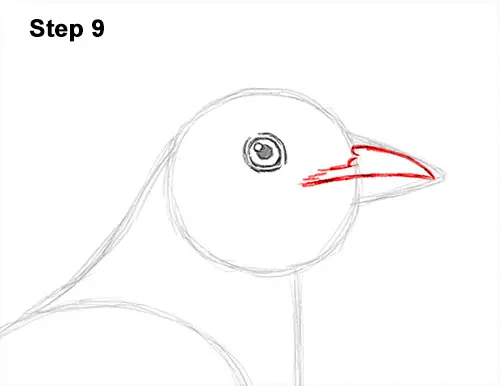
Step 9: Darken the top edge of the triangular shape but make the line curve more for the top of the beak. Draw a line across the shape that extends to the left and almost meets the eye for the mouth. Draw a few short lines to the left of the robin's beak for the feathery base.


