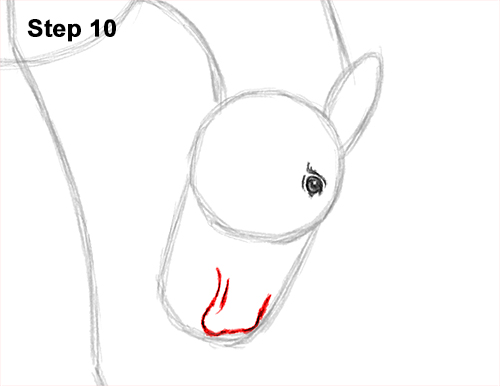
Step 10: Use the initial U-shaped line as a guide to draw the top part of the open mouth. Follow the path of the guide as you draw the shape of the horse's muzzle but make it thinner and wavier. Near the middle of the guide, curve the line up to create the top part of the open mouth.
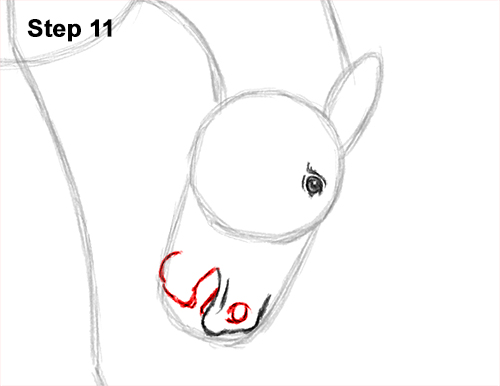
Step 11: Draw a small circle inside the small area of the top of the muzzle for the nostril. Horses have big nostrils, so don't make the circle too small. To the left, draw the lower part of the horse's open mouth using a couple of short, curved lines. The chin should graze the left edge of the guide. Add a flat line inside the mouth on the right for the teeth.
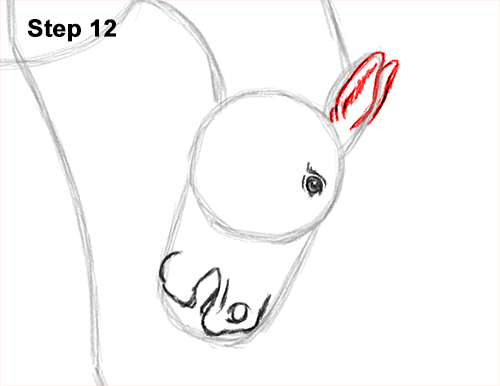
Step 12: Darken the shape at the top for the ear but make it a bit smaller and wavier. Draw a line inside the shape for the ear's opening. To the right, draw a curved line for the visible part of the horse's other ear.
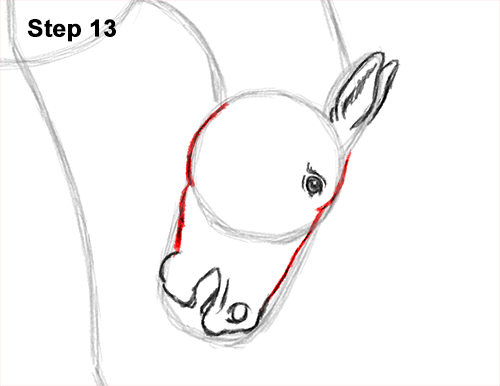
Step 13: Use the remaining shapes as guide to draw the rest of the bucking horse's head. Darken the outer edges of the guides but make the section above the muzzle a bit thinner. Draw a curved line to the right of the eye for the thick brow.
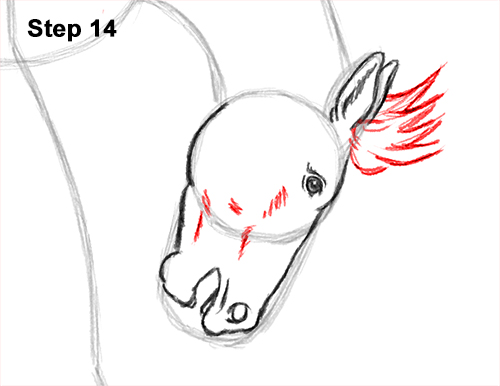
Step 14: Draw a series of short strokes inside the head for extra detail. These lines will help emphasize face structure. On the right side, draw the front part of the mane using curved lines. The mane will be flying in the air as the horse bucks, so start the lines just below the ear and curve them up.


