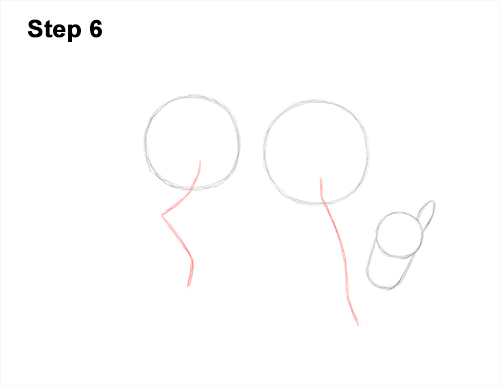
Step 6: Under the first circle, draw a long line as a guide for the front leg. This guide should slope toward the head and curve a bit to indicate the joints. To the left, draw another line as a guide for the bucking horse's hind leg. This line should bend in the middle to indicate the joint.
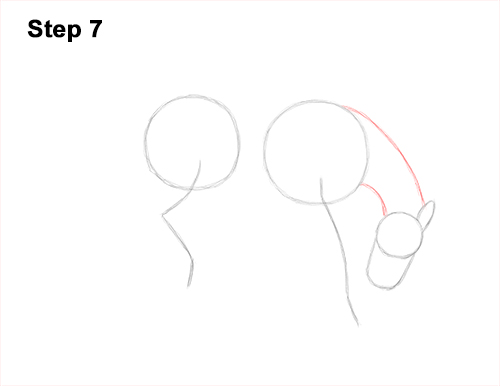
Step 7: Draw two curved lines that connect the head to the body to create the guide for the horse's neck. The line at the bottom should be shorter to indicate the neck curving.
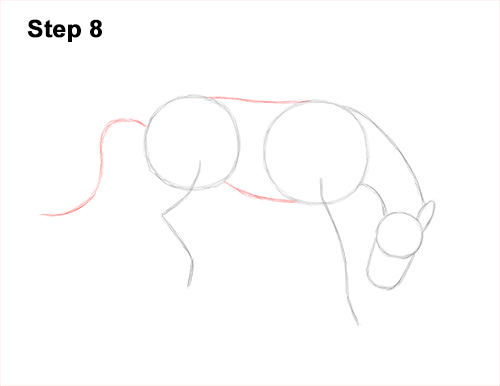
Step 8: Draw two curved lines to connect the first two circles and complete the guide for the body. On the left side of the body, draw a long, wavy line as a guide for the horse's tail.
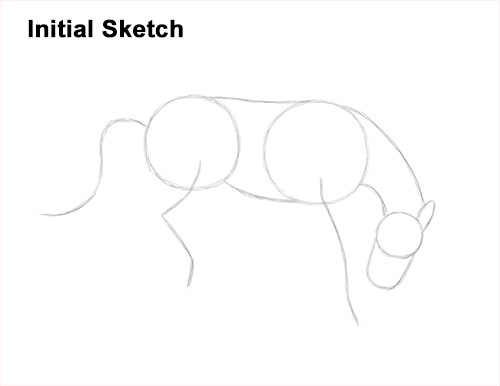
That's it for the guides! From this point on, press harder with your pencil for a more defined drawing.
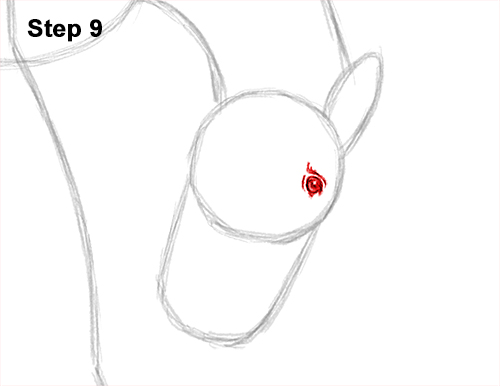
Step 9: Inside the head, near the right side, lightly sketch a small oval for the eye. When you get the size and position right, darken the lines but make the top and bottom pointier. Shade the inside of the horse's eye except for a tiny circle to represent glare. Make the middle of the eye darker for the pupil but don't overlap the tiny glare circle. Draw a couple of curved lines around the horse's eye for extra detail on the wrinkles.


