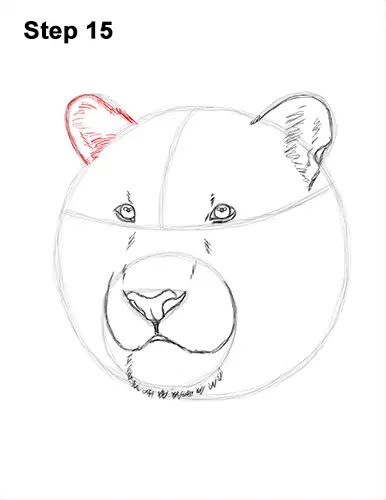
Step 15: Draw the tiger's other ear the same way. Darken the arc and then add some short strokes inside for fur.
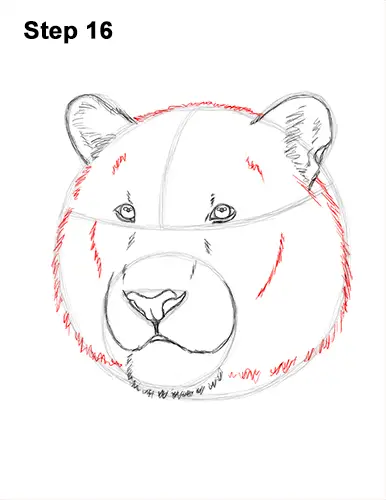
Step 16: Use the main circle as a guide to draw the rest of the tiger's head. Follow the basic path of the circle and darken the lines to create the shape of the head. Use short strokes along the path of the circle to create a furry texture. Use longer strokes at the bottom of the head for the shaggier fur found there. The overall shape of the head should be narrower at the top. Add some strokes inside the head for extra fur and to give the tiger's face more structure.
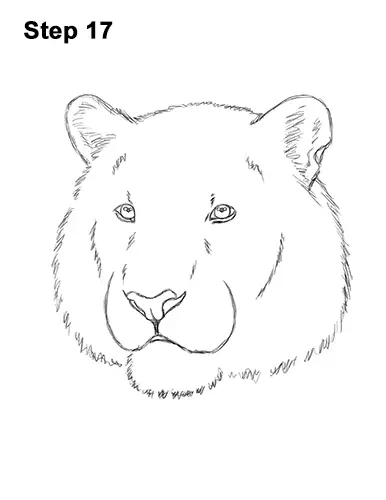
Step 17: For a cleaner look, erase as much as you can of the initial guide lines. Don't worry about erasing all of the guides. It's okay to leave some behind. Re-draw any final sketch lines you may have accidentally erased.
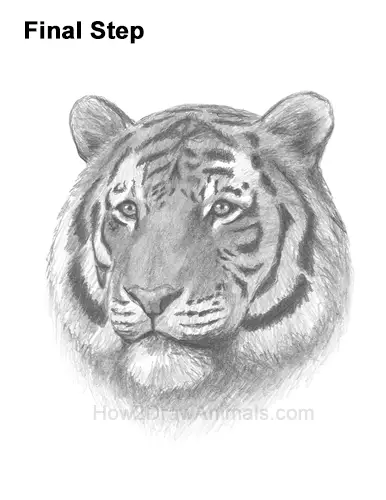
Final Step: Add a dark value to the outer section of each eye and the outer edges of the ears. Now add the distinctive tiger stripe pattern all over the head using a dark value. The stripes on top of the head should be thin, and they should have a horizontal orientation. For a more detailed guide on how to shade, check out this tutorial: How to shade.
The stripes on the tiger's forehead should be short and small, almost like spots. The stripes on the sides should be thin and gradually get thicker the farther away they are from the middle. Add some curved stripes under the eye on the right. Use short strokes as you draw the stripes for a fur-like texture.
It's a good idea to use reference as you draw for a more accurate stripe pattern on your tiger. Draw a series of dots arranged in rows on the sides of the muzzle for the base o f the whiskers. Darken the sides of the nose using a dark value too.
Add a light value to the eye but don't overlap the tiny glare circle. Use a series of short strokes inside the ears to create the furry texture found in there. Use a darker value near the middle of each ear for the opening. Use a medium value for the top of the tiger's head. It's okay if you overlap the stripes as you shade. Use a smooth, medium value for the bridge of the nose. Leave the area around the eyes blank.
Use a slightly darker value to the right of the bridge of the nose to create some shadows. Vary the pressure on your pencil to get different degrees of tonal value. Space out the strokes when you shade the outer sides for a more fur-like texture. Add a dark value to the right side of the tiger's chin. Use strokes that go in the general direction of the fur.
Add some strokes under the tiger's head for a hint of the fur on the neck. Shading can be time-consuming, so be patient and take breaks. Continue to add value to your tiger drawing until you're happy with the results. Don't forget to pause the video after each step to draw at your own pace.
Thanks for visiting! Subscribe to the How2DrawAnimals YouTube Channel for a new tutorial every week.
To learn how to draw popular cartoon characters, visit EasyDrawingTutorials.com.
RELATED TUTORIALS
 |
 |
 |


