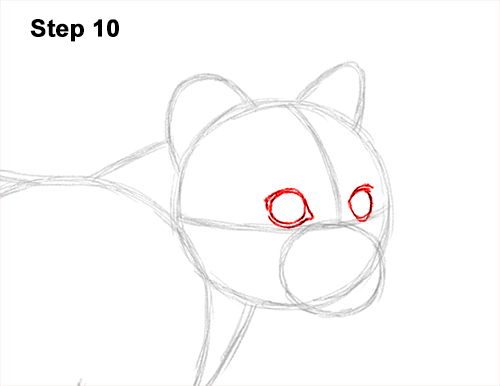
Step 10: Lightly sketch the eyes inside the head as two small circles. The margay's eyes should be on top of the horizontal guide line and on either side of the vertical guide. When you get the size and position of the eyes right, darken the lines. As you darken the shape of the eye, make the sides pointier. The eye on the right should be narrower and not as pointy because of the way the cat's head is turned. Draw a few curved lines around the eyes for extra detail.
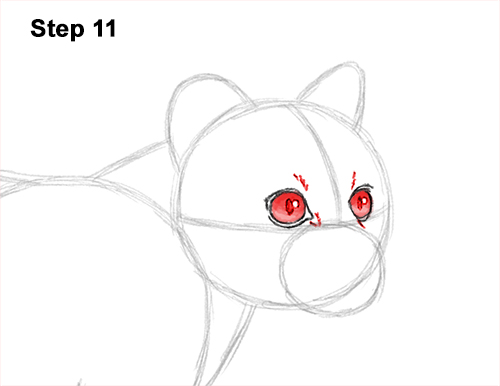
Step 11: Inside each eye, off to the side, draw a tiny circle to represent glare. In the middle of each eye, draw a thin slit shape for the cat's pupils. Shade the eyes using a value that's lighter than the pupils. Be careful when you shade so that you don't overlap the tiny glare circle. To make the eyeballs appear rounder, make the top part slightly darker than the bottom. Add some lines at the bottom to make the corners of the margay's eyes longer and some lines at the top for fur.
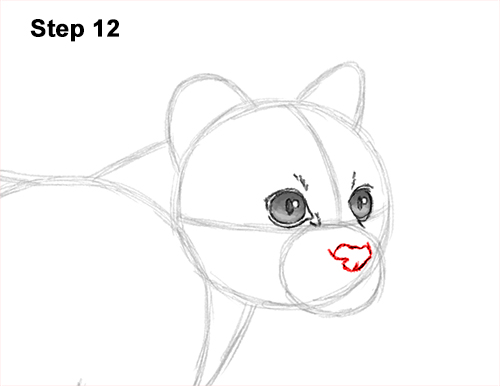
Step 12: Inside the muzzle, near the right side, lightly sketch a small circle for the nose. When you get the size and position of the margay's nose right, darken the shape but make it more angular. Make the top part flat. Draw a sloping line on the left that comes inside the shape for the nostril. Make the bottom of the nose narrow and add a small, vertical line at the bottom.
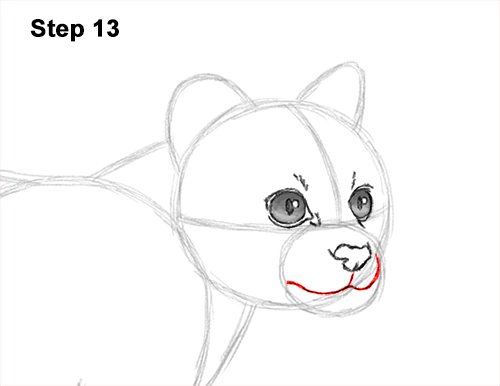
Step 13: Under the nose, draw a line that curves to the left for the first half of the margay's mouth. This line should curve to the left so that it touches the side of the small initial circle. On the right side, draw a line that curves up toward the right side of the initial circle for the other side of the cat's mouth.
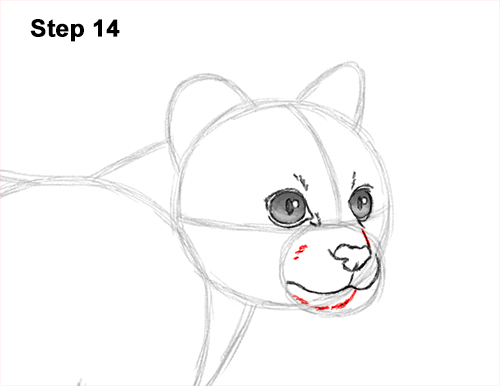
Step 14: Under the mouth, draw a small, curved line for the chin. Use the initial circle as a guide as you draw the margay's chin. Draw a few lines around the nose to finish the shape of the muzzle.


