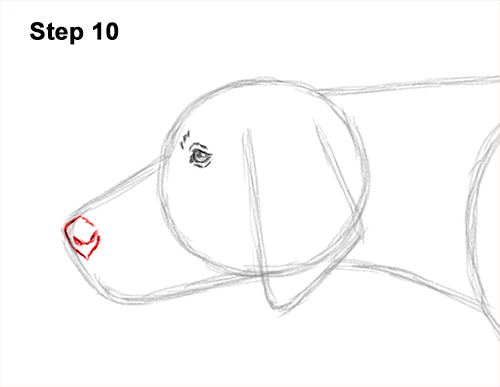
Step 10: Lightly sketch a curved line at the tip of the muzzle for the dog's nose. Follow the guide as you darken the front of the nose. Make the shape more angular. Follow the initial curved shape on the right and curve the line inward as you darken it to create the nostril. Make the bottom part of the pointer's nose longer and pointier than the initial sketched line.
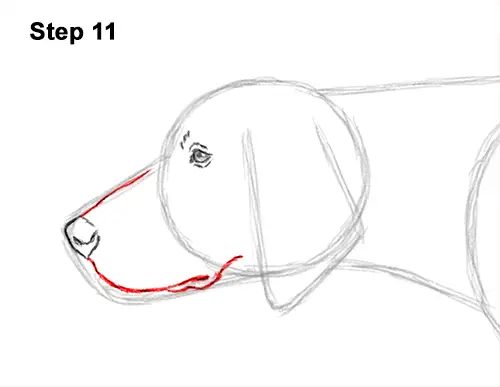
Step 11: Follow the basic path of the initial arc to create the shape of the pointer's muzzle. Draw a line under the nose for the bottom part of the muzzle. Then curve the line to the right. This line will become the mouth, and it should end at the edge of the circle for the head. Make the line thick at the tip. Underneath, draw a curved line for the loose skin on the dog's lower jaw.
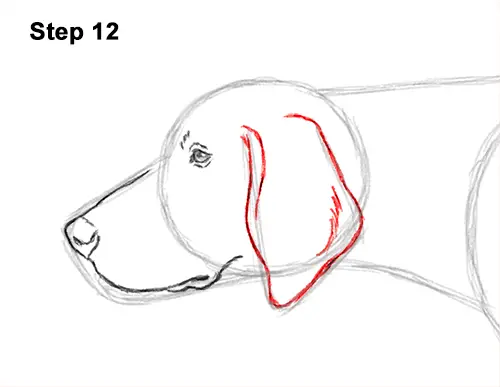
Step 12: Use the angled shape on the right as a guide to draw the pointer dog's ear. Follow the path of the guide but make the lines curvier as you darken them for a more organic look. Inside the shape, draw a few curved lines for extra detail on the folds of skin.
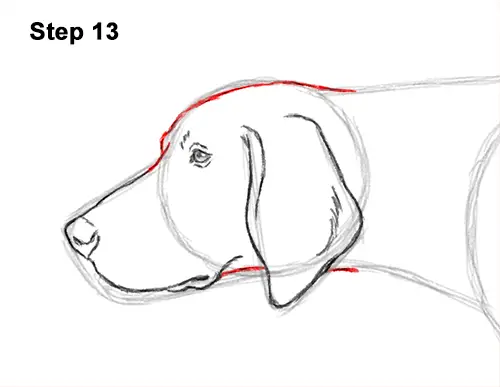
Step 13: Use the initial circle as a guide to draw the rest of the pointer's head. Draw an extra curved line to the left of the eye for the brow. Make the top of the dog's head flatter than the circle. Add a line at the bottom for the lower part of the head but don't overlap the shape of the ear.
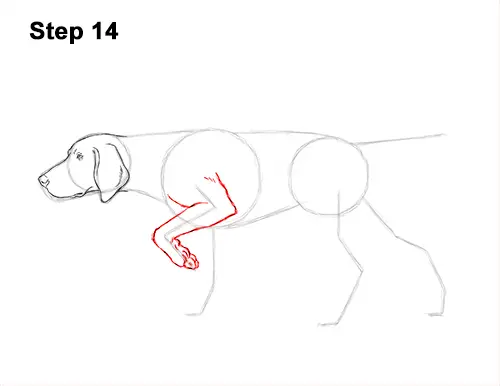
Step 14: Use the angled, Z- shaped line under the body as a guide to draw the pointer dog's first front leg. Follow the path of the guide and lightly sketch the shape of the leg around it. This leg is raised, so the right side should be pointy as the joint bends. Make the top part of the leg wide and curved to emphasize the dog's muscle structure.
When you get the shape of the pointer's leg right, darken the lines. The shape of the leg should gradually become thinner the farther down it goes. At the bottom, draw the big paw facing up using a series of curved lines. Use curved lines at the bottom to separate the toes and for the paw pad higher up.


