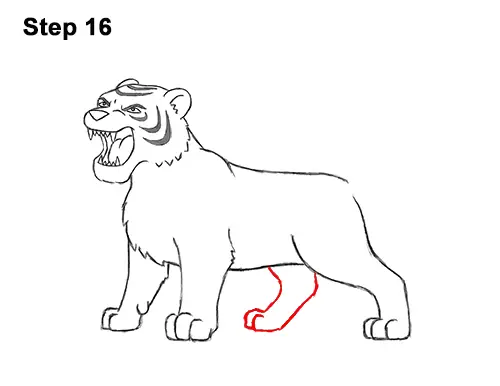
Step 16: Under the body, draw the other hind leg using a couple of lines that slope to the left. The top part of this leg won't be visible from this angle. Add a curved line at the bottom for the foot. Add a short, curved line at the tip of the foot for the tiger's toes.
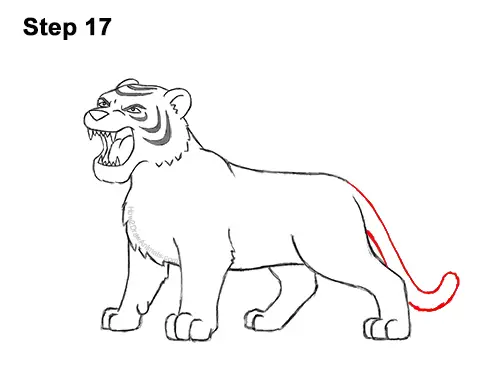
Step 17: On the right side, draw a long line that slopes to right for the tiger's tail. Make the tip of the tail curve up a little. Don't overlap the shape of the first hind leg as you draw the tail.
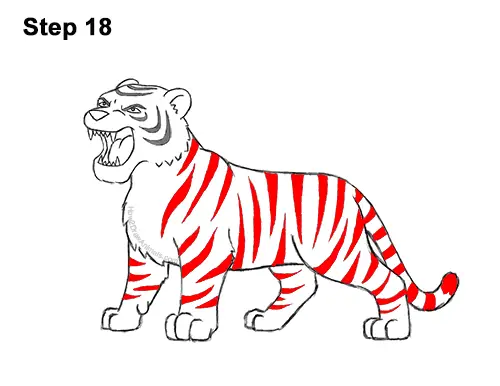
Step 18 Draw a series of stripes all over the tiger's body. To create each stripe, draw a long, thin, pointy spike and shade it in. Start adding the stripes at the top and then move down from there. Adding the stripes to the tiger's body can be time-consuming, so be patient and take breaks. If you need to, pause the video after each stripe to get the correct placement. Don't add stripes to the chest. The stripes on the tail are more like thick rings.
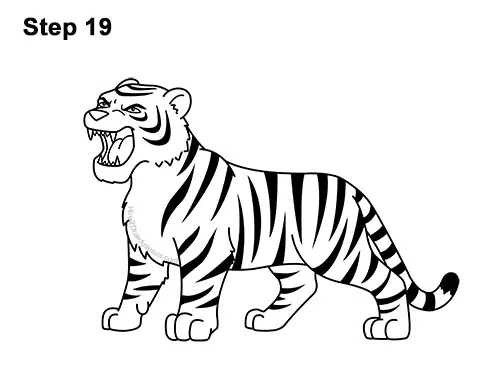
Step 19: Using a pen or marker, go over the lines to make your cartoon tiger drawing permanent. Be very careful when you ink so that you don't make any mistakes. After inking, get rid of every pencil mark with an eraser.
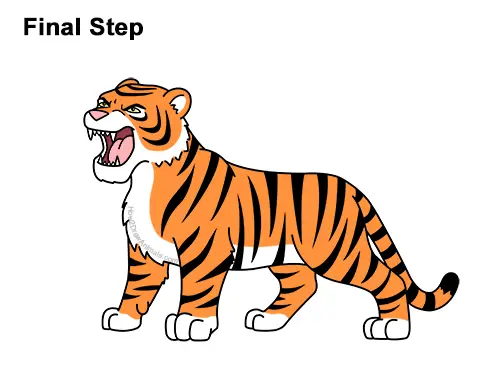
Final Step: Color your cartoon tiger drawing using color pencils, markers or even crayons! Use orange and yellow-orange for the body but leave the muzzle, the chest and the paws white. Add the color lightly at first, and then slowly build up to a darker tone. Use pink for the nose and tongue, a bit of black for the ears and brown for the inside of the mouth.
Thanks for visiting! Subscribe to the How2DrawAnimals YouTube Channel for a new tutorial every week.
To learn how to draw popular cartoon characters, visit EasyDrawingTutorials.com.
RELATED TUTORIALS
 |
 |
 |


