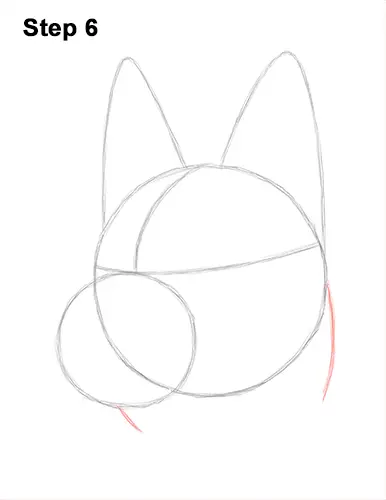
Step 6: Under the head, draw a couple of short, curved lines for an indication of the German shepherd dog's neck.
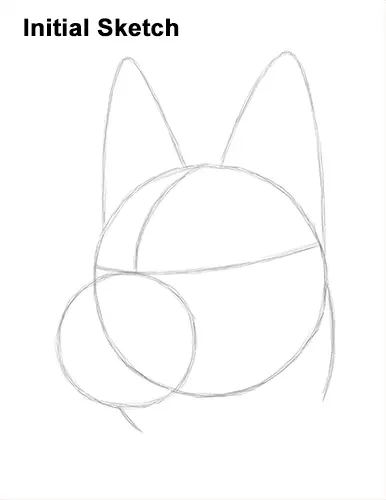
That's it for the guides! From this point on, press harder with your pencil for a more defined drawing.
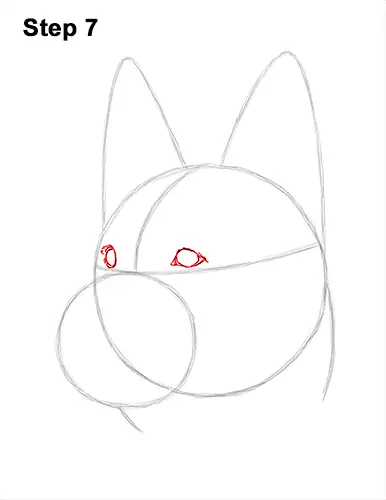
Step 7: Lightly sketch the eyes inside the head as two small circles. The eyes should be sitting on top of the horizontal guide line and on either side of the vertical guide line. When you get the position and size of the eyes right, darken the lines. The eye on the left should be a bit thinner than the eye on the right because the dog's head is slightly turned.
Make the sides of the eye on the left thicker and darker. Draw a few short strokes around the eye to represent the German shepherd dog's fur. Add a couple of angled lines to the eye on the right to create the corners of the eye. Add a few small extra lines on the left side for detail.
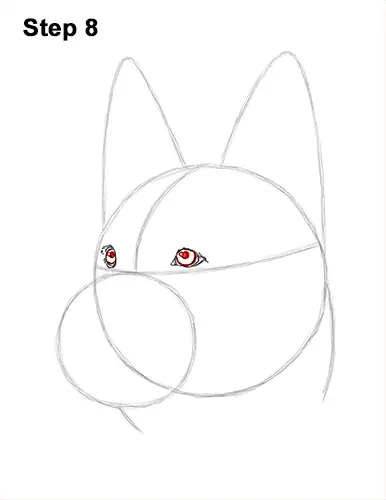
Step 8: Inside each of the eyes, off to the side, draw a tiny circle to represent glare. Inside each eye, draw a small circle and shade them for the pupils. Be careful not to overlap the glare circles as you shade the German shepherd dog's pupils. The pupils should be a tiny bit closer to the top edge of the eye.
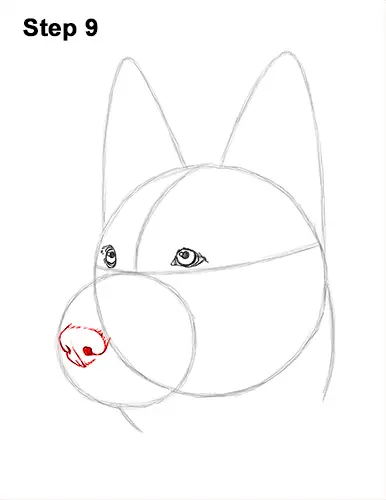
Step 9: Inside the circle guide for the muzzle, lightly sketch a small oval for the German shepherd dog's nose. The nose should fit inside the space created between the edges of the initial circles. When you get the position and size of the nose right, start darkening the lines. Darken the left side of the shape but curve the line inward to create the nostril.
Make the bottom part pointier. Add a short, vertical line at the bottom that splits the dog's nose. Darken the right side and curve the line inward to create a small arc for the other nostril. Darken the top part using a series of short strokes for a fur-like texture. Shade in the nostril on the right side. The nostril on the left isn't completely visible from this angle.


