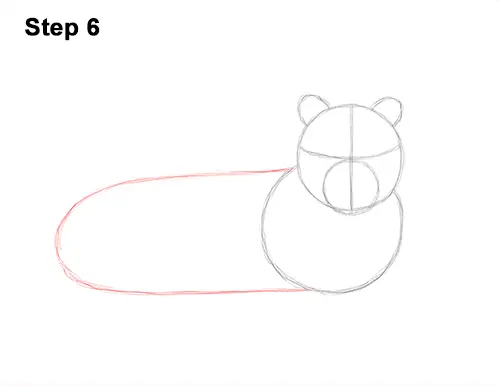
Step 6: Add the guide for the second half of the body by first making a small mark on the far left side. Now connect the small mark to the front part of the tiger's body using a couple of long, curved lines to form a big arc. Pay attention to the size of this arc in relation to the front part of the body. Don't make it too small. This guide should be similar to a giant letter U on its side. You can rotate your paper so that it's easier to draw.
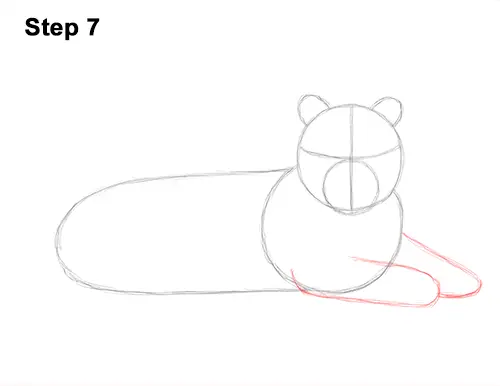
Step 7: To the right of the body, at the bottom, make a small mark for the first part of the guide for the front leg. Then connect the mark to the body using a curved line to form the guide for the first front leg. Make the tips of the lines longer and stretch them in toward the body. Behind this guide, draw a similar line as a guide for the tiger's other front leg.
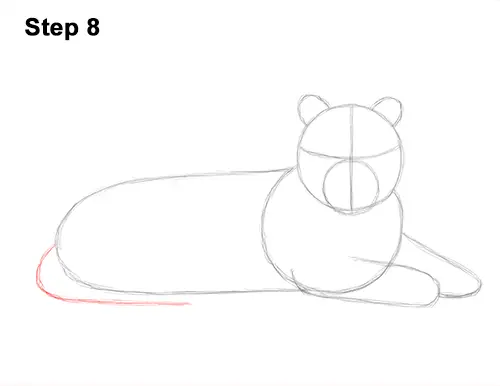
Step 8: On the left side, draw a long line that curves under the body as a guide for the tiger's tail.
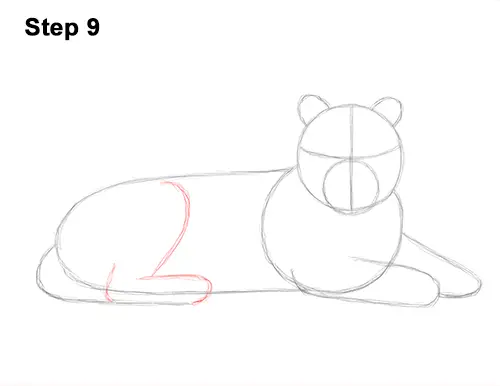
Step 9: Starting at the tip of the tiger's tail, draw a line that curves up and to the left as a guide for the hind leg. On top of that, draw a longer line that curves toward the top of the body, similar to the number 2. Add a shorter curved line on the lower, left side to complete the guide for the hind leg.
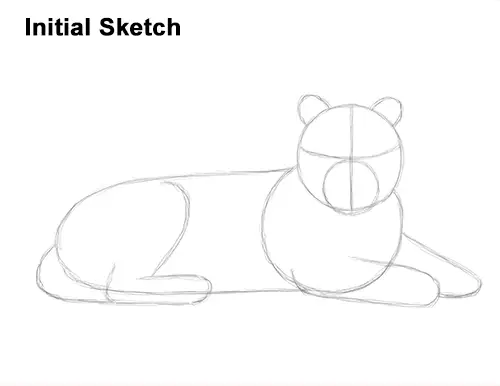
That's it for the guides! From this point on, press harder with your pencil for a more defined drawing.


