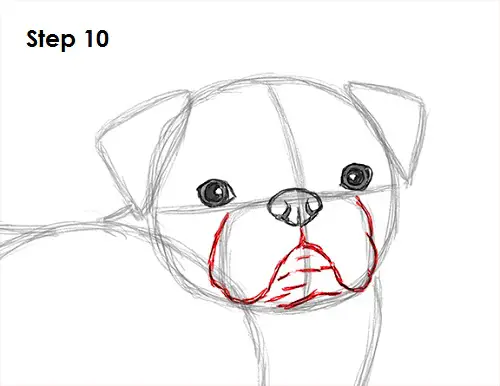
Step 10: Use the initial shape as a guide to draw the pug's muzzle. The mouth is a line that comes down from the nose, splits in two and curls up. Follow the side of the initial square shape but draw more curves and bumps along the way. Draw a few lines on the bottom part for the pug's lips and chin.
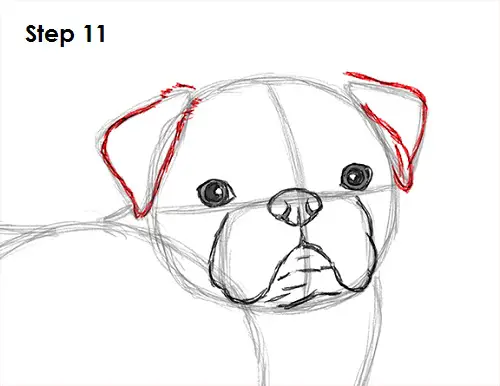
Step 11: Use the triangles as guides to draw the pug dog's ears. Follow the basic pattern of the ears but make the corners rounder. Also draw a few quick, short strokes at the base to represent the pug dog's fur.
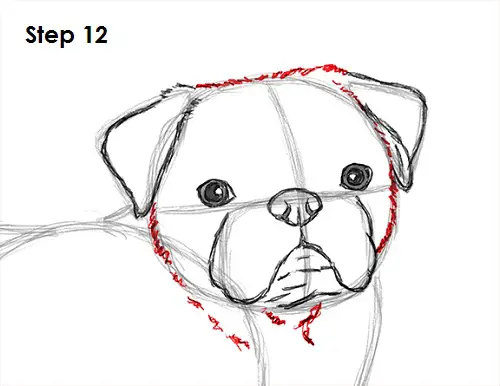
Step 12: Use the circle as a guide to draw the rest of the pug's head. Use quick, short strokes as you draw to give the feeling of pug fur. Draw some lines at the bottom to represent folds of skin.
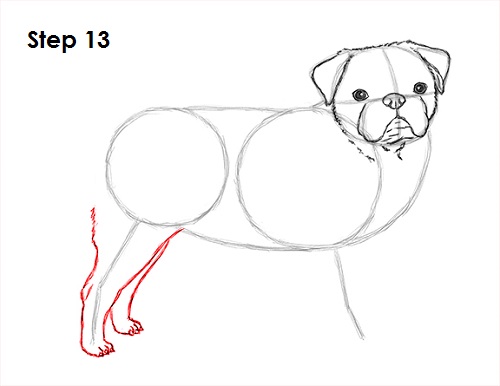
Step 13: Using the lines as guides, draw the pug's hind legs. Draw lightly at first. When you like what you have, go ahead and darken it. Make the leg thicker on top and draw some bumps along the way to represent joints. Draw a few lines at the bottom for the pug's toes. Draw only the visible portion of the other leg the same way.
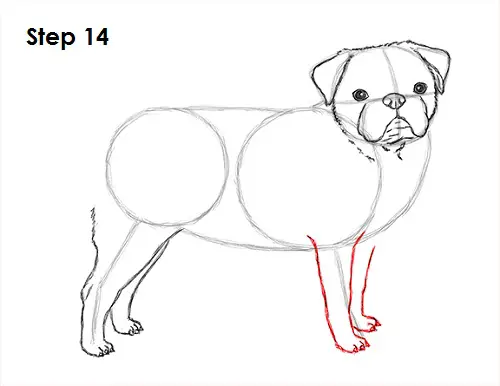
Step 14: Draw the pug's front legs using the same techniques as the pug's hind legs. Draw lightly at first to get the structure right, then darken it. Don't forget the toes! Now draw the other similar-looking leg peeking from the other side.


