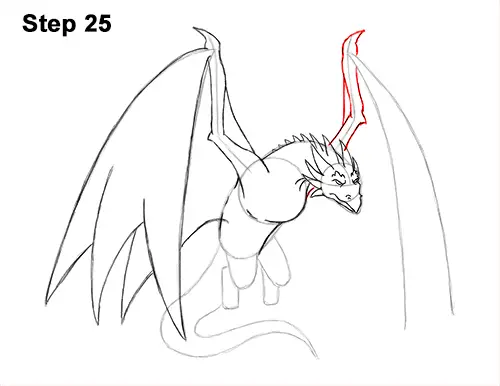
Step 25: Use the angled line on the right as a guide to draw the top part of the second wing. Follow the path of the guide and draw the shape of the wing around it. Use curved lines to emphasize the muscle structure. Don't overlap the wyvern's head or horns. Draw a small spike at the joint in the middle and another spike at the top.
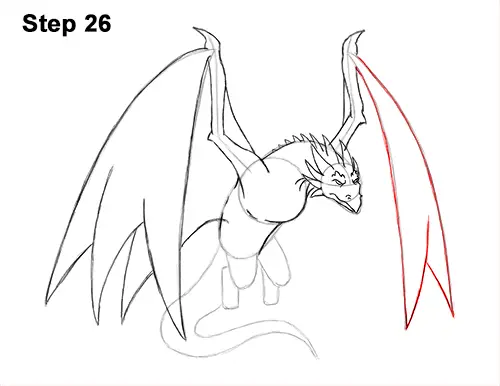
Step 26: Use the curved line on the right as guides to draw the rest of the wyvern's second wing. Simply darken the guides. This wing should be a tiny bit shorter than the wing on the right. At the bottom, draw a couple of shorter curved lines to form the pointy edges of the wing.
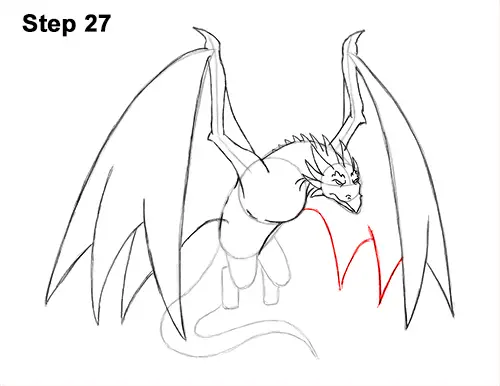
Step 27: Draw a couple of V-shaped lines that connect to the body to complete the wing. Sketch lightly at first and only darken the lines when you get the shapes right. The number of spikes on the bottom edge of each wing should be equal.
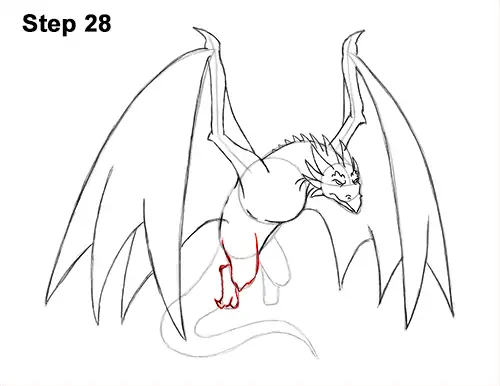
Step 28: Use the U-shaped line under the body, on the left, as a guide to draw the wyvern's first leg. Darken the U- shaped line and add a point at the bottom for a spike. Darken the shape below for the foot. At the bottom, draw the toe pointing backward using a curved line.
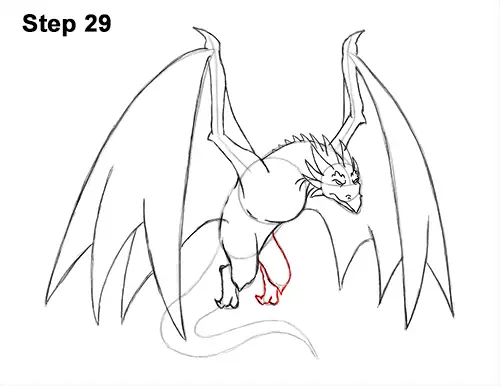
Step 29: Use the shapes on the right as guides to draw the wyvern's second leg the same way as the first. Darken the shapes but add a spike to the joint and the toes pointing backward at the bottom.


