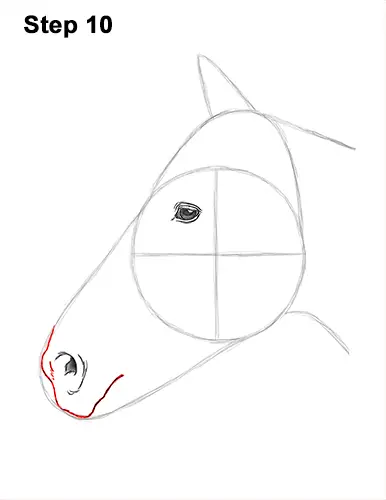
Step 10: Use the initial arc as a guide to draw the top part of the horse's muzzle. Follow the path of the guide but give it an extra bump near the top for the other nostril. Make the line curve outward a bit at the bottom to create the top lip. Curve the line in toward the head to create the mouth. Don't draw this line too long. Add a few short strokes around the muzzle for extra detail.
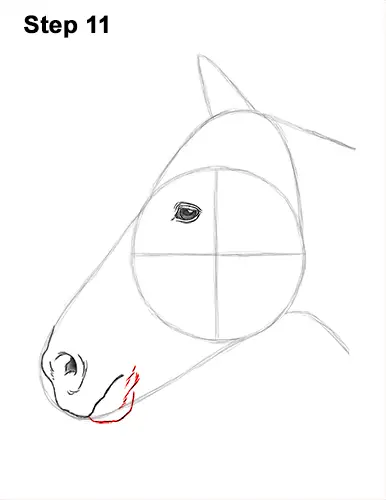
Step 11: Follow the path of the arc to draw the bottom lip and chin under the mouth. Make the line curve more as you follow the guide. Sketch lightly at first. When you get the shape right, darken the line. Add a few short strokes inside for the detail on the skin under the horse's mouth.
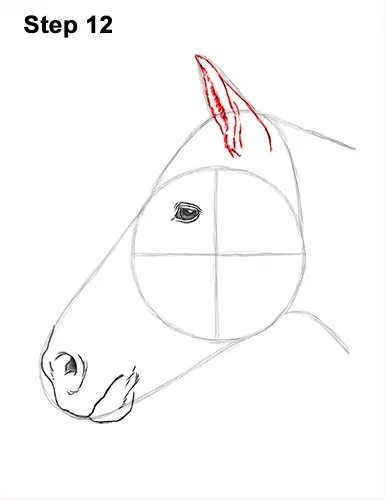
Step 12: Use the angled line on top of the head as a guide to draw the horse's first ear. Darken the path of the guide but make the lines wavier to give the ear a more organic shape. Draw the bottom lines longer so that the base of the ear is farther inside the head. Use the initial circle as a guide to determine how far down to draw the ear. Use a series of short strokes inside the shape to create the hair in the ear opening. Add a few more curve d lines in the middle to give the inner ear more structure.
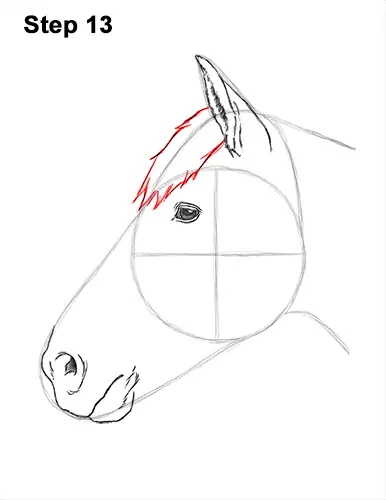
Step 13: To the left of the ear, draw a series of long, curved lines for the front part of the mane. Follow the slope of the initial guide as you draw the lines for the mane. Don't draw the lines too long. At the bottom, draw a few pointy tips for the ends of the horse's mane. It's better to draw the mane as a big clump than to draw every individual strand. Don't draw the shape of the clump too thick, as you may overlap the eye.
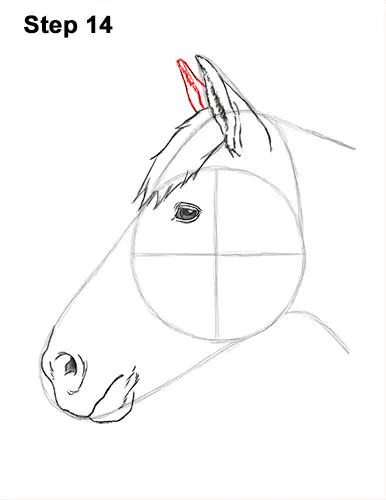
Step 14: To the left of the first ear, on top of the mane, draw the other ear. Use the horse's first ear as reference and draw the visible portion of the ear on the other side.


