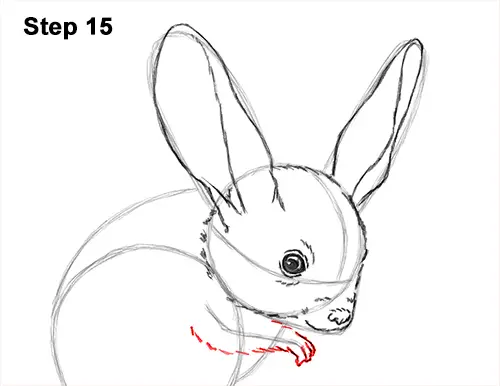
Step 15: Use the line under the head as a guide to draw the front limb. Follow the guide and draw the thick shape of the limb around it. Use short strokes for the fur at the bottom. On the right side, draw a series of short, thin, curved arcs for the jerboa's small digits.
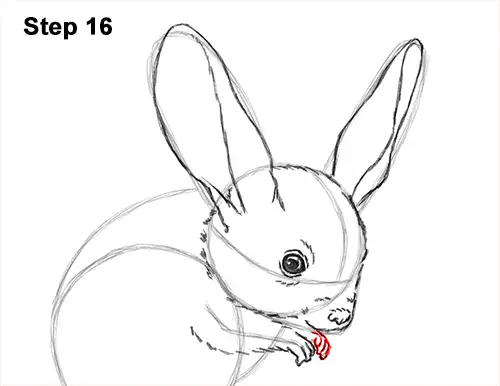
Step 16: Draw a few more short, curved arcs for the digits on the other front limb. Most of this front limb will be hidden behind the jerboa's body, so only draw the visible digits.
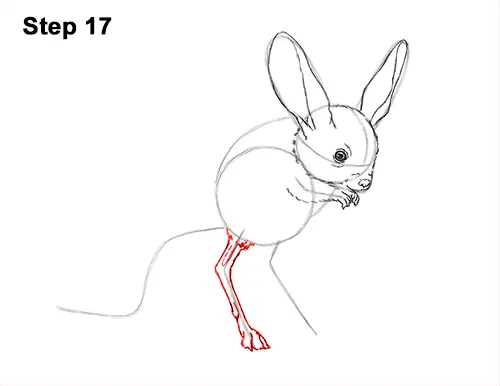
Step 17: Use the long, angled line on the left as a guide to draw the jerboa's first leg. Follow the guide and lightly sketch the shape of the leg around it. At the top, draw a curved line made up of short strokes for the furry base of the leg. Curve the shape at the top to create the joint. When you get the leg right, darken the lines.
Make the jerboa's leg very thin. On the left side, draw a small, curved line for the first toe. At the bottom, draw a series of curved lines to separate the individual toes. Jerboas walk on their tippy toes, so curve the lines for the toes upward. The toes at the bottom should be wide and thick to support the jerboa's weight.
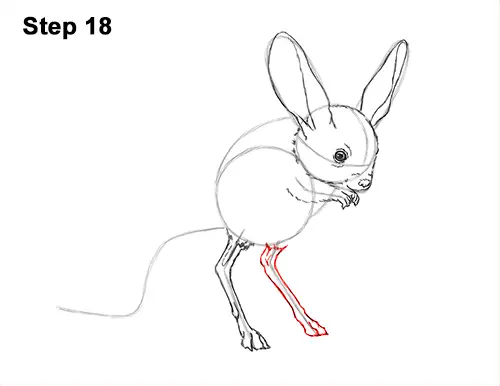
Step 18: Use the line on the right side as a guide to draw the other leg the same way. Start by lightly sketching the shape of the leg around the guide line. Jerboas have skinny legs, so keep the shape of the leg close to the guide. When you get the shape of the leg right, darken the lines. Use short, curved lines at the bottom to separate the individual toes. Don't forget to add the furry base at the top and bend the leg at the joint.
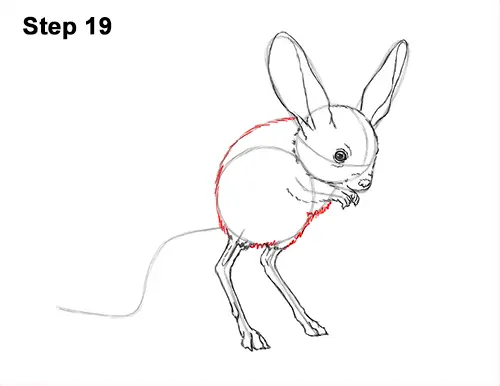
Step 19: Use the shapes between the head and legs as guides to draw the rest of the body. Use short strokes along the outer edges of the guides to create the shape of the body. Don't draw these strokes too long, otherwise your jerboa's fur will be too long.


