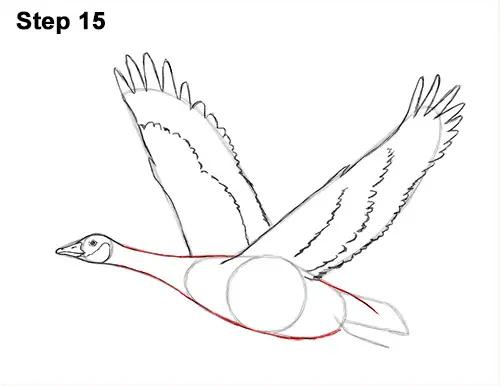
Step 15: Darken the sloping guides to the right of the head to form the neck. Then darken the outer edges of the other guides to create the Canada goose's body. Don't overlap the wing on the right. To the right of the wing, draw a curved line that goes in toward the tail for the rump.
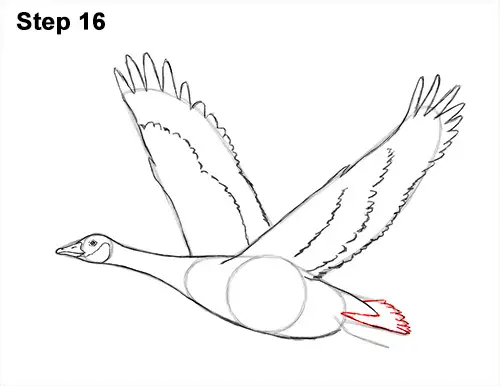
Step 16: Use the square-like shape on the right as a guide to draw the Canada goose's tail. Darken the top and bottom part of the guide to create the first part of the tail. Then add a series of short arcs along the right edge for the feathers.
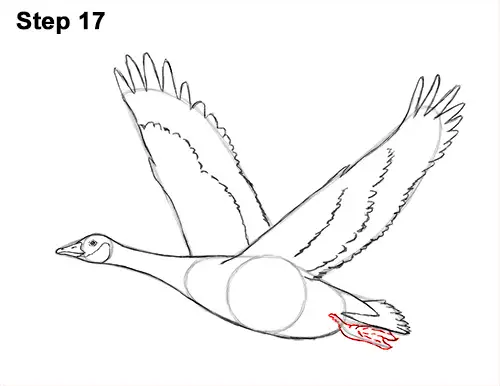
Step 17: Use the angled line under the tail as a guide to draw the foot. Most of the foot is hiding under the goose's tail, so only draw a wavy shape along the path of the guide. Inside the shape, draw a few short lines to represent the toes and webbing.
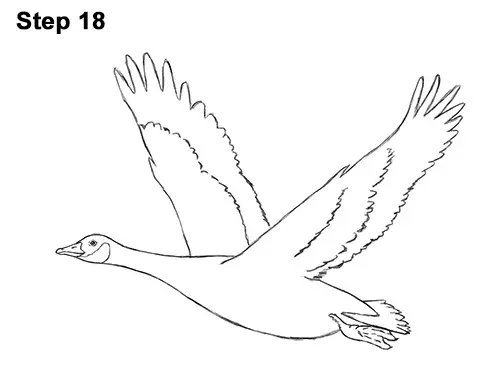
Step 18: For a cleaner look, erase as much as you can of the initial guide lines. Don't worry about erasing all of the guides. It's okay to leave some behind. Re-draw any final sketch lines you may have accidentally erased.
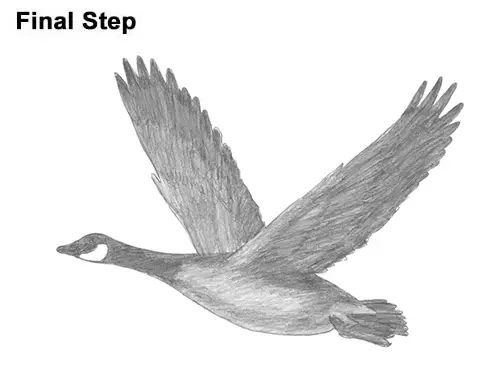
Final Step: Add some shading to your drawing to give it the classic Canada goose look. Use a dark value for the beak and the head. Leave the section on the cheek blank. Draw a line at the bottom of the neck to indicate how far the dark value will go. Add a dark value to the edges of the wings, the tail and the feet too. Push down hard on your pencil to get a dark value but don't overdo it, or the graphite will get too shiny and the paper may tear.
Now use a medium value for the middle of the goose's wings. Vary the pressure on your pencil to get different degrees of tonal value. As you shade the wings, use strokes that go in the general direction of the feathers. Use a slightly lighter value to the bottom of the wings and body. Remember to adjust the pressure on your pencil. Don't worry about shading too smoothly. The rough value gives the feathers more texture. Add a dark section along the bottom of the Canada goose's body. This shadow gives the body more dimension and volume.
Shading can be time-consuming, so be patient and take breaks. It's always a good idea to use reference when you draw. Don't forget to pause the video to draw at your own pace.
Thanks for visiting! Subscribe to the How2DrawAnimals YouTube Channel for a new tutorial every Saturday.
To learn how to draw popular cartoon characters, visit EasyDrawingTutorials.com.
RELATED TUTORIALS
 |
 |
 |
Visit the Amazon affiliate links below for helpful books that you can use as reference when drawing birds!


