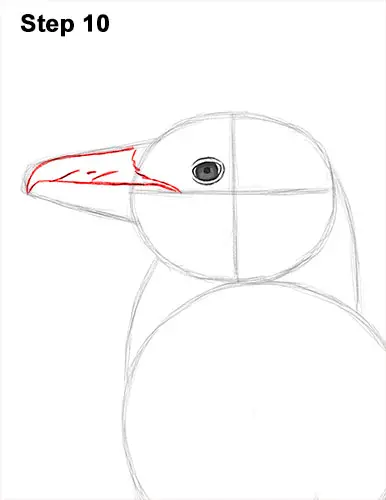
Step 10: Use the arc on the left as a guide to draw the top part of the beak. Follow the basic path of the arc but draw a pointy tip on the left side. Draw a curved line near the middle of the initial arc for the penguin's mouth. On the right side, draw a few quick, short strokes for the feathery base.
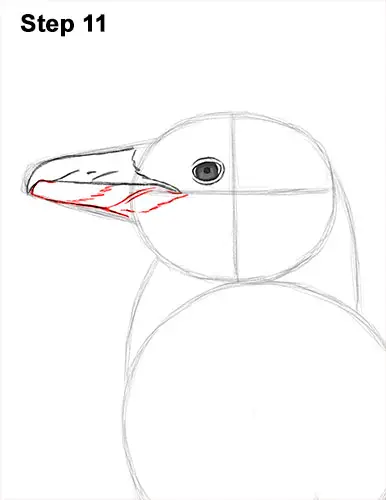
Step 11: Use the initial arc to draw the bottom portion of the penguin's beak. Follow the basic path of the arc and curve the line upward so that it meets the top of the beak on the right. Add a few lines within the shape for the detail on the bird's beak.
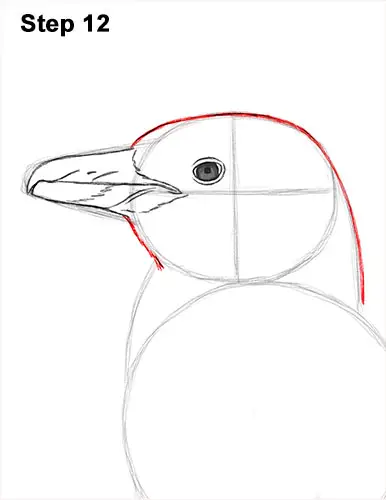
Step 12: Darken the outer edges of the initial shapes to create the top of the head. The head extends farther to the left than the initial oval and is a bit flatter at the top. Darken the line under the penguin's beak to create the bottom part of the head.
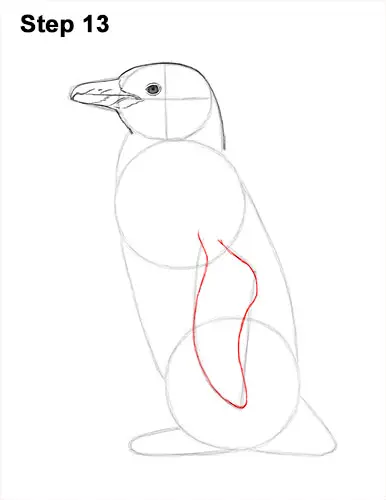
Step 13: Use the shape in the middle of the body as a guide to draw the penguin's flipper. Follow the basic path of the guide but make the shape rounder as you darken it. Curve the lines on the sides so that they're not so rigid and at the bottom so it's not so pointy. The top part of the fin, where it attaches to the body, should be fairly thin.
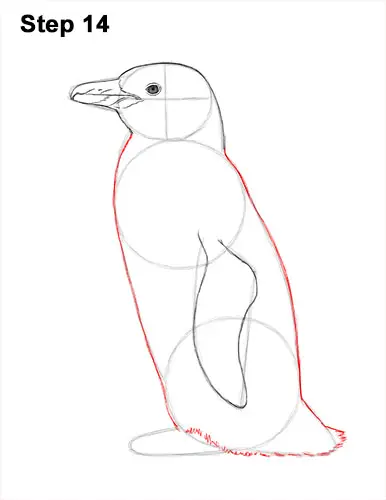
Step 14: Use the remaining shapes as guides to draw the rest of the bird's body. Simply darken the outer edges of the initial guides to create the shape of the body. When you get to the penguin's tail, use quick, short strokes to represent the fluffy feathers found there. Continue drawing the short strokes so that they go over the guide for the feet.


