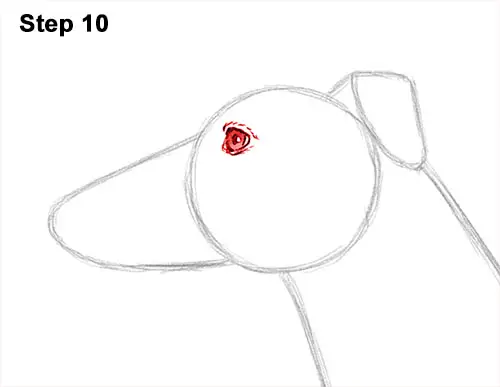
Step 10: Inside the greyhound's head, on the top, left side, draw a small circle for the eyeball. On the right, draw a curved line similar to a greater-than sign (>) for the rest of the eye. Make the lines thicker and darker when you get the size and placement right. Inside the eyeball, draw a tiny circle to represent glare. In the middle, add a dot for the pupil. Shade the eyeball but don't overlap the small glare circle. As you shade, use a value that's lighter than the pupil. Add a few short strokes around the dog's eye for a fur-like texture.
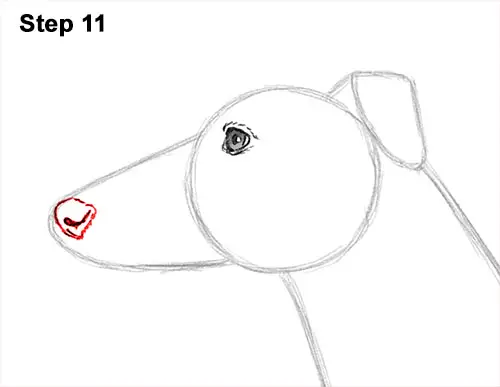
Step 11: Add the greyhound's nose by first lightly sketching a small circle at the tip of the muzzle. When you get the placement right, darken the lines for the nose. Bend the edges so that the shape is a bit more angular than circular. Inside, draw a short, angled line similar to a check mark for the nostril. Pay attention to the size of the nose in relation to the rest of the dog's muzzle.
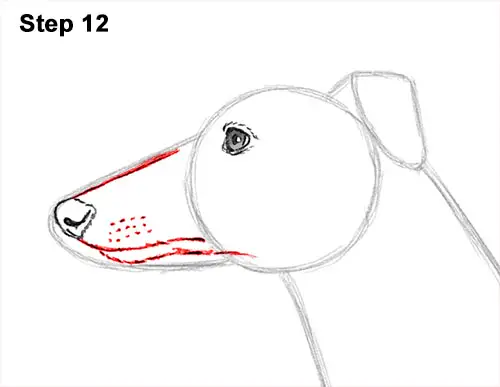
Step 12: Use the initial arc as a guide to draw the rest of the muzzle. Draw a long line under the nose that curves to the right for the mouth. Follow the basic path of the arc to draw the lower jaw. Use quick, short strokes to emphasize the greyhound's furry chin. Add a few dots near the nose for extra detail.
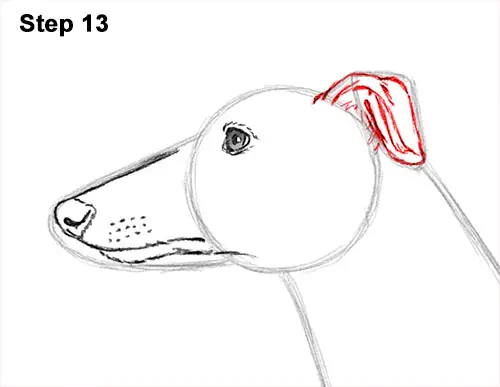
Step 13: Use the U-shaped line on top of the head as a guide to draw the greyhound's ear. Follow the path of the guide as you darken the lines to create the shape of the ear. The ear is flopping over itself and covering the opening, so overlap the lines at the bottom. Add a few extra lines inside the shape for the skin creases and fur.
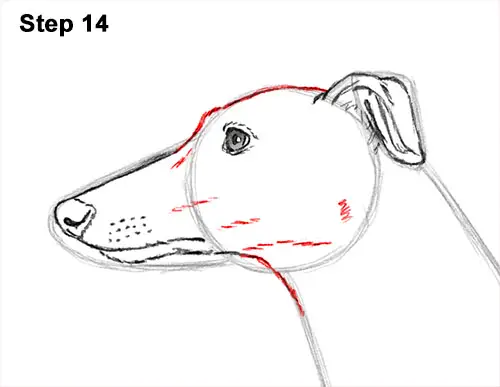
Step 14: Use the remaining shapes as guides to draw the rest of the greyhound's head. Darken the top part of the initial circle but make it flatter to create the top of the head. The section in front of the eye should bulge out a little to create the brow. Add a few quick, short strokes inside the head for a fur-like texture. Add a row of dots to the right of the dog's nose for extra detail on the muzzle.


