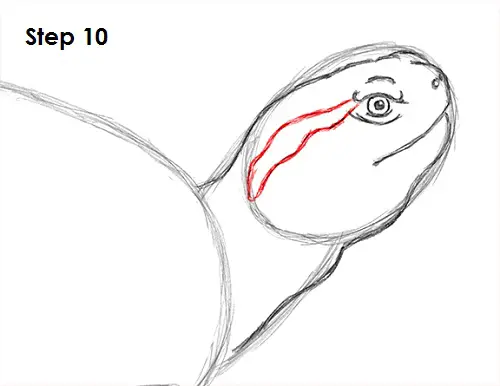
Step 10: Draw a curvy shape next to the turtle's eye to represent the red portion of the head where the name red-eared slider comes from.
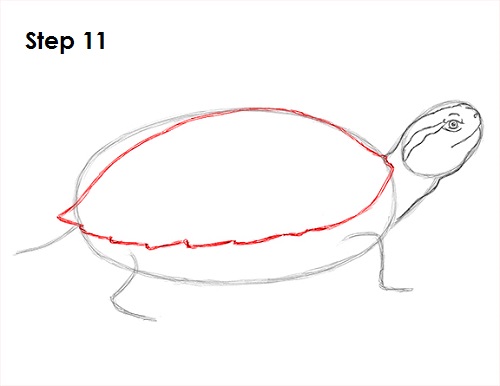
Step 11: Use the original oval as a guide to draw the top part of the red-eared slider turtle's shell. Dip the back portion of the shell more toward the tail. Draw the bottom portion of the top shell using jagged lines to indicate the rough texture of the shell.
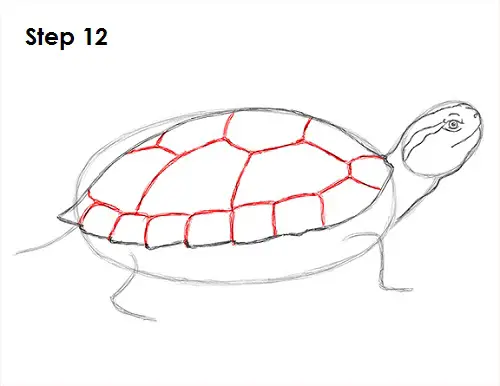
Step 12: Draw the shapes within the shell. Basically draw a row of square-like shapes at the bottom of the shell. Then draw more pentagon-like shapes above the row. It's a good idea to use reference to be as accurate as possible. Otherwise, just have fun and design the turtle's shell yourself.
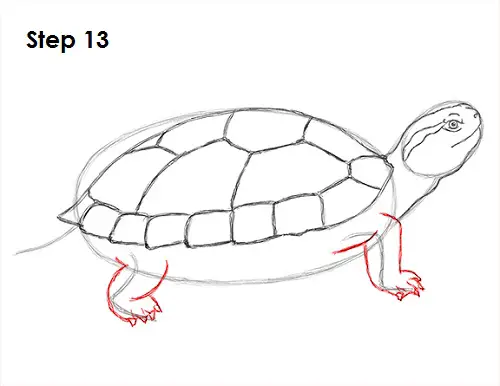
Step 13: Draw the turtle's feet using the initial lines as guides. Simply go around the guides, making the legs thicker and draw the toes at the end. At the end of each toe, draw a small triangle-like shape for the claws. Draw the front leg the same way. Go around the guide, then draw the turtle's toes at the end. Don't forget the claws!
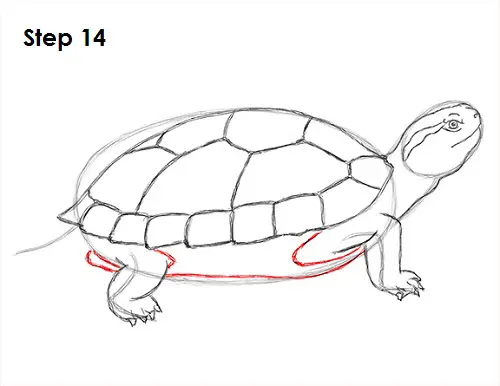
Step 14: Use the original oval again to draw the bottom part of the shell. Darken the bottom part of the shell and add openings where the turtle's legs go through.


