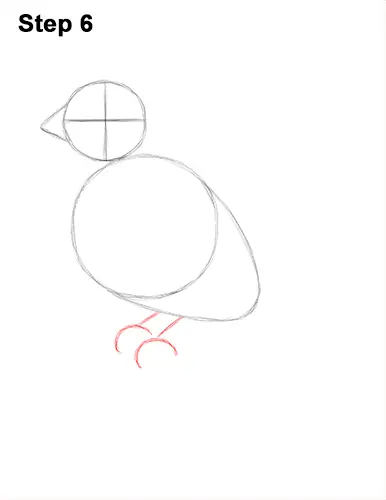
Step 6: Draw the guides for the house finch's feet using a series of short lines under the body. First draw a short, diagonal line for the top part. Then below it, draw a C-shaped line for the bird's foot. Add a similar set of lines to the left but make them smaller because of the perspective.
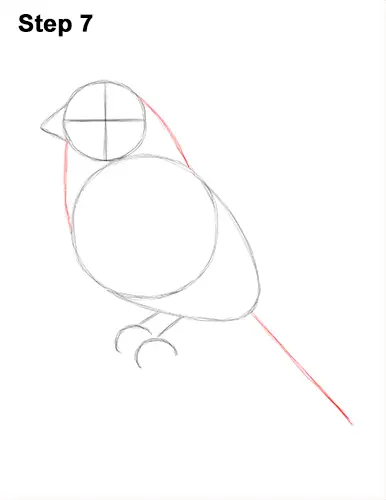
Step 7: Draw two curved lines that connect the head to the body create the guide for the neck. Pay attention to the width of the neck. Don't make it too skinny. Draw a long line with a diagonal orientation on the lower, right side of the body as a guide for the house finch's tail.
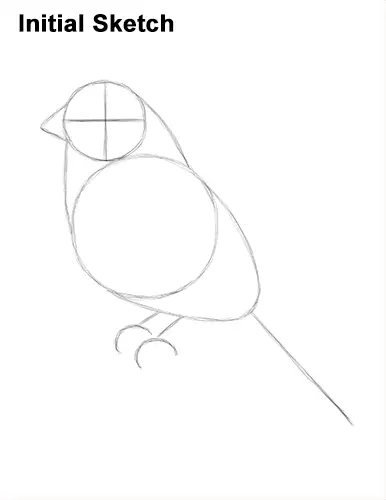
That's it for the initial sketch! From this point on, press harder with your pencil to get a more defined sketch.
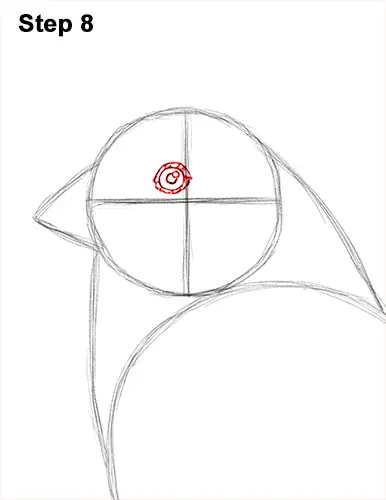
Step 8: Inside the head, lightly sketch a small circle for the eye. Use the lines as guides for placement. When you get the size and placement of the eye right, darken the lines. Inside the eye, off to the side, draw a tiny circle to represent glare. In the middle, add another circle for the pupil. Shade in the house finch's eye if you're not going to color it later. Add a few curved lines around the eye for the bare skin.
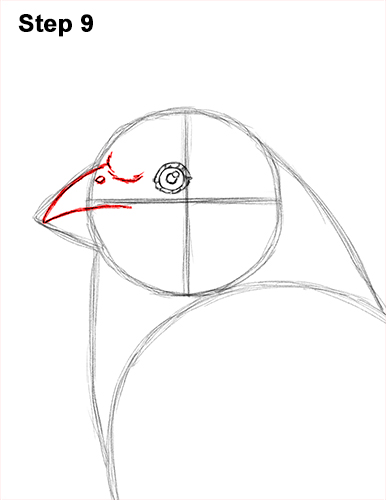
Step 9: Use the angled line on the left as a guide to draw the top part of the beak. Follow the path of the guide but curve it more as you darken it. Add a curved, horizontal line in the middle for the mouth. Use the construction lines in the head as guides. Draw a curved line between the top of the beak and the eye for the feathers on the house finch's head. Add a small circle at the top of the beak for the nostril.


