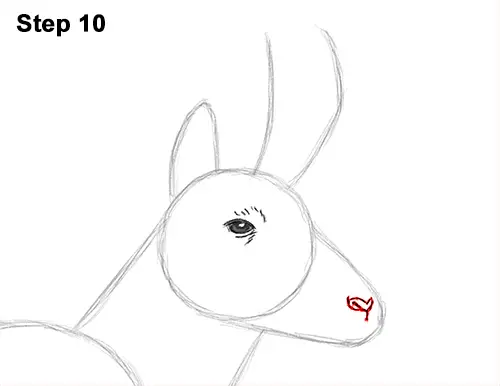
Step 10: Draw the pronghorn's nose inside the muzzle by first lightly sketching a small triangle. When you get the size and position of the nose right, darken the lines. Add a curved line at the bottom for the nostril. Use a wavy line for the top of the nose and add a small line at the bottom that splits the top lip.
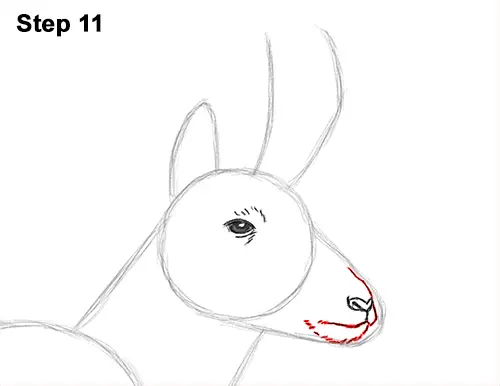
Step 11: Draw a line under the nose that's made up quick, short strokes and stretches to the left for the mouth. Draw the other side of the mouth and follow the path of the initial arc to draw the shape of the muzzle. Darken a small section of the initial arc above the pronghorn's nose for that part of the muzzle. Follow the path of the guide as you draw the chin under the mouth. Use quick, short strokes for the furry texture.
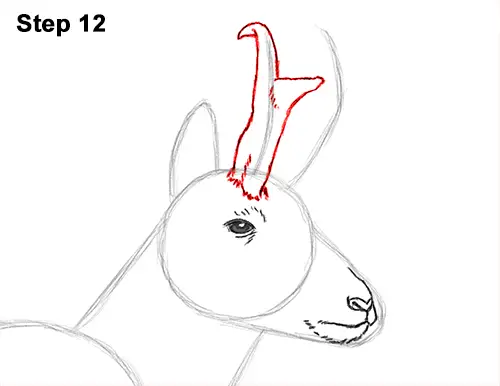
Step 12: Use the left line on the head as a guide to draw the pronghorn's first horn. Lightly sketch a line on either side of the guide to determine the width of the horn. Add the base at the bottom using quick, short strokes. Darken the sides of the horn and make the left edge longer. Curve the line to the left and add a pointy tip at the end of the horn. Draw a second tip near the middle of the horn that points to the right for the second "prong."
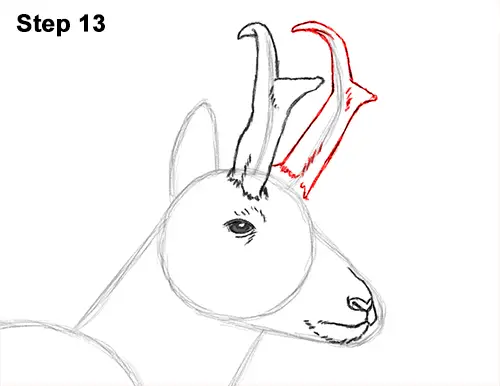
Step 13: Draw the other horn using the line on the right as a guide. Draw the base using quick, short strokes, then follow the basic path of the guide upward. Curve the point to the left. Draw the right edge of the horn and add the second prong a little higher than halfway up. Add a few strokes within the shape of the horn for a rough texture.
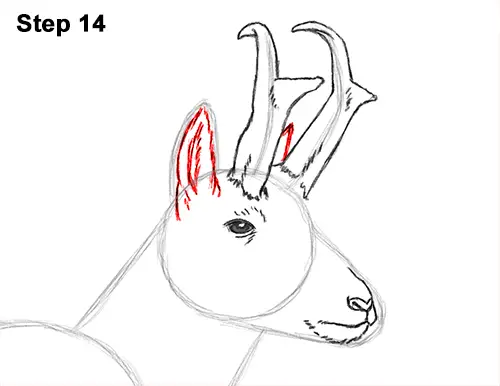
Step 14: Darken the shape of the arc on the left side to create the pronghorn's ear. Add a few lines inside the shape for the fur. Add a short line between the horns for the other ear peeking out from behind. You can skip this ear if you don't have room.


