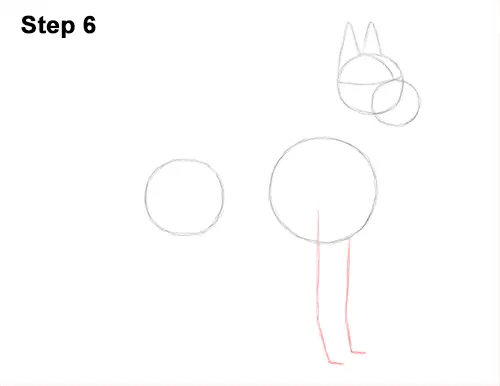
Step 6: Draw a couple of long vertical lines under the first circle as guides for the front legs. Bend the line a bit near the bottom to indicate the joint and again at the tip for the foot. The guide for the Great Dane's other leg should be a bit shorter because it's on the other side of the body.
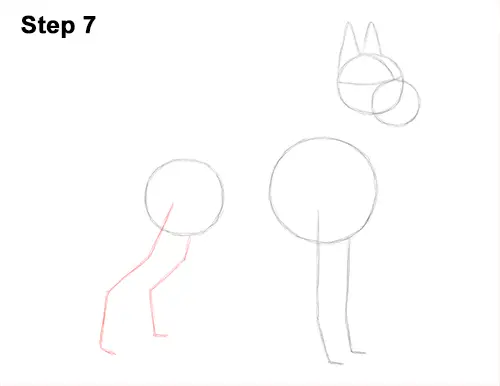
Step 7: Draw another two lines under the body circle on the left for the Great Dane's hind legs. This line should have more of a diagonal orientation and bend a couple of times along the way for the joints. Add the guide for the other hind leg to the left. It should look the same, only shorter.
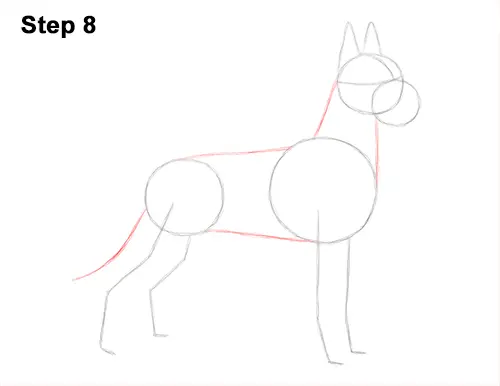
Step 8: Draw two lines that connect the head to the body to form the guide for the dog's neck. Now draw two longer lines that connect the first two circles to complete the guide for the body. Draw a long curved line on the right side of the body as a guide for the Great Dane's tail.
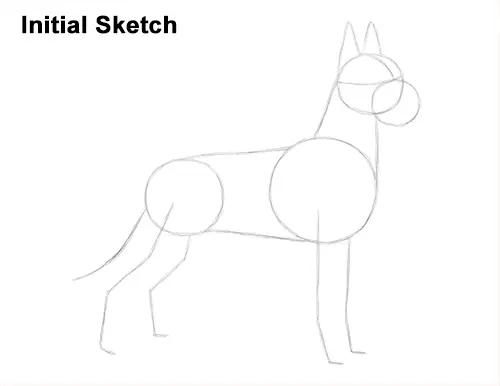
That's it for the initial sketch! From this point on, press harder with your pencil to get a more defined sketch.
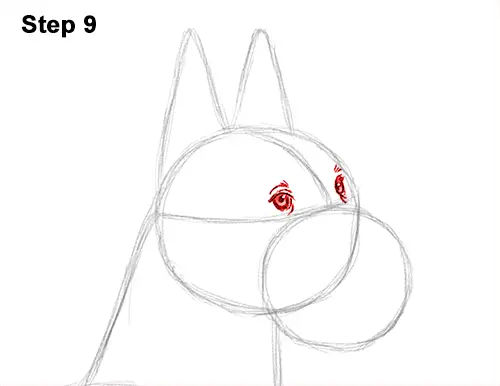
Step 9: Lightly sketch the eyes inside the head as two small circles. When you get the placement and size of the Great Dane's eyes right, darken the lines. Use the initial lines as guides. The eye on the right should be thinner and smaller because of the way the head is turned.
Inside each eye, near the middle, draw a tiny dot for the pupils. Shade in the rest of the eyes except for a tiny circle that represents glare. Add a series of short lines around the dog's eyes for the wrinkles and fur. Use quick, short strokes above the eyes to represent a furry texture.
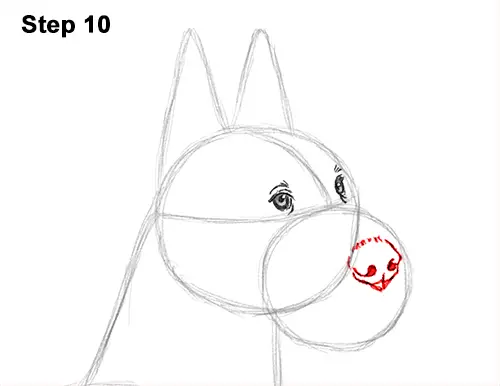
Step 10: Draw the Great Dane's nose inside the muzzle by first lightly sketching a small oval. When you get the size and placement of the nose right, darken the lines. Use quick, short strokes at the top to represent fur and darken the sides. Add two small ovals in the middle and shade them in for the nostrils. Connect the nostrils to the sides. Add a small vertical line to split the nose at the bottom, and then draw a point underneath.


