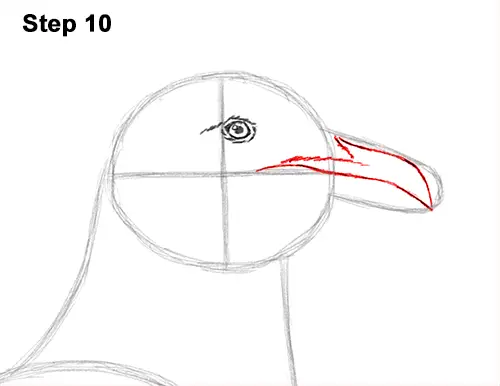
Step 10: Use the arc on the right as a guide to draw the top part of the beak. Follow the basic path of the guide as you darken the lines but make the tip of the beak a bit shorter. Now draw a long wavy line across the middle of the arc for the actual mouth. The mouth should stretch in toward the head and end very close to the eye. Add a series of quick, short strokes on the left side of the beak for the feathery base.
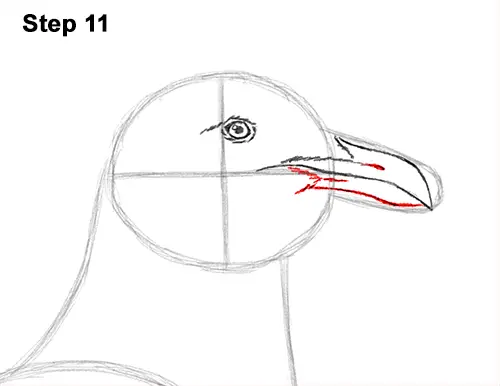
Step 11: Now draw the bottom part of the beak by using the initial arc as a guide too. Make the bottom part of the beak a bit thinner than the arc and add more strokes on the right for the base. Draw a short line inside the top part of the beak for the nostril and a few more strokes inside the bottom for extra detail.
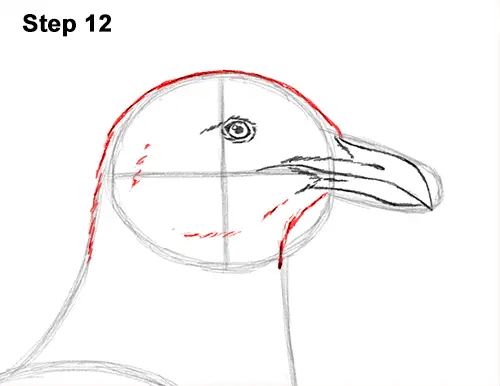
Step 12: Use the initial circle as a guide to draw the rest of the head. Follow the basic path of the initial circle but make the shape of the head bigger and wider. Continue drawing the line downward to create the neck. Make the throat section thinner than the guides. Add a few quick, short strokes within the head to emphasize the feathery texture.
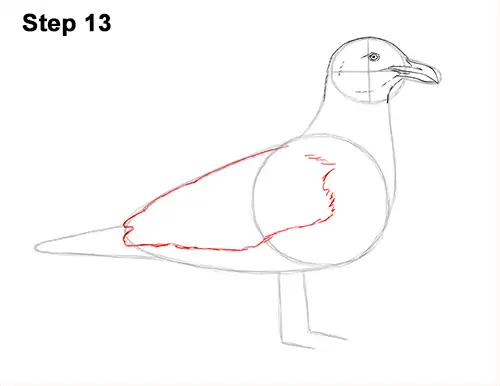
Step 13: Draw the folded wing within the shape of the body. Darken the top part of the initial arc to create the top edge of the folded wing. Now draw a series of horizontal lines that cut across the body toward the initial circle for the bottom part of the wing. Add a few quick, short strokes that curve up toward the top of the body to finish the shape of the folded wing.
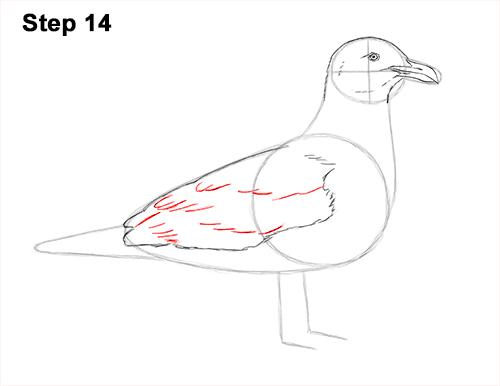
Step 14: Draw a series of short, curved lines within the wing for extra detail on the feathers. The feathers basically consist of rows made up of small curved lines across the shape of the wing. Don't overdo it with the feathers. Just draw about three rows made up of small curved lines inside the wing.


