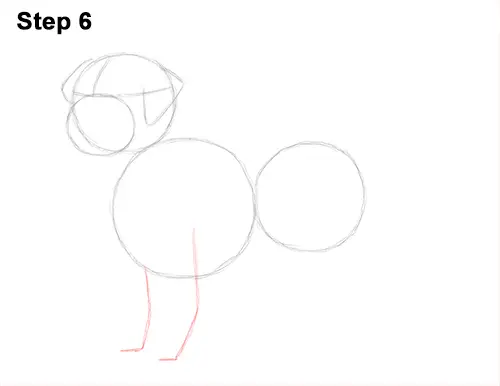
Step 6: Draw a vertical line under the left body circle as a guide for the first front leg. Bend the line in the middle to indicate the joint. Bend it at the bottom too for the foot. Draw a similar line but shorter on the left side for the golden retriever's other front leg.
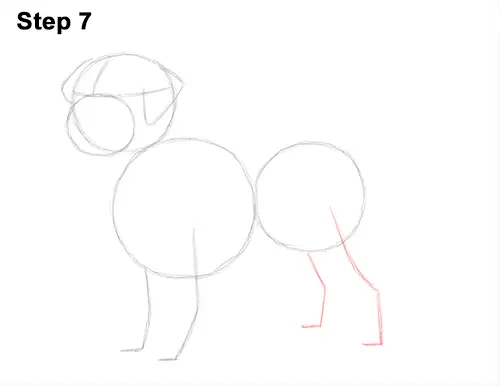
Step 7: Draw another two lines under the body circle on the right for the dog's hind legs. This line should start with a diagonal orientation, then bend down vertically at the joint and bend again at the bottom for the foot. Add the guide for the other hind leg to the left. It should look the same, only shorter.
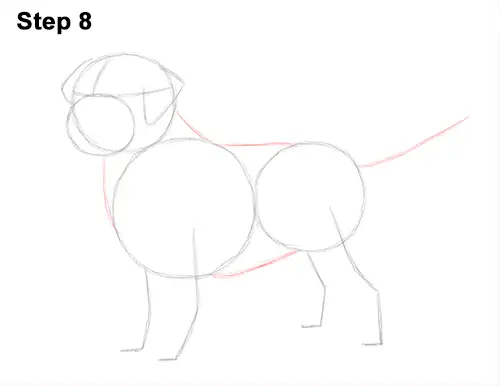
Step 8: Draw two lines that connect the head to the body to form the guide for the dog's neck. Now draw two longer lines that connect the first two circles to complete the guide for the body. Draw a long line on the upper, right side of the body as a guide for the golden retriever's tail.
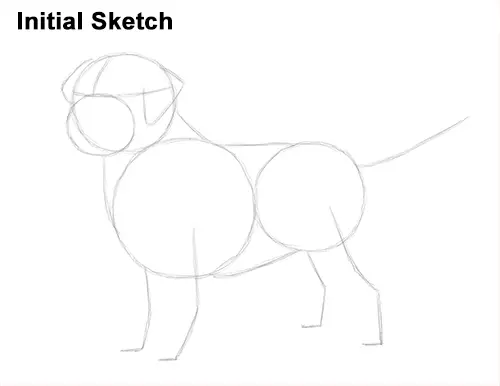
That's it for the initial sketch! From this point on, press harder with your pencil to get a more defined sketch.
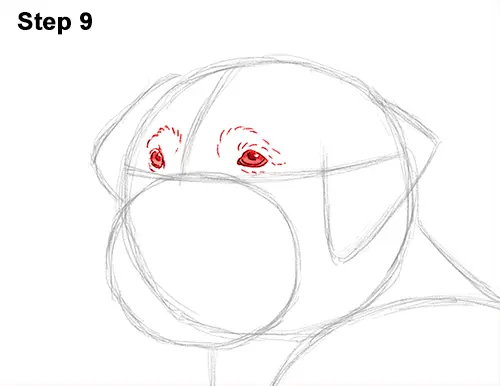
Step 9: Lightly sketch the golden retriever's eyes inside the head as two small circles. Use the construction lines as guides for the placement of the eyes. When you get the placement and size of the eyes right, darken the lines. Make the shape of the dog's eyes a bit more narrow and add a pointy tip to the sides. Inside each eye, near the middle, draw a tiny dot for the pupils.
Shade in the rest of the eyes except for a tiny circle that represents glare. As you shade the dog's eyes, use a value that's slightly lighter than the pupils. Draw a series of quick, short strokes above each eye to represent fur. As you draw the quick, short strokes, arrange them so that they form an arc over the eyes. Add a few lines under each eye for more fur. Sketch lightly when you start to draw the eyes so that it's easy to erase if you make a mistake.


