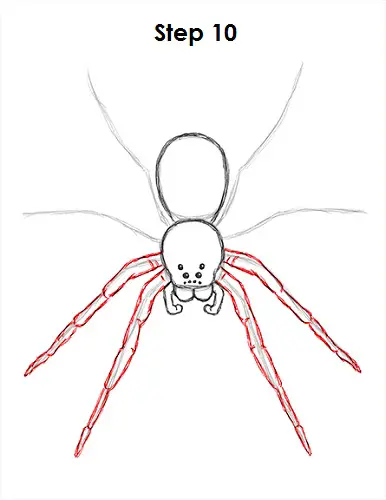
Step 10: Using the initial lines as guides, draw the spider's four lower legs. Follow the line around to make the leg thicker. Use bumps throughout the spider's leg instead of straight lines to create the different segments. Draw the spider's other legs the same way. Have the end of each leg come to a point. All of the legs are attached to the cephalothorax, so try to squeeze them all in there.
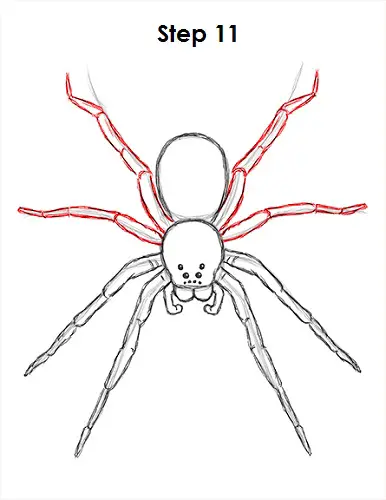
Step 11: Draw the spider's remaining legs using the initial lines as guides. Don't forget to used curved and not straight lines to create the different leg segments. When you draw the end of one of the spider's legs, have the point angle out a bit to indicate the support.
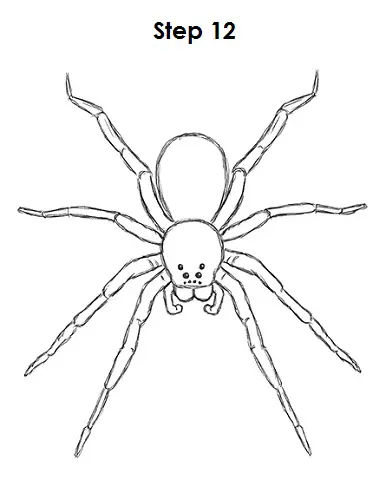
Step 12 (optional): For a cleaner look, erase as much as you can of the initial guide lines. Don't worry about erasing all of the guides. It's okay to leave some behind. Also re-draw any of the final lines you accidentally erase.
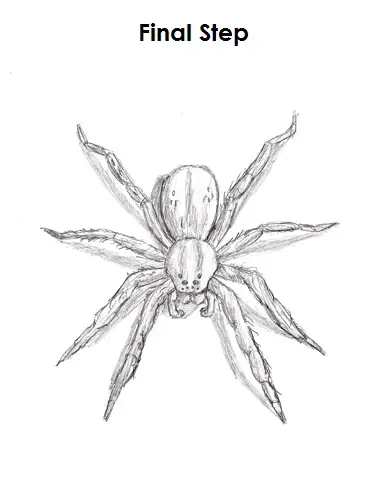
Final Step (optional): You can add some shading to give your drawing more dimension and volume. Pick the direction of the light source when shading so that the shadows are consistent with it. Add a cast shadow underneath the spider. Or draw a vertical line coming from the spider's abdomen to have it hanging down.
You can add more value throughout your spider drawing for extra detail. It's a good idea to use reference to be as accurate as possible. Vary the pressure on your pencil to get different degrees of tonal value.
Thanks for visiting! Subscribe to the How2DrawAnimals YouTube Channel for a new tutorial every week.
To learn how to draw popular cartoon characters, visit EasyDrawingTutorials.com.
To learn how to draw Manga, visit How2DrawManga.com.
RELATED TUTORIALS
 |
 |
 |


