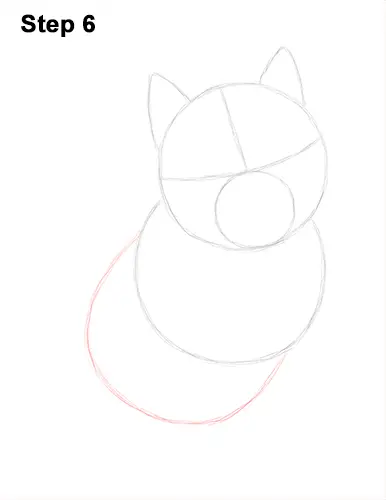
Step 6: Draw a U-shaped line on the lower left side as a guide for the lower half of the husky puppy's body. Draw this guide like the previous step, only this guide is tilted and the sides are flatter.
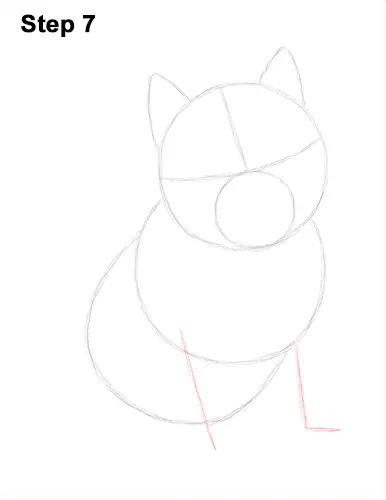
Step 7: Draw two vertical lines that are slightly tilted under the top half of the puppy's body as guides for the front legs. The guide line on the right should bend at the tip to indicate the foot.
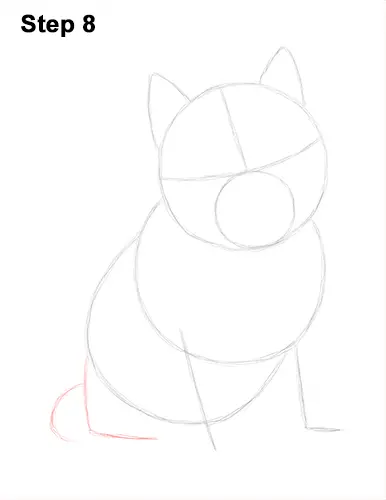
Step 8: Draw an angled line on the lower left side of the body as a guide for the folded hind leg. Add a smaller curved line on the left for the husky puppy's tail.
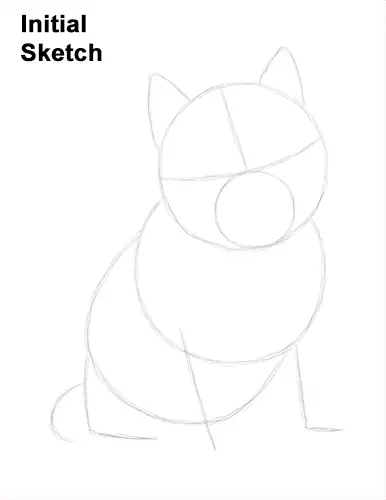
That's it for the initial sketch! From this point on, press harder with your pencil to get a more defined sketch.
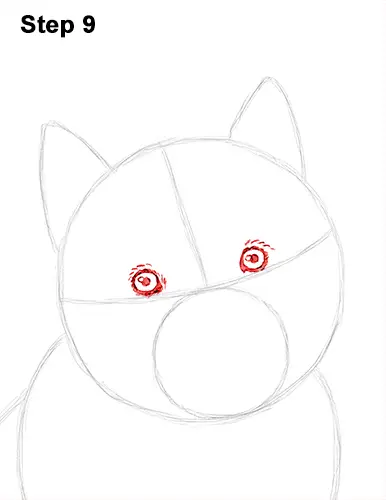
Step 9: Lightly sketch the husky's eyes inside the head as two small circles. Use the construction lines as guides for the placement of the eyes. When you get the placement and size of the eyes right, darken the lines. Make the outline of the eyes darker and thicker. Add a slightly pointy tip on either side of the shape to represent the corners of the eyes. Use jagged lines as you draw the shape around the eyeball to represent fur.
The dark shapes around the puppy dog's eyeballs should be similar to little footballs. Add a series of quick, short strokes around each eye to represent more fur. Inside each eye, off to the side , draw a tiny circle to represent glare. In the middle of each eye, draw a big dot for the pupils. If you'd like, you can shade the eyes, otherwise leave them blank to represent light-colored eyes.


