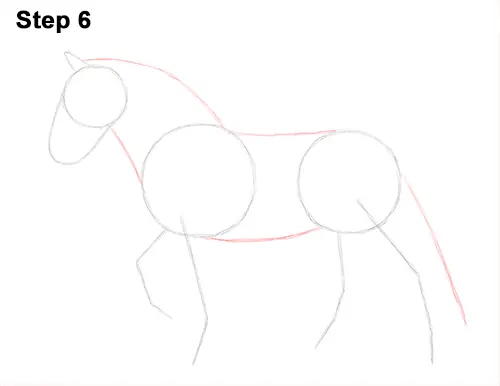
Step 6: Draw a series of curved lines that connect the major shapes to complete the guide for the body. Draw two curved lines on the left that connect the head to the biggest circle to create the guide for the neck. Add two more lines in the middle to conect the main circles to create the guide for the torso. Add another long line coming from the right side of the body as a guide for the horse's tail.
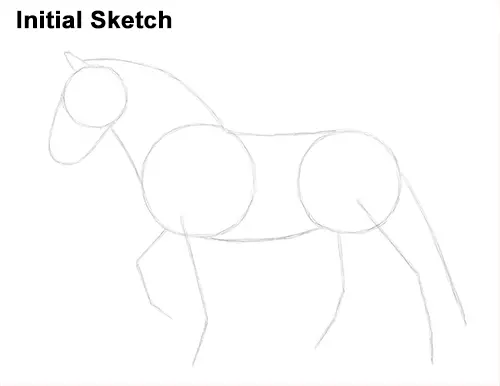
That's it for the initial sketch! From this point on, press harder with your pencil to get a more defined sketch.
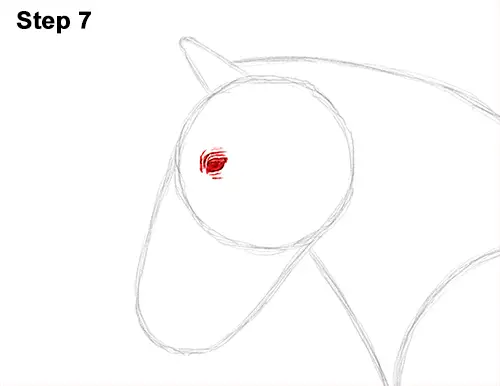
Step 7: Lightly sketch the horse's eye inside the head near the left edge. The shape should be similar to an oval. When you get the shape and the position of the eye right, darken the lines. Make the sides of the shape pointy to create the corners of the eyes. Add a small line at the top for the eyelashes.
Shade the inside of the eye except for a tiny circle off to the side to represent glare. Add an extra-dark value to the middle of the eye for the pupil. Add a short, curved line above the eye for the eyelid. Draw a few more lines around the horse's eye for the detail on the folds of skin.
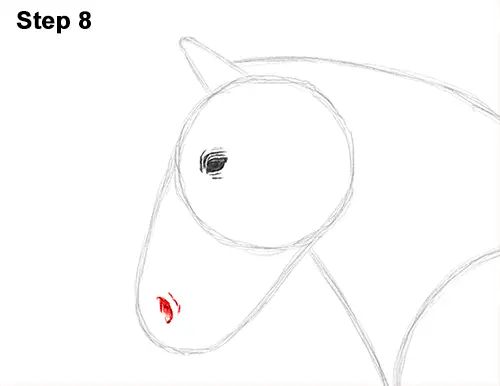
Step 8: Draw the nostril as a curved line on the lower left side of the horse's muzzle. The line should be similar to a backward letter C. Shade the left side of the line. Add a smaller curved line on the right to complete the shape of the nostril.
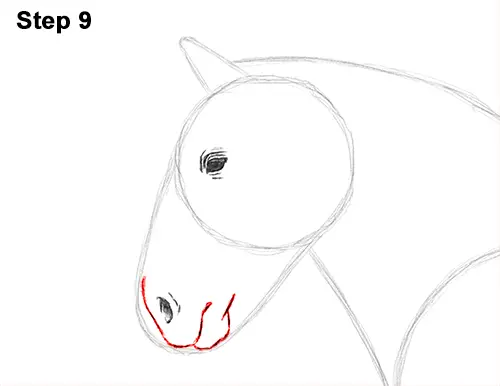
Step 9: Use the initial arc as a guide to draw the horse's muzzle. Follow the basic path of the arc but make the line curvier for the top lip. Extend the line inward to create the mouth. Follow the path of the arc and draw a short, curved line to create the bottom lip.


