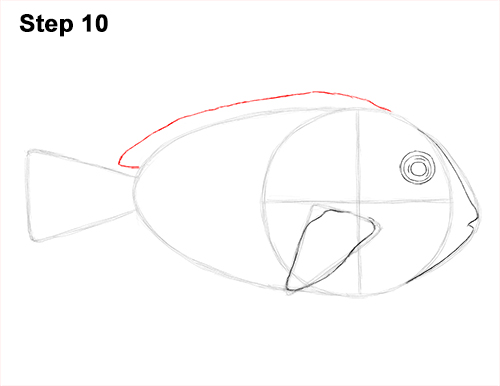
Step 10: Draw a long, curved horizontal line above the fish's body for the dorsal fin. Sketch the line lightly at first. When you get the height and shape of it right, darken the line. Follow the basic outer shape of the body to draw the blue tang's fin but make the line wavier to indicate movement.
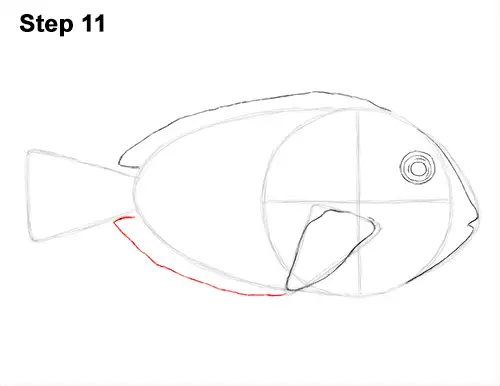
Step 11: Draw a shorter curved line under the body on the left side for the anal fin. Sketch lightly at first as you follow the basic outline of the body. Darken the line when you get the shape right. The left end of this fin should be near the middle of the blue tang's body. It shouldn't go further right than the pectoral fin.
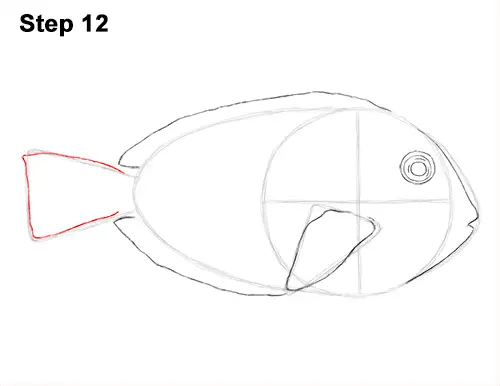
Step 12: Use the three lines on the left as guides to draw the blue tang's tail. Follow the basic path of the guides but make the shape of the tail curvier as you darken the lines. You can also make the vertical line on the left a lot wavier to represent movement.
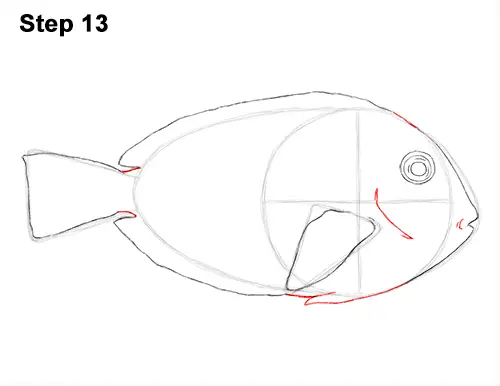
Step 13: Use the remaining initial lines as guides to draw the rest of the blue tang's body. Simply go around the initial sketch and darken the outer portion of the guides to create the shape of the body. On the bottom edge of the body, below the pectoral fin, draw a wavy spike-like shape for the pelvic fin. Draw a long curved line between the eye and the pectoral fin for the fish's gills. The gills should have a diagonal orientation. Add a few lines next to the mouth for extra detail.
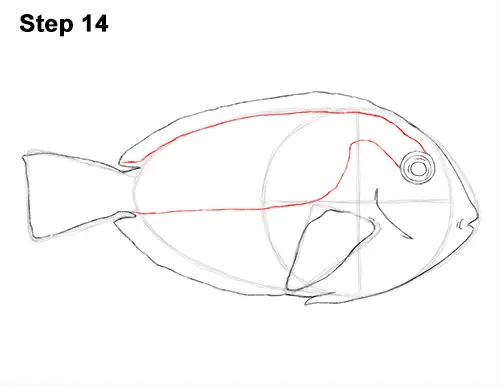
Step 14: Draw a few long, curved lines inside the blue tang's body to represent the color separation. The first line should follow the path of the initial arc, then curve down toward the eye. The second line starts to the left of the eye, then curves up and then down toward the pectoral fin. The line then moves left across the body and ends at the base of the fish's tail. Use the horizontal construction line as a guide for placement. This bottom color separation line should be almost parallel.


