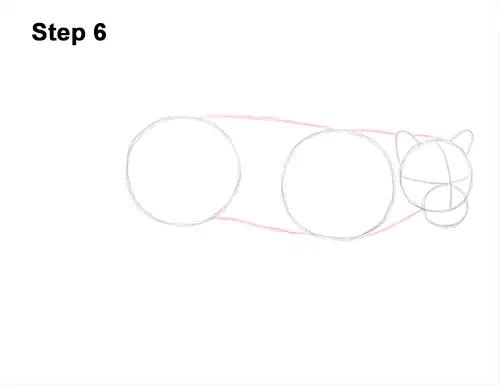
Step 6: Draw a series of curved lines that connect the major shapes to form the rest of the clouded leopard's body. Draw two curved lines on the right to create the neck and two more in the middle to complete the torso.
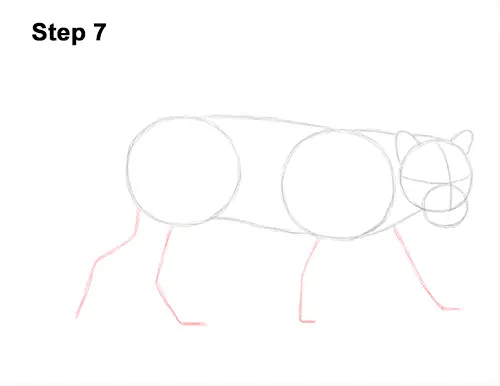
Step 7: Draw four lines under the body as guides for the clouded leopard's legs. Clouded leopards have relatively short limbs, so don't draw the lines too long. The leopard will be stepping forward, so space out the front legs. Bend the lines to indicate where the joints and the feet will be. The tip of the last line should point down to indicate the forward motion.
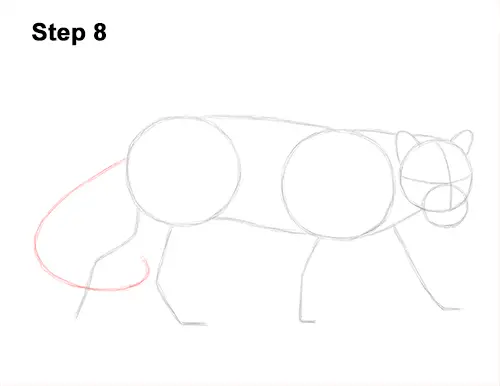
Step 8: Draw a long, curved line on the left side of the clouded leopard's body as a guide for the tail. Clouded leopards have very long tails, so don't draw this line too short. If you have enough room on the left side of your paper, you may want to extend the line to the left instead of in front of the hind legs.
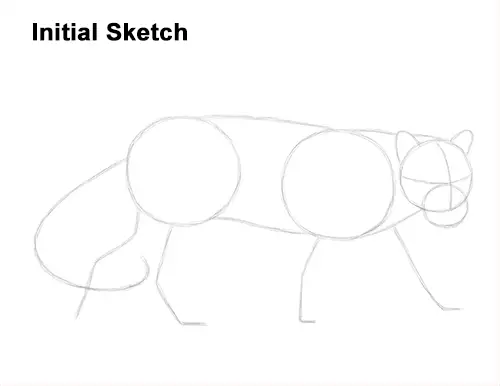
That's it for the initial sketch! From this point on, press harder with your pencil to get a more defined sketch.
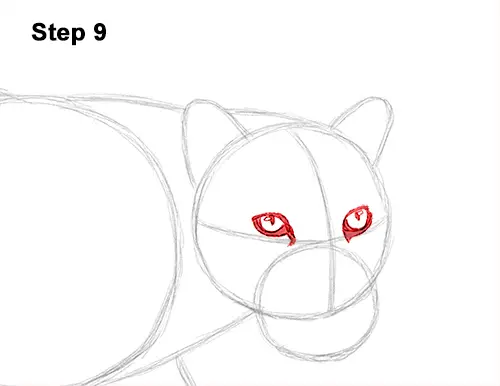
Step 9: Lightly sketch the clouded leopard's eyes inside the head as two small half-circles. Use the lines inside the head as guides for the eyes' placement. When you get the shape and placement of the eyes right, darken the lines. Use a thick, dark line to draw the outer shape of the eyes. Elongate the sides of the eyes and create a circle inside the shape as you darken the lines for the actual eyeball.
The dark, thick outer edge of the eyes should end in a tip that points down toward the clouded leopard's muzzle. The eyes are almond- shaped and should be made up of a thick outline. Take your time to get the shapes right. Add a tiny circle inside each eye, off to the side, to represent glare. In the middle of each eye, draw a slit for the clouded leopard's pupil. You can add a bit of light value inside the eye if you'd like.


