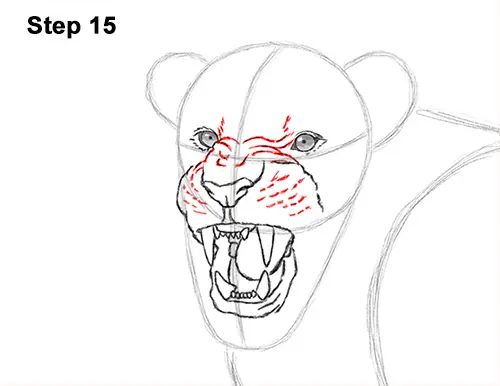
Step 15: Draw a few more lines on the lion's face for the wrinkles and to emphasize the growl. Add a few wavy lines at the top in between the eyes. The lines shouldn't touch in the middle but should stretch all the way to the eyes. Draw some lines that connect to the sides of the muzzle and some right above the nose. Add a few small lines within the shape of the muzzle. The lion's whiskers are omitted because there are too many lines already.
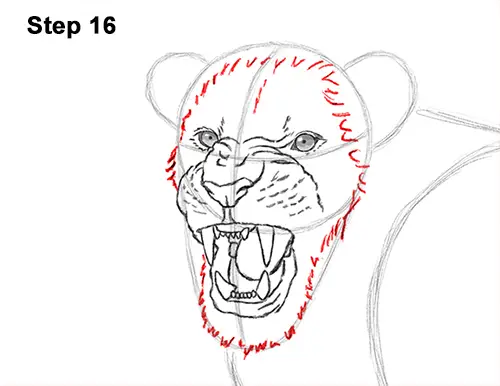
Step 16: Draw the outline of the roaring lion's face using the initial shapes as guides. Follow the basic path of the guides as you draw the face using quick, short strokes. These short strokes are basically the base of the mane. The back of the head is hidden under the big mane. Use quick, short strokes along the path of the initial U-shaped arc to create the chin.
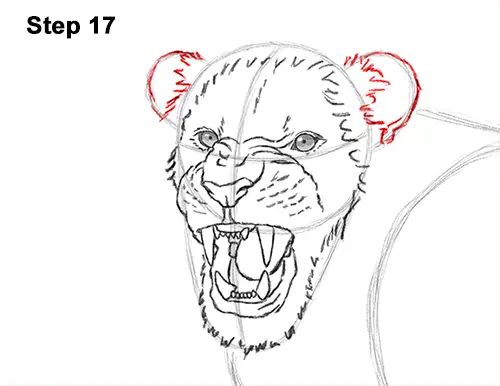
Step 17: Use quick, short strokes under the small arcs on the head for the fur that's in front of the ears. The lion's mane will hide most of the ears, so just darken the tops of the arcs for the ear's tips.
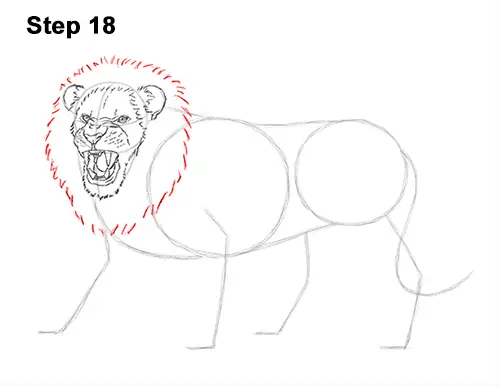
Step 18: Use quick, short strokes to draw the front part of the lion's mane around the head. First lightly sketch the mane so that you get the shape around the head right. When you get the shape of the mane right, darken it using quick, short strokes. You can make the shape bigger if you'd like, and use longer strokes for a shaggier mane. We'll come back to the second part of the mane, which will stretch back toward the body, in a later step.
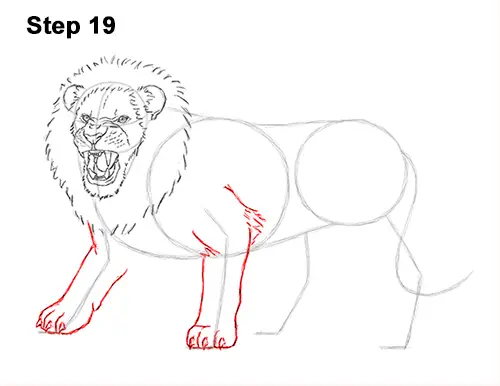
Step 19: Use the lines on the left side as guides to draw the lion's front legs. Lightly sketch the shape of the leg as you follow the basic path of the guide line. Make the overall shape thicker. When you get the structure of the leg right, darken the lines. Bend the shape near the top, where the joint is, and add some fur to the elbow. Draw the toes at the bottom using a couple of curved lines and the claws using small triangle-like shapes.
Draw the other front leg the same way. Draw the other front leg the same way. Start with a light sketch at first to get the shape right. Follow the basic path of the guide as you make the shape of the leg thicker. Bend the leg at the top and darken the lines only when you get the structure right. Don't forget to add the toes using curved lines and the triangle-like claws at the bottom.


