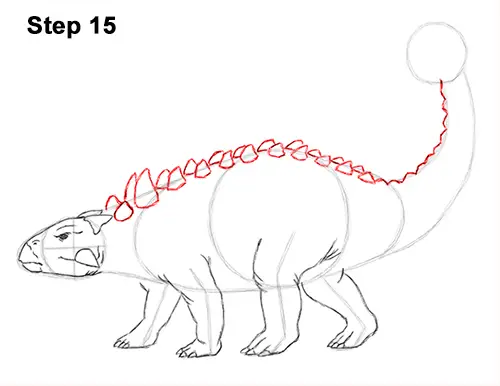
Step 15: Draw the two rows of bony bumps called osteoderms that line the back of the ankylosaurus. The osteoderms are similar in shape to triangles that bend to the right. Make them bigger near the front. Follow the basic top path of the initial guides as you draw the osteoderms on this side of the body. Then duplicate the shape slightly to the left for the osteoderm on the other side of the body. Then you'll have two rows. You can make these bony bumps bigger or smaller if you'd like. Osteoderms can be found in modern-day crocodiles too! Ankylosaurus had a lot of armor, so adding all the detail can be time- consuming. Be sure to take breaks! The osteoderms should get tinier the closer they are to the tip of the tail.
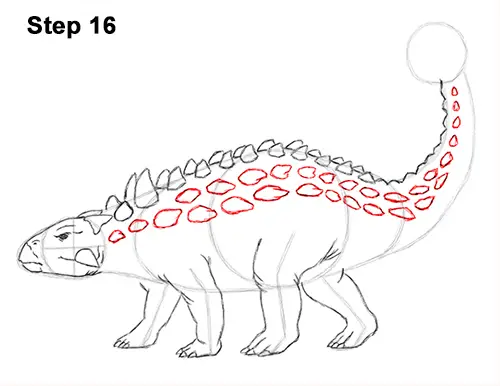
Step 16: Now draw the osteoderms that are on the side of the body, right below the first set. Start off with a single row that splits into two. Because of the angle, the osteoderms are more diamond-like in shape. Add an extra spike at the right side of the shape for the tip pointing toward the tail. Follow the basic curvature of the body as you draw the two rows. The osteoderms near the middle should be bigger. The shapes should get smaller the closer they are to the ankylosaurus's tail. They should also revert to a single row near the tip.
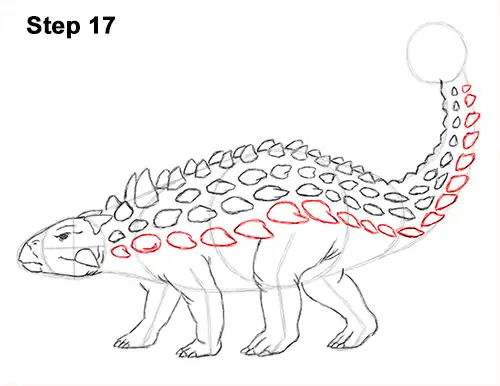
Step 17: Add the final row of osteoderms near the bottom of the ankylosaurus's body, using the row above as a guide. The osteoderms in this row should be similar to misshaped triangles pointing downward and to the left. It takes a very long time to draw all these shapes, so maybe split up the process and draw one row now and another later.
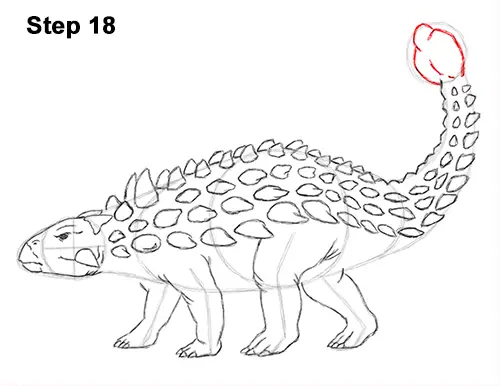
Step 18: Use the circle at the top as a guide to draw the club-like tip of the ankylosaurus's tail using a series of curved lines.
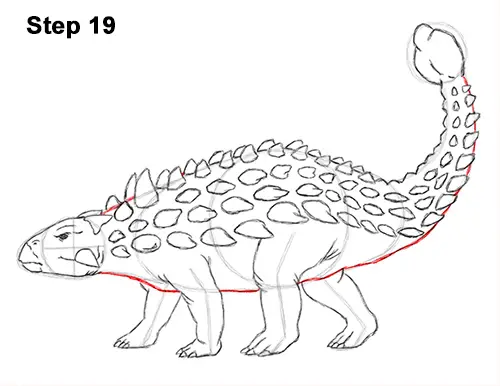
Step 19: Darken the remaining initial guides to create the shape of the rest of the ankylosaurus's body.


