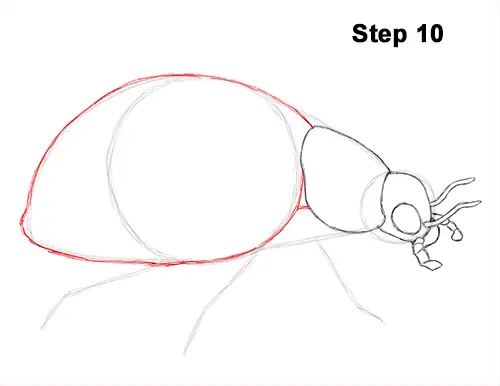
Step 10: Use the initial circle and lines as guides to draw the top dome part of the ladybug's body called the elytra. Follow the path of the guides as you darken the lines to create the shape of the elytra. The bottom right side of the elytra should follow the path of the initial circle and curve up toward the pronotum.
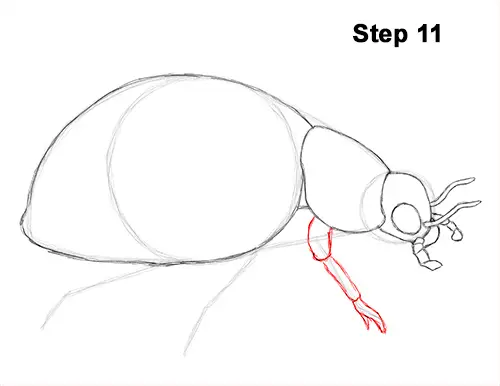
Step 11: Use the line on the left as a guide to draw the ladybug's front leg. Follow the path of the guide and draw the leg using separate segments.
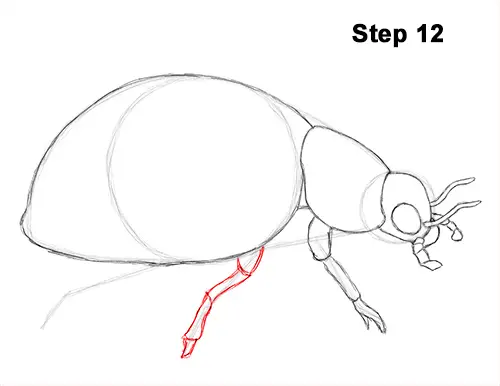
Step 12: Use the line in the middle as a guide to draw the ladybug's second leg. Draw the leg using separate segments. Add the segments based on the way the guide line bends.
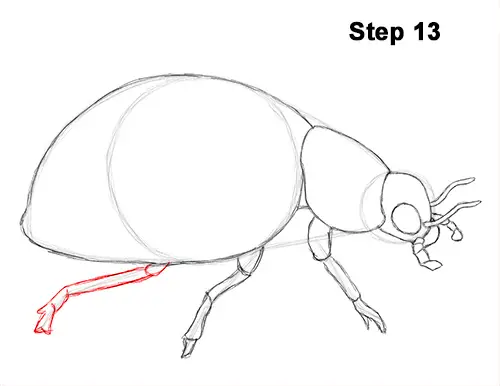
Step 13: Use the line on the left as a guide to draw the last leg the same way. The legs on the other side of the body are being blocked by the ladybug's body, so don't worry about drawing them.
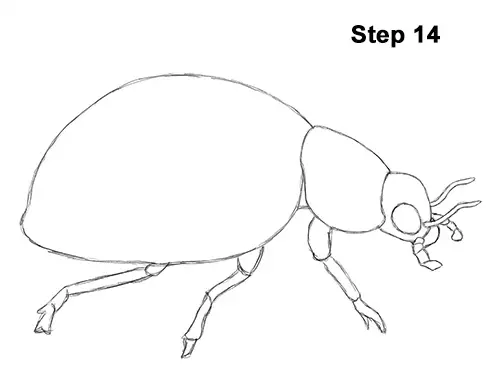
Step 14 (optional): For a cleaner look, erase as much as you can of the initial guide lines. Don't worry about erasing all of the guides. It's okay to leave some behind. Re-draw any of the final sketch lines that you may have accidentally erased.
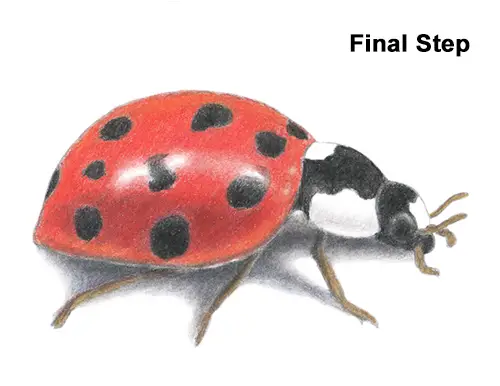
Ladybugs are colorful, so instead of the usual shading, try coloring your drawing. Using gray and blue, add some shading to give the drawing more dimension and volume.
Add a cast shadow underneath. This helps ground the ladybug so it doesn't appear to be floating. The middle of the shadow should be darker, and the edges should be lighter for the shadow's diffusion. Shadows are usually at the cool end of the spectrum, so use some blue or purple along with the gray.
Draw the outline of the black spots on the elytra. Add them randomly, and they should be different shapes and sizes. Start adding dark red to the body, mainly to the section in shadow. Add the color lightly at first. Try not to overlap the red into the shapes of the spots. Leave a couple of extra shapes blank to indicate the shine on the ladybug's elytra. Now add a lighter shade of red, like red-orange on top of the dark red and to the rest of the elytra. Add different shades of red on top of each other, pushing harder as you go along to blend the colors. Use darks near the shadow and lights near the top. Remember to try not to add red into the shapes of the spots and leave a streak near the middle blank for the elytra's shine. Adding the different shades of red can be time-consuming, so be patient and take breaks. Continue adding different shades of red to the body to build up to a smooth tone. Push harder as you color to blend the colors together.
Start adding the black to the spots. Add them lightly at first and build up to the level of darkness that you want. Use a lighter value on the spots near the middle to indicate the elytra's shine. After the spots, start adding black to the pronotum and the head. Add the black lightly at first, then darken it to the level that you want. The pronotum and the head have some white sections, so draw the outline of a few shapes and leave them blank. Push harder on your pencil to achieve a richer shade of black. Add different shades of brown (dark brown, light brown, even orange!) to the legs and antennae. After the legs and antennae, you can add more gray and black to the shadows and body to give the ladybug drawing more dimension. Color separate sections at a time to break up the long coloring process and don't forget to pause the "How to Draw a Ladybug" video to draw at your own pace.
Thanks for watching! Subscribe to the How2DrawAnimals YouTube Channel for a new tutorial every Tuesday.
To learn how to draw popular cartoon characters, visit EasyDrawingTutorials.com.


