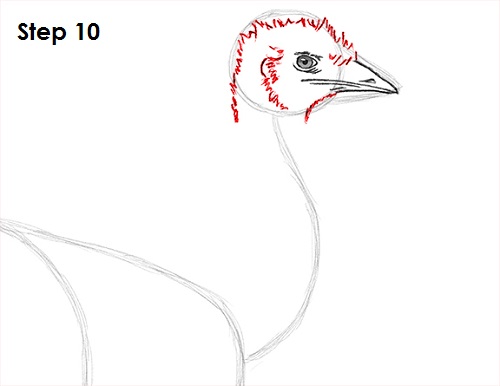
Step 10: Use the initial circle as a guide to draw the emu's head. Use quick, short strokes as you follow the basic path of the circle to create the messy feathers on the head. Emus have some bald patches on their head, so don't add too many strokes. Add a few more strokes within the shape of the head and a curved line for the ear opening.
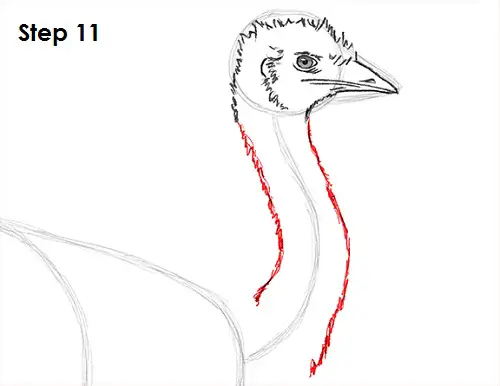
Step 11: Use the initial curved line as a guide to draw the emu's neck. Make the neck wider as you follow the path of the guide. Use quick, short strokes for the bird's sparsely spaced feathers.
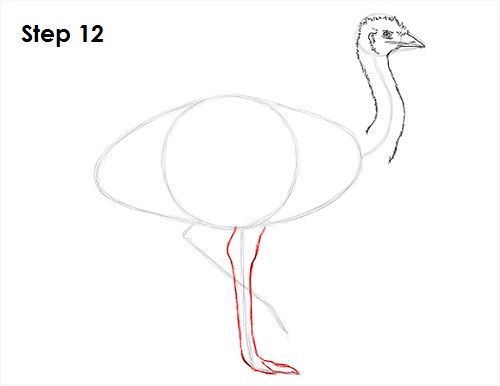
Step 12: Use the straight line as a guide to draw the leg on this side of the emu's body. Sketch the shape of the leg lightly as you follow the path of the guide. Darken the lines when you get the structure right. Emus have three toes but only two should be visible from this perspective.
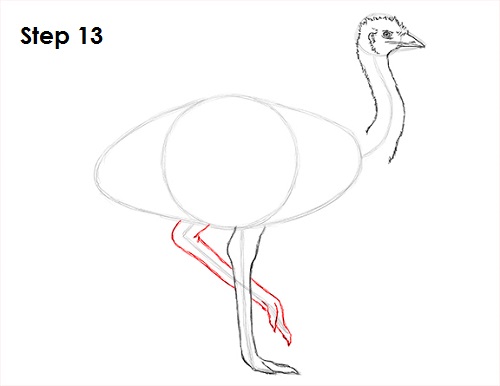
Step 13: Now draw the leg on the other side of the emu's body by using the other line as a guide. First lightly sketch the shape of the leg as you follow the basic path of the guide line. Darken the lines only when you get the structure of the leg right. Add the toes at the bottom as V-shaped lines. Remember to just draw the two that are visible from this angle.
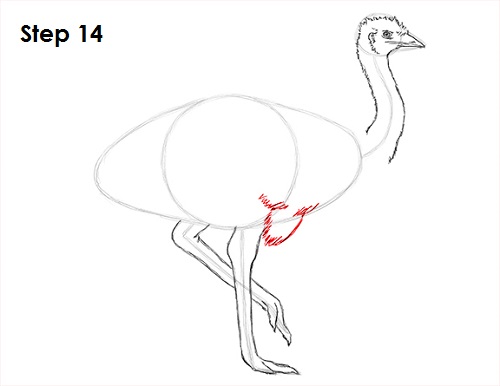
Step 14: Draw the small U-shaped wing on the lower right side of the body using quick, short strokes to represent the emu's feathers.


