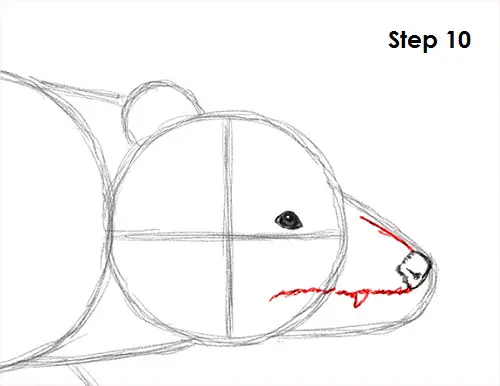
Step 10: Use the arc as a guide to draw the top part of the opossum's muzzle. Follow the basic path of the arc but draw the top part a bit lower as a you darken the line. Use quick, short strokes to draw the mouth to represent fur. The line should stretch to the left inside of the head. Add the canine at the bottom.
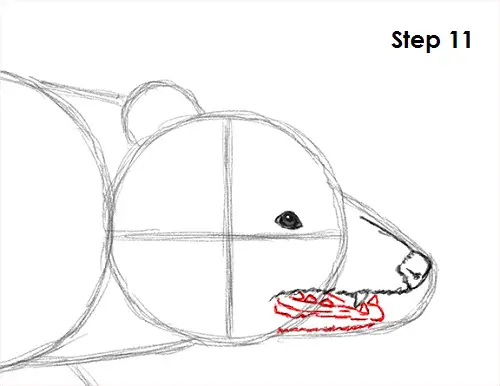
Step 11: Use the initial arc as a guide to draw the bottom part of the opossum's muzzle. Follow the path of the arc as you darken the line for the lower jaw but make it shorter. Add the lower canine as a small arc and a couple of lines for the gums. Add a few more teeth using arcs that line the bottom part of the mouth along the gumline. For a simpler drawing, draw the mouth closed by simply adding a line under the mouth for the lower jaw.
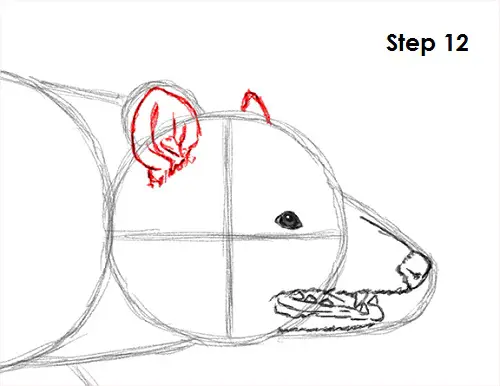
Step 12: Use the small arc on the top as a guide to draw the opossum's ear. The shape of the ear should be pointier at the top, and the base should be inside the head. Add a few strokes at the bottom for the fur and curved lines inside the shape for the ear's structure. Add the ear on the other side of the head using a couple of curved lines.
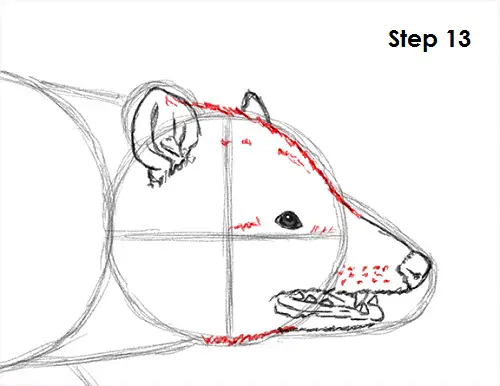
Step 13: Use the remaining lines as guides to draw the rest of the opossum's head. Follow the path of the guides as you darken the lines and use quick, short strokes for a furry texture. Add some lines inside the head for extra detail. Draw a few dots in the muzzle and a few long strokes coming out of them for the whiskers.
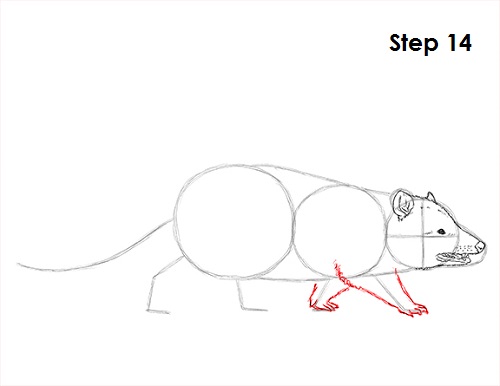
Step 14: Use the lines on the right side of the opossum's body as a guide to draw the front legs. Use quick, short strokes as you go around the guide line and create the leg. Draw the foot and toes at the tip using a series of curved lines. Draw the front leg on the other side the same way. Use the line to the left as a guide.


