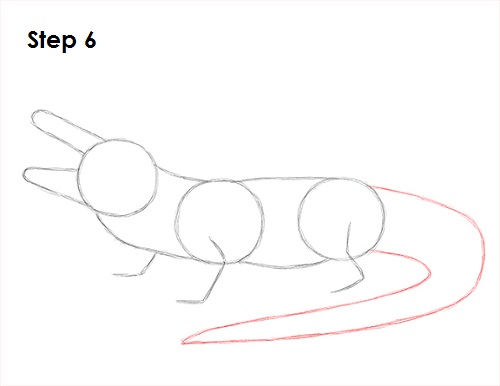
Step 6: Draw two long curved lines on the right side of the body as a guide for the tail. Sketch the lines lightly at first to get the shape right. They should curve to the left and come to a point in front of the alligator's body. If you have room on your paper, you can draw the tail straight to the right of the body instead of curved for an easier drawing.
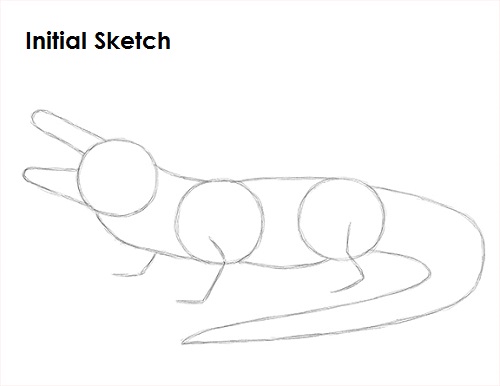
That's it for the initial sketch! From this point on, press harder with your pencil to get a more defined sketch.
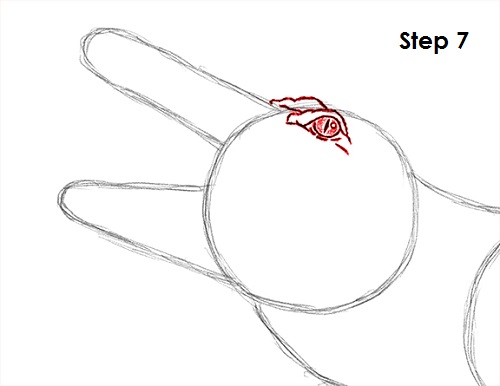
Step 7: Draw the alligator's eye as a small circle inside the head near the top edge. Add a thick line in the middle for the slit pupil. Shade the rest of the eye except for a tiny circle to represent glare. Draw a curved line over the eye for the first part of the brow structure. Add a longer curved line over the top of the eye on the outside of the main circle for the top of the brow. Draw a few lines under the eye as well for extra detail. Draw another curved and bumpy line on the left for the eye structure on the other side.
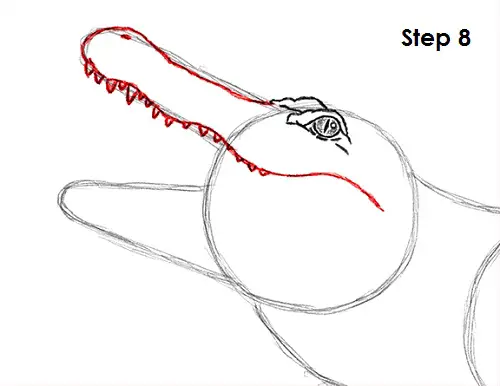
Step 8: Use the arc on the left as a guide to draw the top part of the alligator's snout. Follow the basic path of the guide but make the line bumpier at the top and wavier at the bottom. The bottom line should stretch to the right, almost to the right edge of the main circle. Sketch the shape of the snout lightly at first to get the structure right. Darken it only when you get it right. Draw a series of small, different-sized shapes under the snout for the row of sharp teeth.
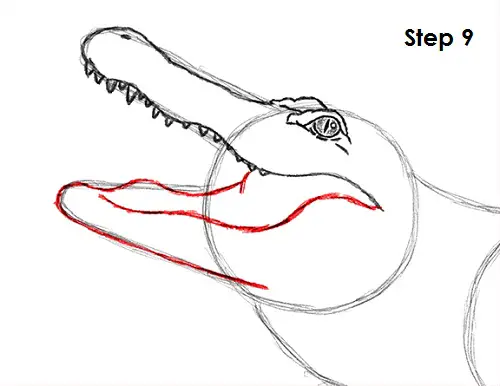
Step 9: Now add the bottom jaw by first drawing a wavy line across the arc underneath. The line should connect to the top jaw on the right side. Now add the rest of the alligator's jaw by following the path of the guide. The top part should be wavy and the bottom part straight.


