Page 2 of 4
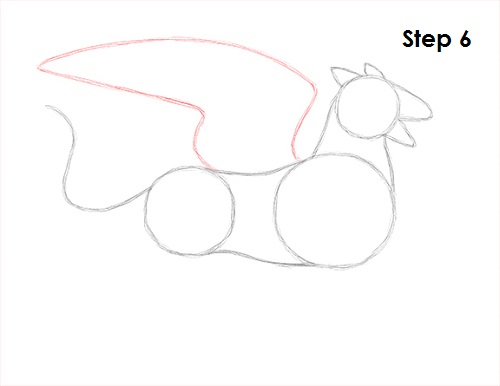
Step 6:
Draw a few curved lines on top of the body as a guide for the griffin's wings. First draw a long curved line at the top and connect it to the body with a smaller curved line on the right side. Then draw a smaller curved line under the long line and connect it to the body with a small curved line on the left side.
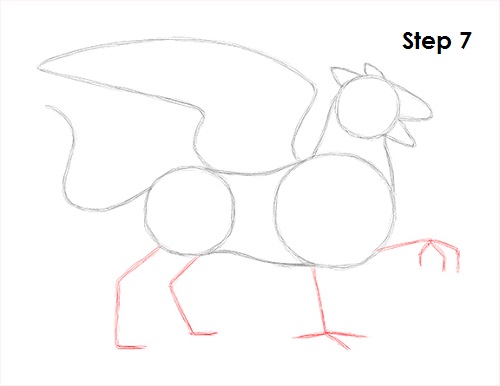
Step 7:
Draw four lines under the body (two below each circle) as guides for the griffin's legs. Add a few small lines on the ends of the front legs as guides for the individual toes. Draw the line on the other side higher up on the body for a raised front leg. Bend the lines on the right side to indicate where the joints and feet will be on the hind legs.
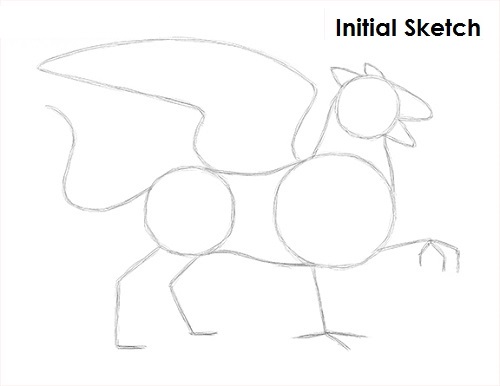
That's it for the initial sketch! From this point on, press harder with your pencil to get a more defined sketch.
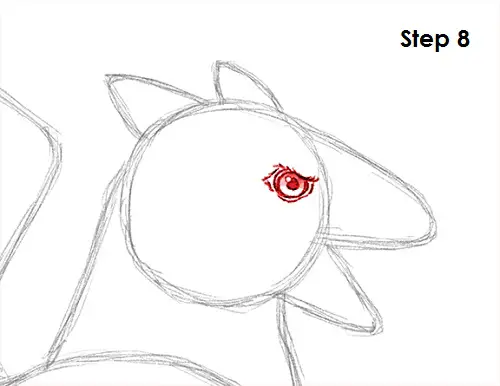
Step 8:
Draw the eye as a small circle inside the griffin's head on the top right. Add an angled line above the circle for the furrowed feathers. Draw a tiny circle to represent glare and a bigger dot in the middle for the pupil. Shade the eye except for the tiny circle. Use a value that's lighter than the pupil. Add a few lines around the eye for extra detail.
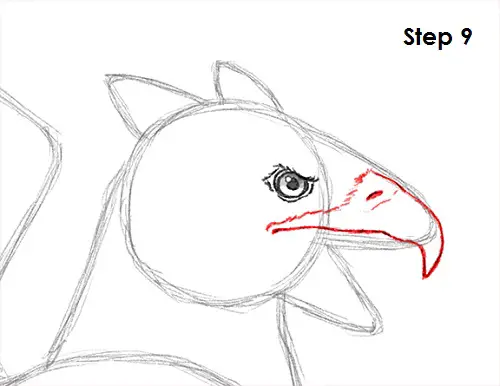
Step 9:
Use the arc on the right side as a guide to draw the top part of the griffin's beak. Use quick, short strokes on the left side for the feathery base of the beak. Lightly sketch the shape of the beak as you follow the basic path of the guide. The shape should curve down and come to a sharp point on the lower right side. Darken the lines when you get the shape right. Add a small line inside for the nostril.


