Page 3 of 4
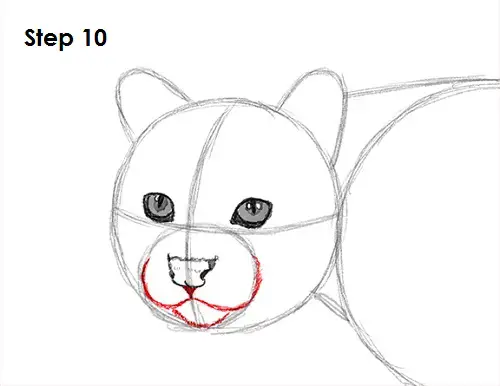
Step 10: Use the small circle as a guide to draw the rest of the ocelot's muzzle. Draw the mouth under the nose as a line that splits in two, then curves up along the path of the circle. Draw the chin under the mouth using quick, short strokes for the fuzzy texture.
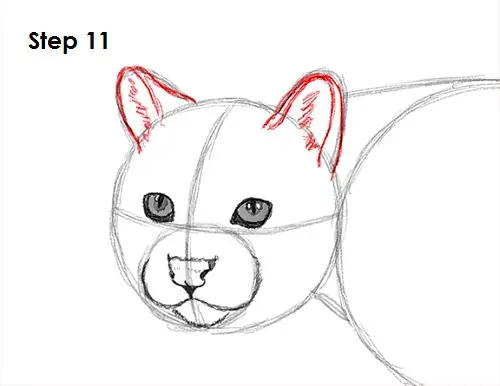
Step 11: Use the arcs on the ocelot's head as guides to draw the ears. Darken and shape the arcs. Draw another smaller arc within each ear. Draw a few quick, short strokes inside each ear for the fur.
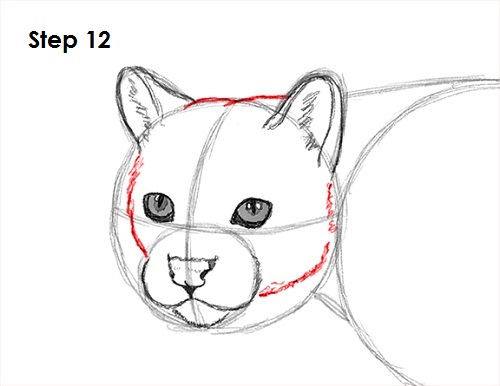
Step 12: Use the original circle as a guide to draw the rest of the ocelot's head. Follow the basic path of the circle but make the head thinner. Use quick, short strokes for the texture. The jaw line should be higher up than the original circle.
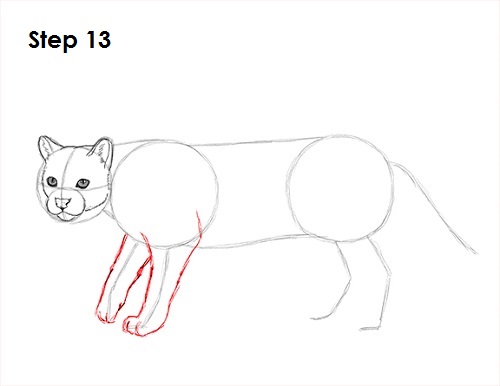
Step 13: Use the lines on the left side as guides to draw the ocelot's front feet. Lightly sketch the shape of the first leg as you follow the basic path of the line. Bend the shape a little for the joints. When you get the structure right, darken the lines. Use quick, short strokes for the fur. Add a couple of curved lines at the bottom for the toes. Use the other line to draw the front leg on the other side. The ocelot is stepping forward, so draw the foot pointing down as you sketch the structure.
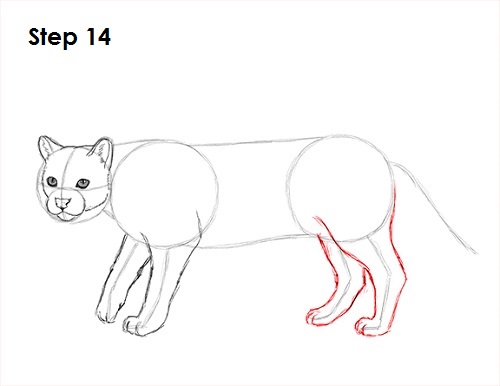
Step 14: Now use the lines on the right as guides to draw the ocelot's hind legs using the same technique. Sketch the first leg lightly as you follow the basic path of the line. Darken the lines only when you have the structure right. Draw the toes a the bottom. Use the last line as a guide to draw the hind leg on the other side. The hind legs should be thick at the top and narrower at the bottom.


