Page 4 of 4

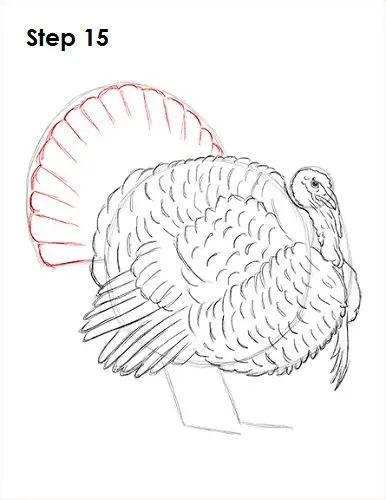
Step 15 (optional): Draw the turkey's tail feathers by using the curved line as a guide. Follow the path of the guide and add short bump-like arcs as you darken the guides. Add some lines inside to create the feathers. Notice how the orientation changes from vertical at the top to horizontal at the bottom.

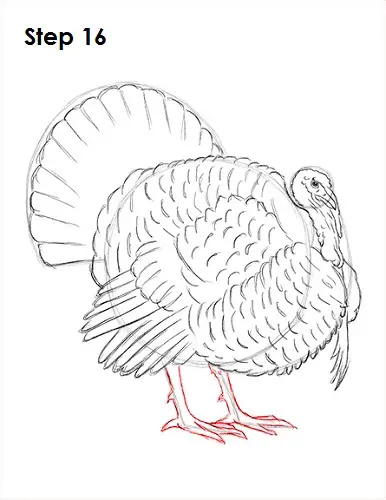
Step 16 (optional): Use the L-shaped lines as guides to draw the turkey's feet. Follow the path of the guide as you darken the lines. Make the leg thick and add the talons at the bottom. Draw the leg on the other side the same way. Don't forget the pointy talons.

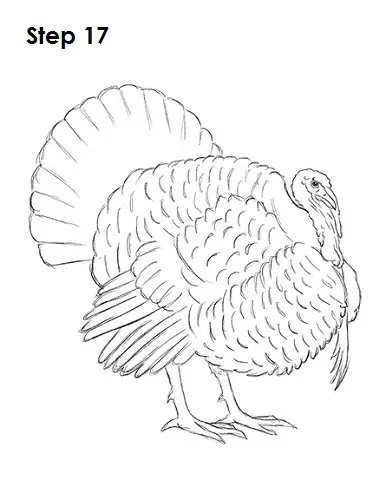
Step 17 (optional): For a cleaner look, erase as much as you can of the initial guide lines. Don't worry about erasing all of the guides. It's okay to leave some behind. Re-draw any of the final sketch lines that you may have accidentally erased.

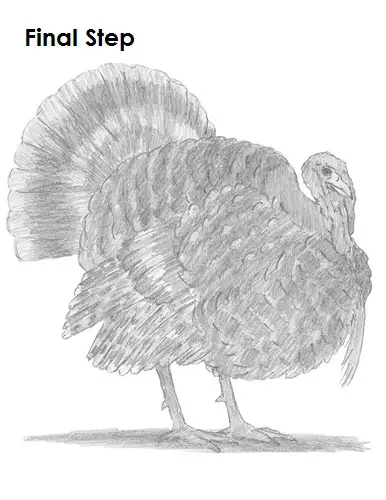
Final Step (optional): Add some shading to your drawing for extra detail. Domestic turkeys have various feather patterns, so shade yours using whichever variety you'd like. Some domestic turkeys are entirely black. You can shade using a darker value all over for an easier drawing. Some domestic turkeys (like the ones the president pardons at Thanksgiving) are entirely white. You can skip the shading for an even easier drawing! Vary the pressure on your pencil to get different degrees of tonal value. Use a lighter value on the tip of each individual curved line inside the body for a puffier texture. Turkey feathers are shiny and iridescent, so use a lighter value on sections of feathers. Try to add the value smoothly and avoid a rough, gritty texture. Shading can be very time-consuming, so be patient and take breaks. It's always a good idea to use reference for a more accurate drawing.
And finally, add a cast shadow underneath. This helps ground the turkey so it doesn't appear to be floating.
Thanks for watching! Subscribe to the
How2DrawAnimals YouTube Channel for a new tutorial every Tuesday.
To learn how to draw popular cartoon characters, visit
EasyDrawingTutorials.com.


