Page 2 of 4
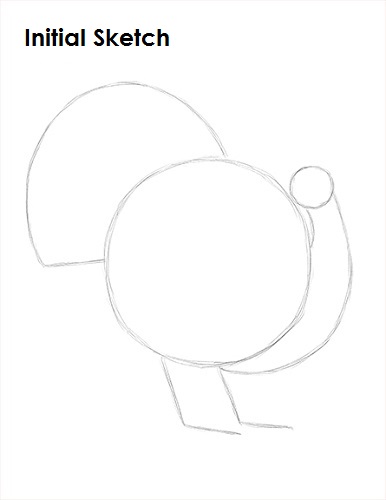
That's it for the initial sketch! From this point on, press harder with your pencil to get a more defined sketch.
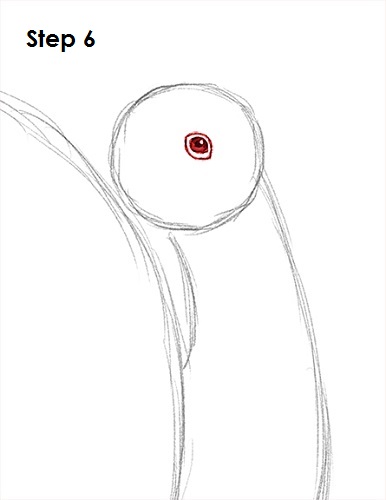
Step 6: Draw the eye inside the turkey's head as a small circle. The eye should be near the middle of the head. Add a small dot inside for the pupil. Shade the inside of the eye except for a tiny circle to represent glare. When shading, use a value that's lighter than the pupil. Add some lines around the eye for extra detail.
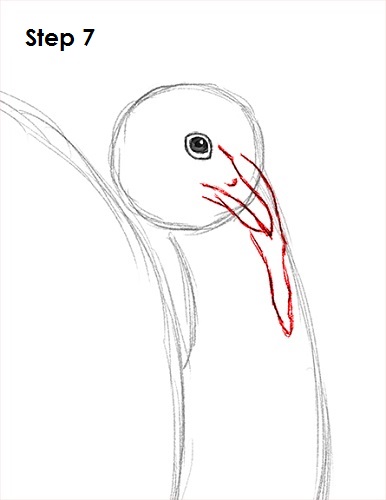
Step 7: Draw the turkey's beak on the lower right side of the head. The top part of the beak is a bit wavy because that's where the loose skin will be. The mouth is a straight line. Add a small line below the turkey's mouth for the lower part of the beak. Draw the fleshy piece of skin called the snood on top of the beak. The snood basically consists of a long, curvy line on the other side of the beak.
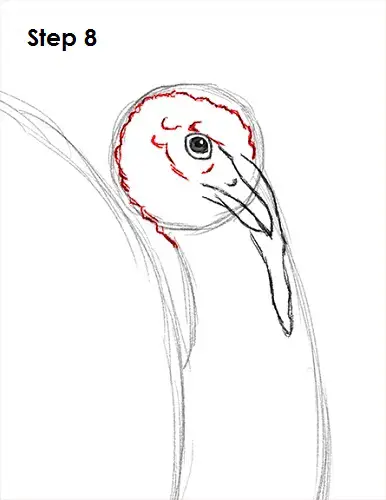
Step 8: Use the small circle as a guide to draw the turkey's head. Follow the basic path of the circle and make the head bumpier as you darken the lines. Add a few more lines inside the head for the bare skin texture.
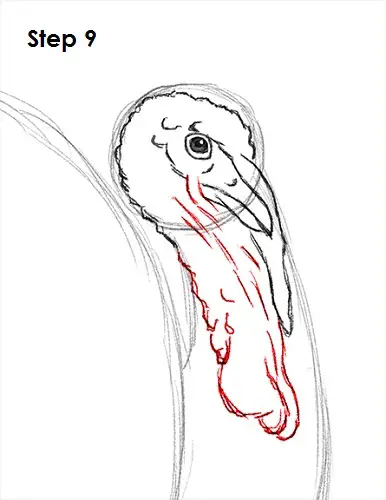
Step 9: Use the lines under the turkey's head as a guide to draw the neck and the dewlap or wattle. The wattle is just loose skin on the neck, so don't worry if it's not perfect. Just draw it using long curved lines.


