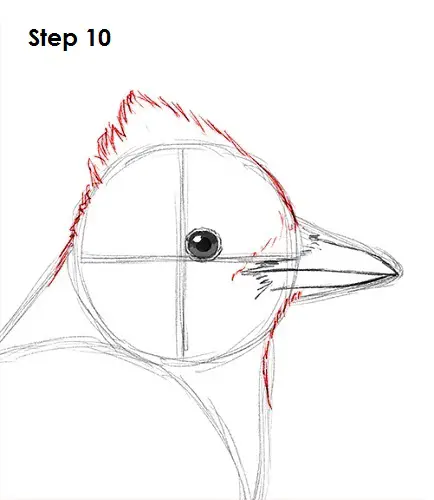
Step 10: Use the initial circle as a guide to draw the blue jay's head. Blue jays have a crest of feathers on their heads. Sketch lightly at first to get the structure right. When you get the shape right, darken the lines using quick, short strokes for a fuzzy texture. Add a few more lines under the blue jay's beak for the neck and on the base of the beak.
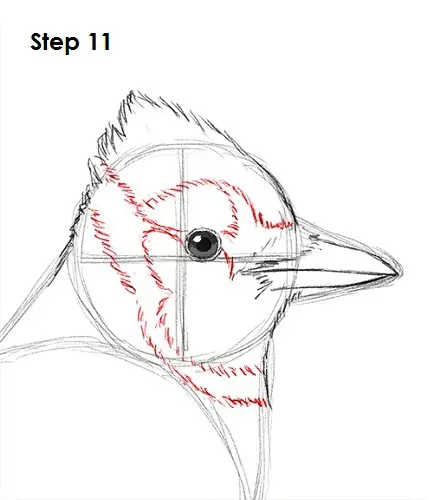
Step 11: Add a few more lines within the blue jay's head for the detail on the face's pattern. Use quick, short strokes as you draw the lines going around the eye. Add a few more lines next to the eye and down toward the neck. These lines will help separate the different colors of the blue jay's head later on.
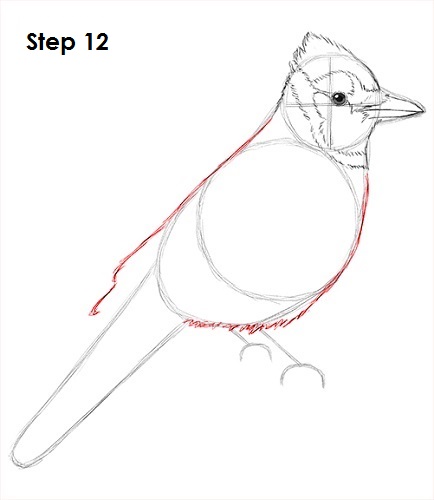
Step 12: Use the initial shapes as guides to draw the outline of the blue jay's body. The line on the left side should stick out to form the tip of the wings. Use quick, short strokes at the bottom for the blue jay's fluffy feathers.
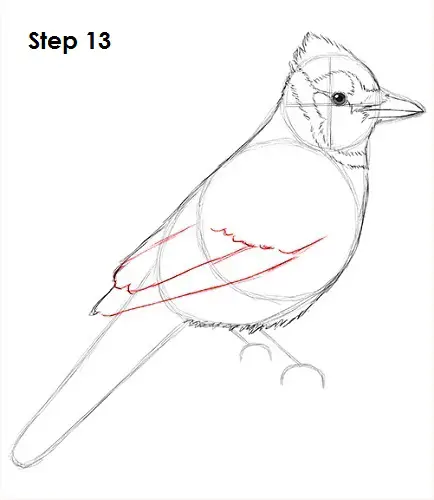
Step 13: Draw the rest of the blue jay's wings within the shape of the body. Draw a couple of diagonal lines coming from the lower, left side toward the inside of the body for the ends of the folded wing. Add a few small curved lines at the top of the wing for the smaller feathers.
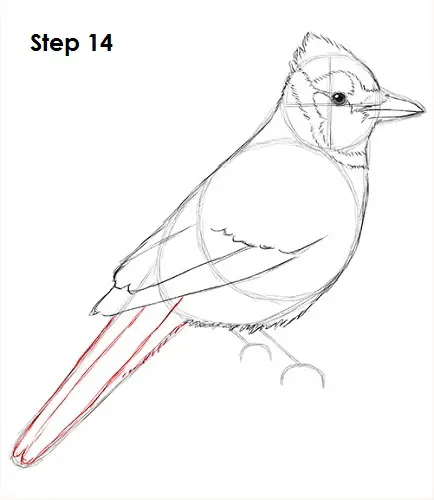
Step 14: Use the long arc as a guide to draw the blue jay's tail. Follow the basic path of the guides as you darken the lines. Add another line in the middle for extra detail.


