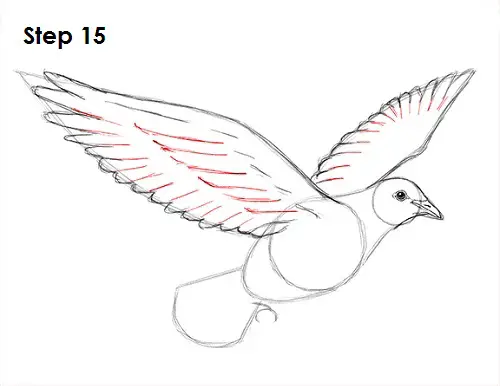
Step 15: Draw a few lines within the shape of the wings for further structure and extra detail. Extend the curved lines you drew earlier into the wing to make the dove's feathers longer. Draw a few more curved lines in the middle of the wing for more feathers. Extend the curved lines on the other wing as well to make those feathers longer.
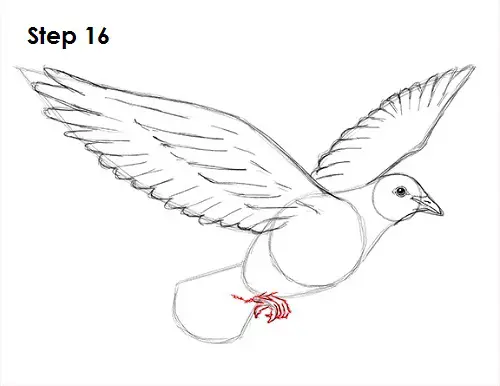
Step 16: Use the small lines underneath the body as guides to draw the feet. Draw a curved line close to the dove's body for the base of the feet. Then make the guide lines thicker to create the folded feet.
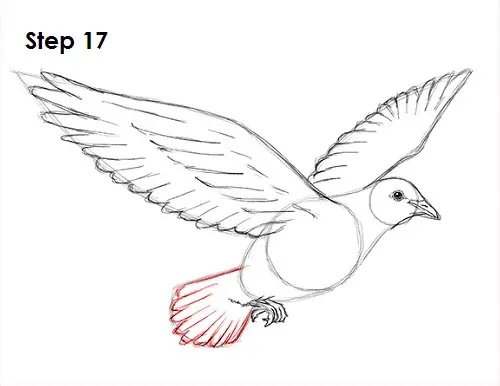
Step 17: Use the shape on the left side as a guide to draw the dove's tail. Darken the sides of the tail and then add a few straight lines within the shape for the bird's individual tail feathers.
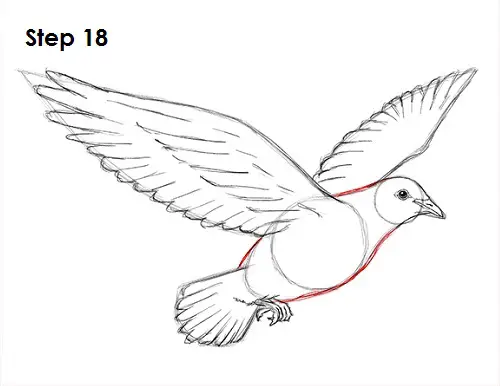
Step 18: Darken the remaining guide lines to create the rest of the dove's body.
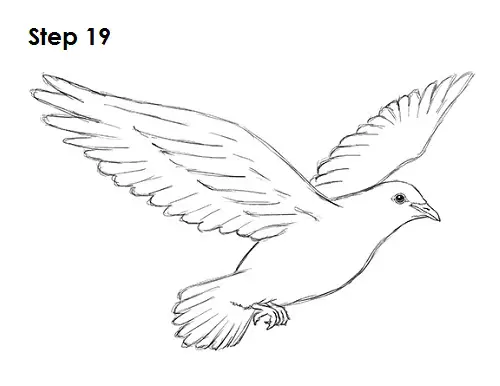
Step 19 (optional): For a cleaner look, erase as much as you can of the initial guide lines. Don't worry about erasing all of the guides. It's okay to leave some behind. Re-draw any final sketch lines that you may have accidentally erased.
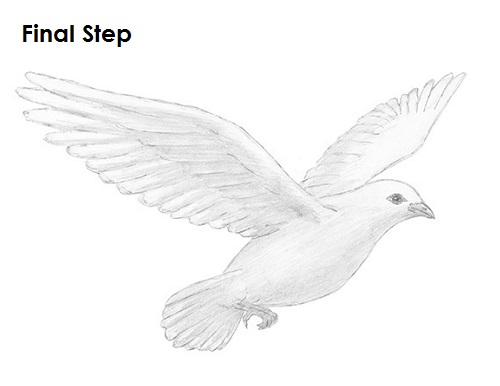
Final Step: Add some shading to your dove drawing to give it more dimension and volume. Pick the direction of the light source when shading so that the shadows are consistent with it. Vary the pressure on your pencil to get different degrees of tonal value. You can add more value throughout the dove's body if you'd like or leave it most of it blank for a white dove. It's always a good idea to use reference for a more accurate drawing. Don't forget to pause the "How to Draw a Dove" video after each step to follow at your own pace.
Thanks for visiting! Subscribe to the How2DrawAnimals YouTube Channel for a new tutorial every Saturday.
To learn how to draw popular cartoon characters, visit EasyDrawingTutorials.com.
RELATED TUTORIALS
 |
 |
 |
Visit the Amazon affiliate links below for helpful books that you can use as reference when drawing birds!


