Page 2 of 3
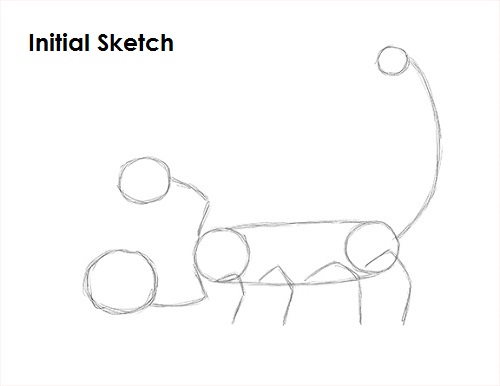
That's it for the initial sketch! From this point on, press harder with your pencil to get a more defined sketch.
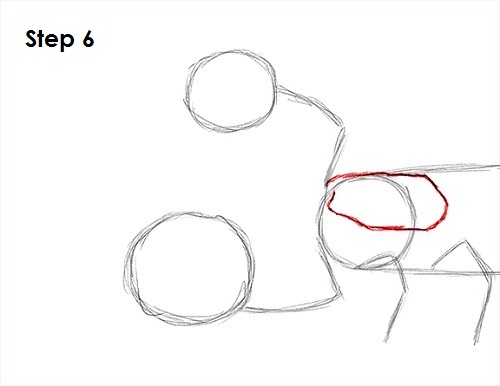
Step 6: Use the initial shapes as guides to draw the front part of the scorpion's body or the cephalothorax. Follow the basic path of the guides and draw a hexagon-like shape for the top part of the exoskeleton. This shape can be a little tricky, so don't forget to pause the video to follow at your own pace.
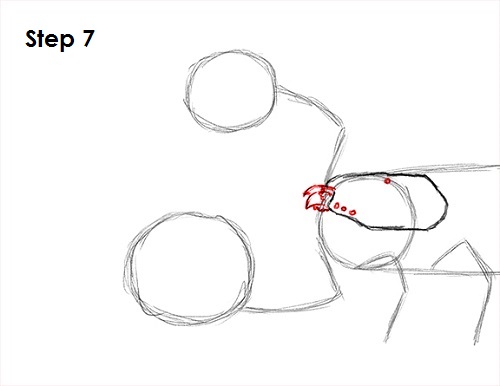
Step 7: At the front of the cephalothorax, draw two curved, pointed shapes for the fangs or chelicerae. Draw three dots near the front and one at the top for the eyes. Scorpions usually have eight eyes, but the other four are on the other side.
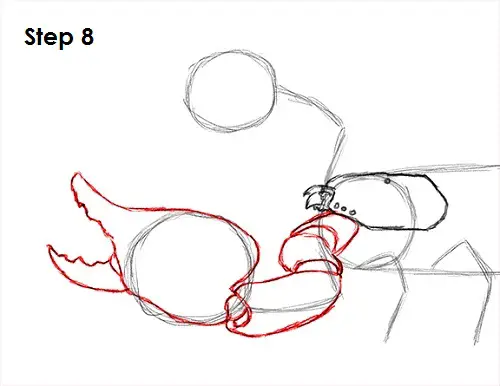
Step 8: Use the initial line and circle at the bottom as a guide to draw the pedipalp that is shaped into a claw. Follow the basic path of the lines as you add the segments that lead to the claw. Sketch each segment lightly at first as you follow the path of the guides. When you get the structure right, darken the lines. There's a total of three segments plus the claw. The shapes can be a bit tricky, so remember to pause the video as you follow along. Now draw the scorpion's claw at the end using the circle as a guide. Follow the basic path of the circle as you darken the line that creates the base of the claw. Add a pointed tip to the top left side of the shape for the first part of the claw. Draw another pointed shape just below it for the bottom part of the claw. Notice that the inside of the scorpion's claws are slightly serrated.
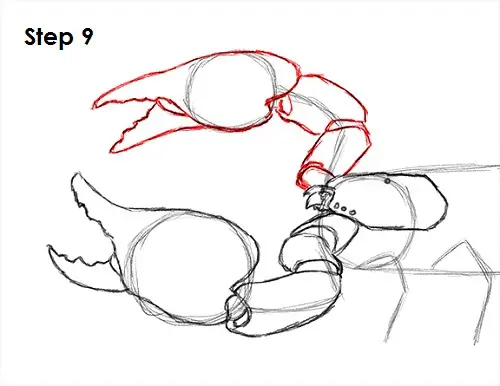
Step 9: Use the other line and circle as a guide to draw the scorpion's pedipalp or claw on the other side. Follow the path of the line as you add each separate segment. Sketch each of the three segments lightly. When you get the structure of them right, darken them. Now follow the basic shape of the circle as you draw the claw at the tip. First draw the base of the scorpion's claw along with the pointy end for the top part of the claw. Then add the pointy section at the bottom for the second part of the claw.


