Page 4 of 4


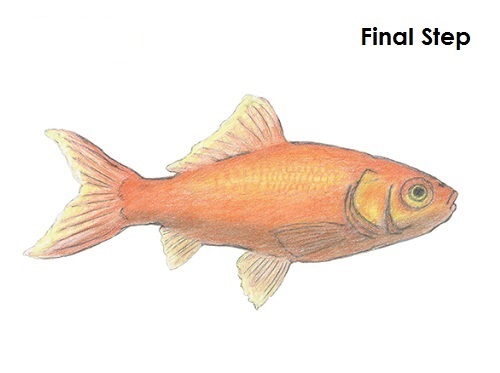
Add some yellow for the shiny highlights on the goldfish. They're more of an orange color than gold, but the highlights can be yellow. You can start adding more orange. It's a good idea to add the colors lightly at first to determine what works, and then commit to darker hues.
There are different varieties of goldfish. Some are more red than orange. Others are black. Some have patterns and spots. You can color your goldfish however you want! If you have a pet goldfish, try to duplicate its pattern on your drawing. It's also a good idea to use reference if you want your goldfish drawing to have a particular pattern.
You can add a few small curved lines in the highlighted portion of the fish for the scales. Don't add every individual scale, just a few for the basic idea. Add different shades of orange throughout the goldfish's body to further shape the body. You can also vary the pressure on each pencil to get different shades of orange. Try to add the color smoothly for a sleek and shiny feel. But don't worry about making it perfect. Have fun with it! Keep building using darker tones until you get the result you want. Don't add too much color to the fins because a lot of the time they are see-through. You can add some blue circles around the goldfish to indicate bubbles in the water! Remember to pause the "How to Draw a Goldfish" video to draw at your own pace.
Thanks for watching! Subscribe to the How2DrawAnimals YouTube Channel for a new tutorial every Tuesday.
To learn how to draw popular cartoon characters, visit EasyDrawingTutorials.com.


