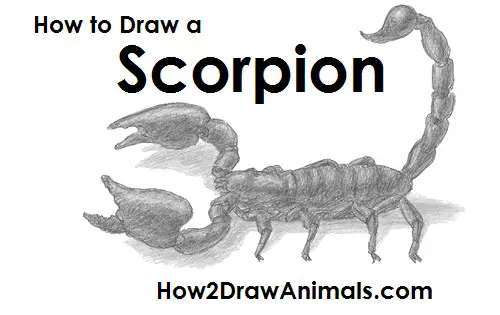
Please PAUSE the "How to Draw a Scorpion" video after each step to draw at your own pace.
For the first few steps, don't press down too hard with your pencil. Use light, smooth strokes to begin.
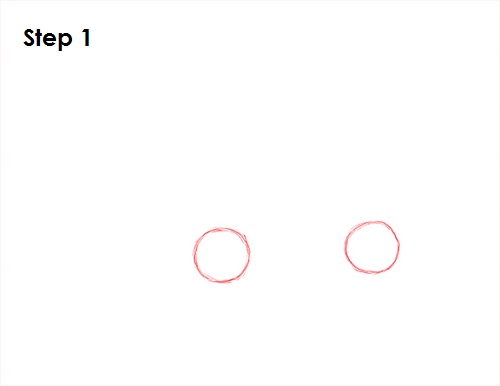
Step 1: Draw two small circles as guides for the scorpion's body. The circles don't have to be perfect. They're just guides. The space between the circles will determine the length of the scorpion. Leave enough room at the top for the tail and on the left for the claws.
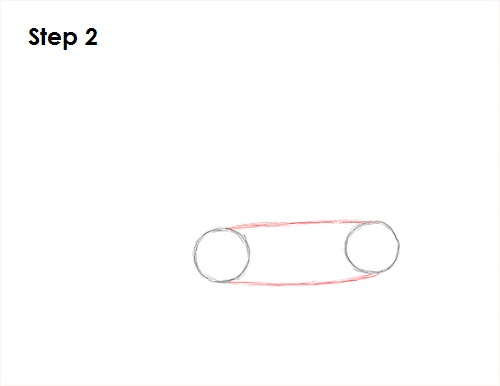
Step 2: Draw two curved lines that connect the circles to form the rest of the scorpion's body.
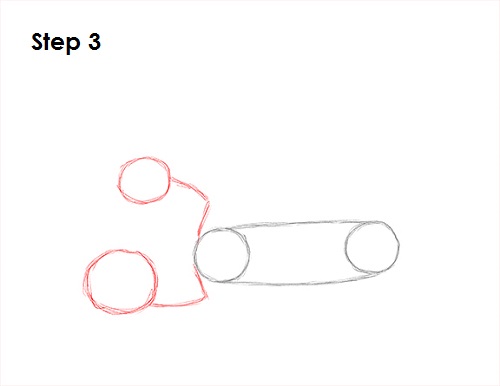
Step 3: Draw a couple of circles and lines on the left side of the body as guides for the claws. First draw a circle in front of the scorpion's body, then connect it to the body using an angled line. The claw at the top will be on the other side of the scorpion, so make it a bit smaller because of the perspective. The size of these circles will determine the size of the claws. So draw them based on what particular species of scorpion you want.
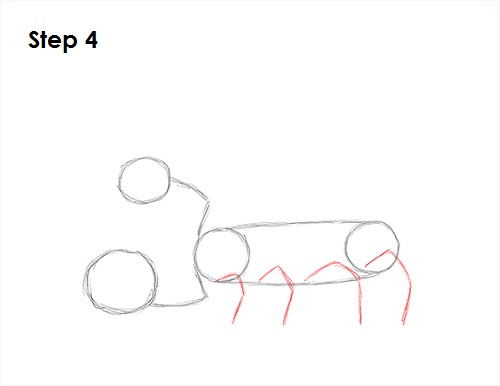
Step 4: Draw a few short, angled lines under the scorpion's body as guides for the legs. Scorpions are arachnids like spiders, so they have eight legs. The four on the other side will be hidden behind the scorpion's body.
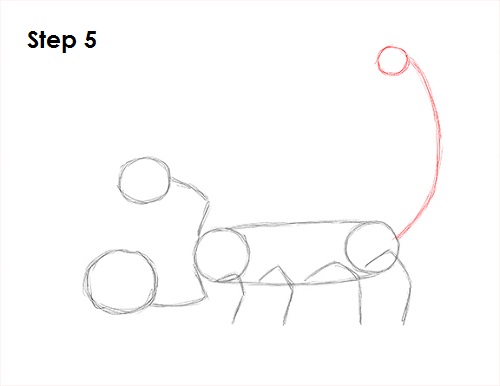
Step 5: Draw a curved line and circle on the right side of the body as a guide for the scorpion's tail and sting. Draw a bigger circle for a bigger sting.
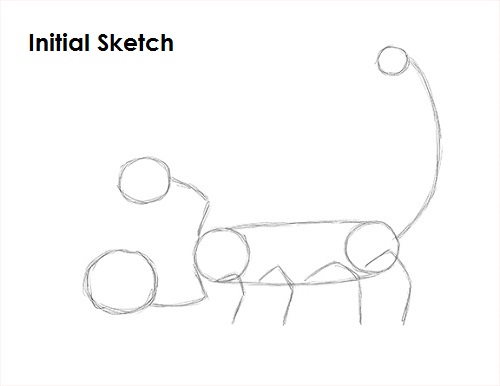
That's it for the initial sketch! From this point on, press harder with your pencil to get a more defined sketch.
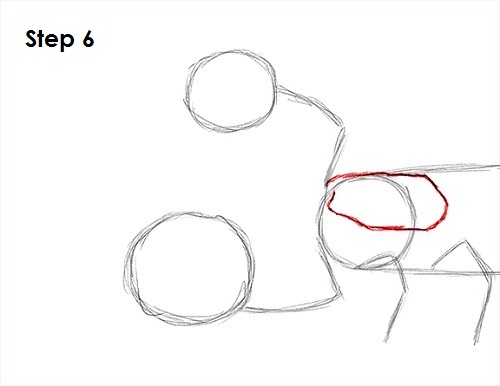
Step 6: Use the initial shapes as guides to draw the front part of the scorpion's body or the cephalothorax. Follow the basic path of the guides and draw a hexagon-like shape for the top part of the exoskeleton. This shape can be a little tricky, so don't forget to pause the video to follow at your own pace.
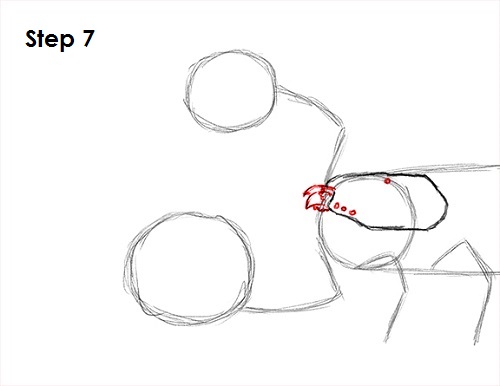
Step 7: At the front of the cephalothorax, draw two curved, pointed shapes for the fangs or chelicerae. Draw three dots near the front and one at the top for the eyes. Scorpions usually have eight eyes, but the other four are on the other side.
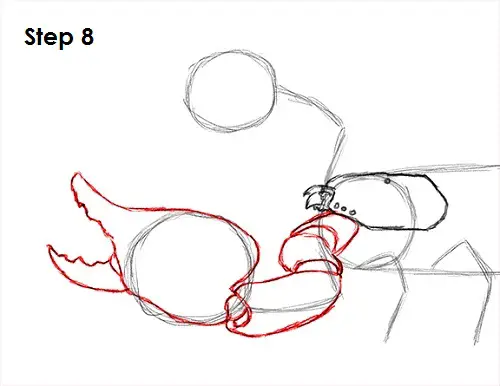
Step 8: Use the initial line and circle at the bottom as a guide to draw the pedipalp that is shaped into a claw. Follow the basic path of the lines as you add the segments that lead to the claw. Sketch each segment lightly at first as you follow the path of the guides. When you get the structure right, darken the lines. There's a total of three segments plus the claw. The shapes can be a bit tricky, so remember to pause the video as you follow along. Now draw the scorpion's claw at the end using the circle as a guide. Follow the basic path of the circle as you darken the line that creates the base of the claw. Add a pointed tip to the top left side of the shape for the first part of the claw. Draw another pointed shape just below it for the bottom part of the claw. Notice that the inside of the scorpion's claws are slightly serrated.
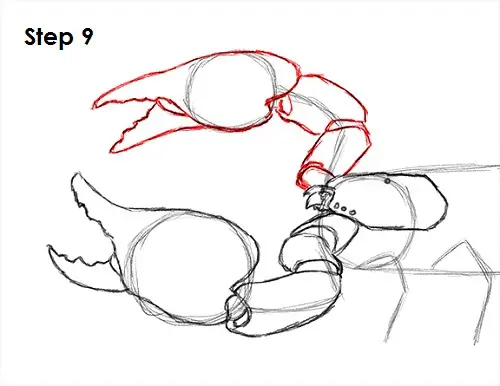
Step 9: Use the other line and circle as a guide to draw the scorpion's pedipalp or claw on the other side. Follow the path of the line as you add each separate segment. Sketch each of the three segments lightly. When you get the structure of them right, darken them. Now follow the basic shape of the circle as you draw the claw at the tip. First draw the base of the scorpion's claw along with the pointy end for the top part of the claw. Then add the pointy section at the bottom for the second part of the claw.
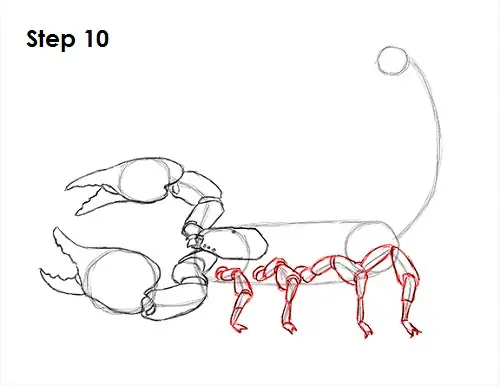
Step 10: Use the lines at the bottom as guides to draw the scorpion's legs. Just like with the pedipalps, follow the path of the line as you draw the separate segments that create each leg. Each leg should have about four segments each. They should also get bigger the farther back toward the tail they are. The legs should be attached to the cephalothorax, but for the sake of simplicity and to prevent too much overlap, you can add them across the bottom along the scorpion's abdomen. The joints where each segment is attached should be thinner. Each individual segment should also vary in width.
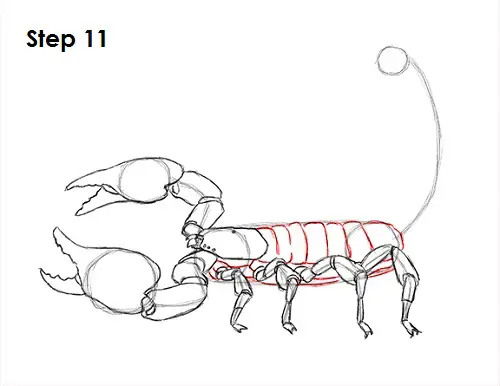
Step 11: Use the initial shapes as guides to draw the back portion of the body or the abdomen. Add a few bumps to the abdomen as you follow the path of the guides and darken the lines. Draw a few curved lines inside the shape to indicate the separate segments within the scorpion's abdomen. There should be about seven segments. Now darken the lines at the bottom in between the legs to finish up the scorpion's abdomen.
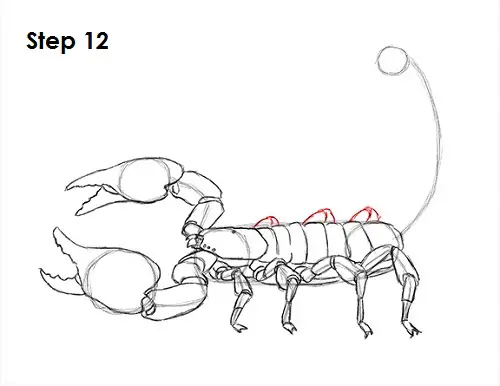
Step 12: Draw a few bumps on top of the abdomen to indicate the legs on the other side. Only draw the tips, as most of the legs are hidden behind the scorpion's body.
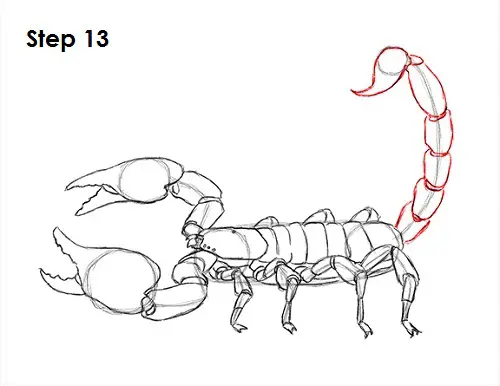
Step 13: Use the curved line and circle on the right as guides to draw the scorpion's tail and sting. Darken the shape of the circle but add a curved, pointy spike-like shape on the left side for the actual sting. Follow the path of the line as you draw the individual segments that make up the tail. There should be five segments of different sizes under the sting. Different species of scorpions have different-sized stings and tails, so draw yours as big or small as you'd like.
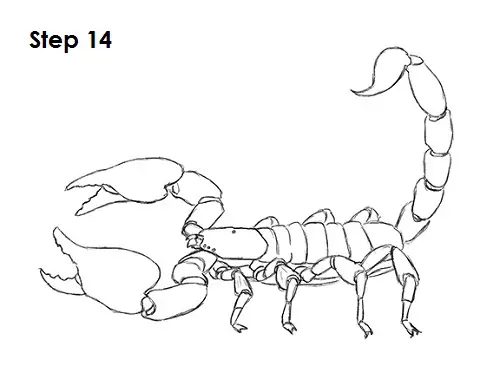
Step 14 (optional): For a cleaner look, erase as much as you can of the initial lines. Don't worry about erasing all of the guides. It's okay to leave some behind. Also re-draw any final sketch lines that you may have accidentally erased.
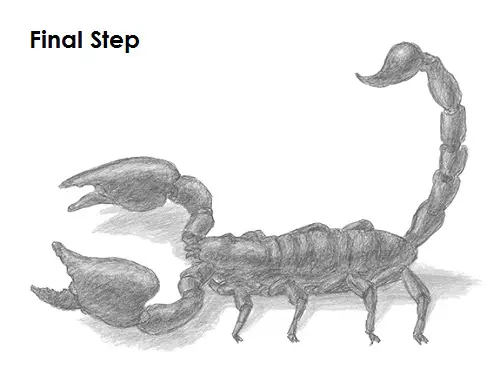
Final Step (optional): Add some shading to your scorpion drawing to give it more dimension and volume. Pick the direction of the light source when shading so that the shadows are consistent with it. Don't worry too much about the shading if you're going to add more value to scorpion drawing later.
Add a cast shadow underneath. This helps ground the scorpion so it doesn't appear to be floating.
You can add more value throughout your scorpion drawing for extra detail. Vary the pressure on your pencil to get different degrees of tonal value. Scorpions have hard exoskeletons that can be very shiny, so use a lighter value on part of each segment for a shinier look. Add the value using even, smooth strokes for a sleek, shiny look instead of a rough, gritty texture. Adding value to each tiny, individual segment can be very time-consuming, so be patient and take plenty of breaks. Some species of scorpions are very light in color, so you can make your scorpion lighter for a faster process. Some people keep scorpions as pets. If you have a pet scorpion, try to duplicate its look on your drawing. You can also get creative and add the value however you'd like. You can use spots, stripes and even different colors! If you want a more accurate scorpion drawing, it's a good idea to use reference, especially if you're drawing a specific species of scorpion. Pause the "How to Draw a Scorpion" video to use this drawing as reference and draw at your own pace.
Thanks for watching! Subscribe to the
How2DrawAnimals YouTube Channel for a new tutorial every Tuesday.
To learn how to draw popular cartoon characters, visit
EasyDrawingTutorials.com.







