







How to Draw a Phoenix
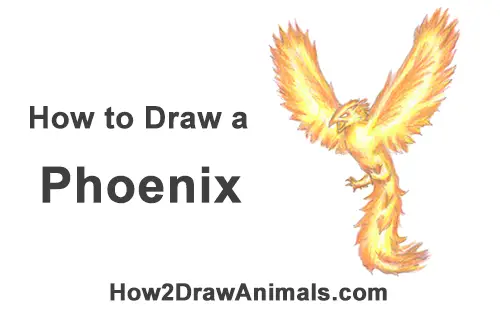
Please PAUSE the "How to Draw a Phoenix" video after each step to draw at your own pace.
For the first few steps, don't press down too hard with your pencil. Use light, smooth strokes to begin.

Step 1: Draw a circle as a guide for the top part of the phoenix's body. The circle doesn't have to be perfect. It's just a guide. Leave enough room at the top and bottom for the wings and tail.

Step 2: Draw a smaller circle on the top left side as a guide for the phoenix's head.

Step 3: Draw a triangle-like angled line to the left of the small circle as a guide for the top part of the phoenix's beak.

Step 4: Draw another triangle-like angled line under the first one as a guide for the bottom part of the phoenix's beak.
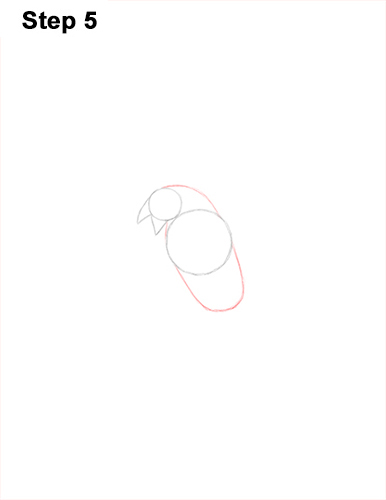
Step 5: Add a couple more curved lines to finish the guide for the body. Use a short curved line at the top to form the neck and an arc at the bottom for the lower half of the phoenix's body.
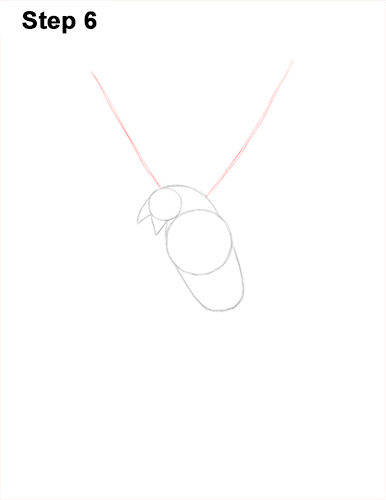
Step 6: Draw two lines above of the body as the first part of the guide for the phoenix's wings.
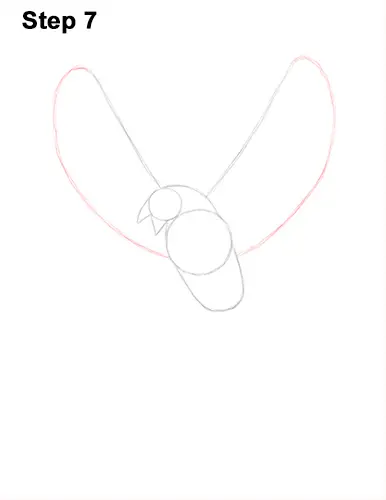
Step 7: Now draw two curved lines underneath as the second part of the guide for the wings. Remember that the phoenix is a mythical creature, so feel free to make the wings bigger and make any other changes you'd like along the way.
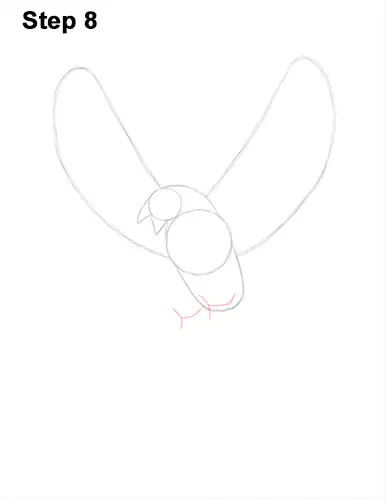
Step 8: Use a few angled lines near the bottom part of the body as guides for the feet.
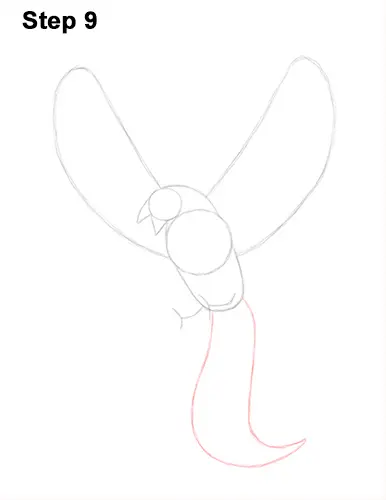
Step 9: Use a couple of long, wavy lines under the body as a guide for the tail. Some depictions of the phoenix have shorter tails; others have very long ones. You can adjust yours however you'd like.
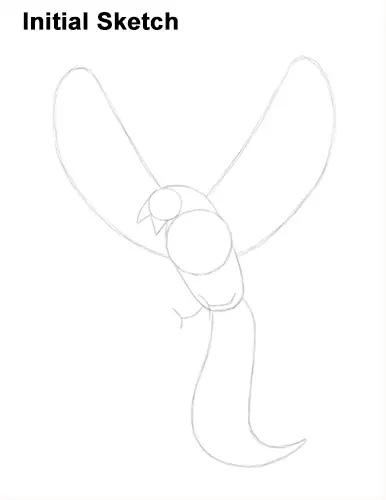
That's it for the initial sketch! From this point on, press harder with your pencil to get a more defined sketch.
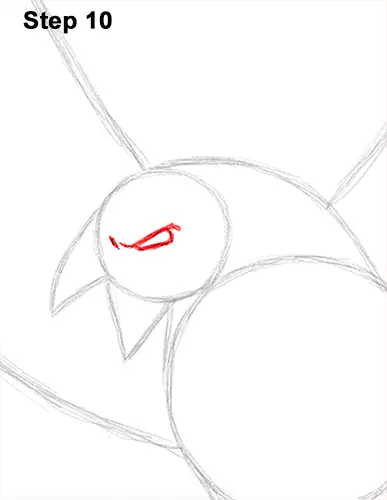
Step 10: Draw the phoenix's eye inside the head, near the middle, as a triangle-like shape. Sketch the eye lightly at first. When you get the shape right, darken the lines.
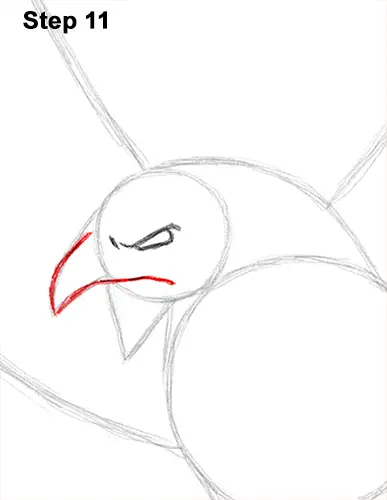
Step 11: Use the initial triangle-like line as a guide to draw the top part of the phoenix's beak. Follow the basic path of the guide as you darken the lines but make the mouth extend inward more.
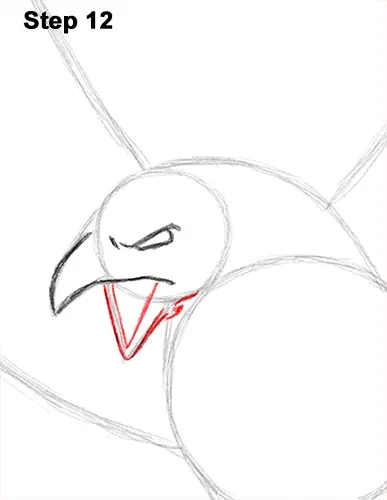
Step 12: Now use the angled line at the bottom as a guide to draw the bottom part of the phoenix's beak. Add another V- shaped line inside for the open mouth.
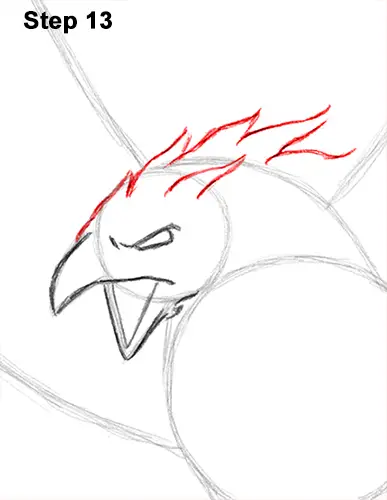
Step 13: Use the initial shapes as guides to draw the top part of the phoenix's head. As you follow the path of the guides, draw wavy, spiky shapes for the flame-like feathers. You can make these flames longer for a bigger crest or just darken the guide lines for a smoother look.
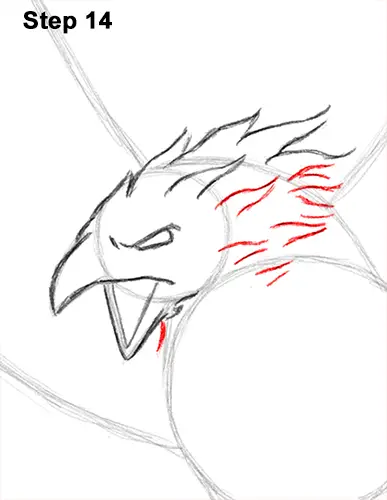
Step 14: Draw more fiery flames using wavy, spiky shapes throughout the head. More flames make it seem as though the phoenix is made of fire.
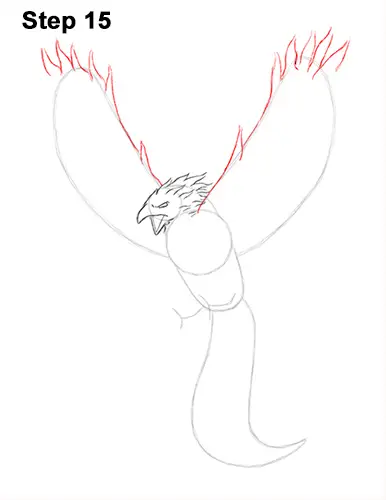
Step 15: Use the initial shapes as guides to draw the top part of the phoenix's wings. Follow the basic path of the guides as you draw wavy, spiky shapes for the flame-like feathers. You can make the spike shapes longer for bigger flames. Don't overthink it when it comes to the shape of the flames. The more random they are, the more fire-like they'll appear.
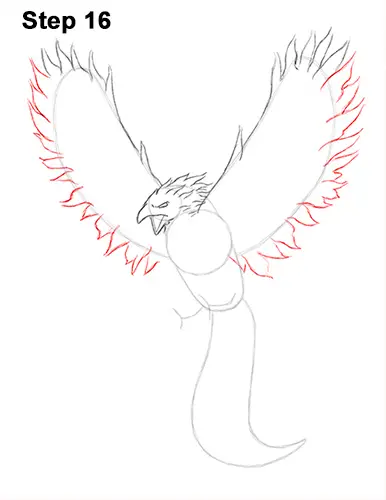
Step 16: Now draw the bottom part of the phoenix's wings using the initial shapes as guides. Follow the basic path of the guides as you use triangle-like wavy spikes to represent the fiery feathers. Vary the shape and spacing of the feathers for a more fiery effect.
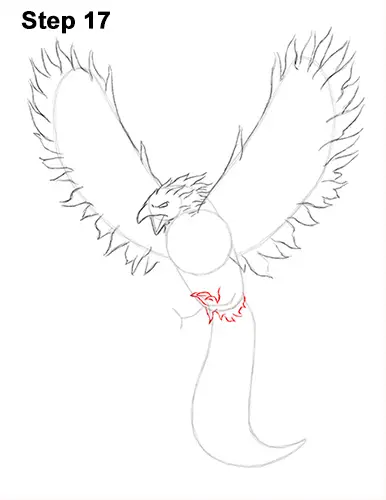
Step 17: Follow the path of the initial guides at the bottom to create the shape of the phoenix's first foot.
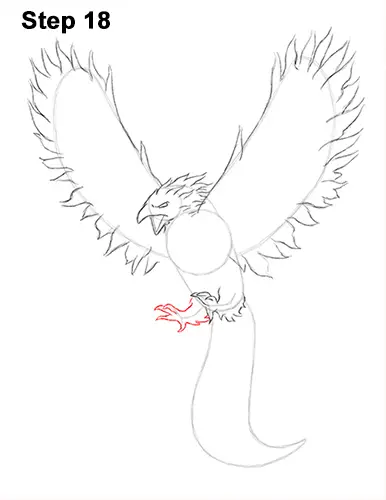
Step 18: Draw the other foot the same way. Add a couple of curved lines at the ends of the phoenix's feet for the talons.
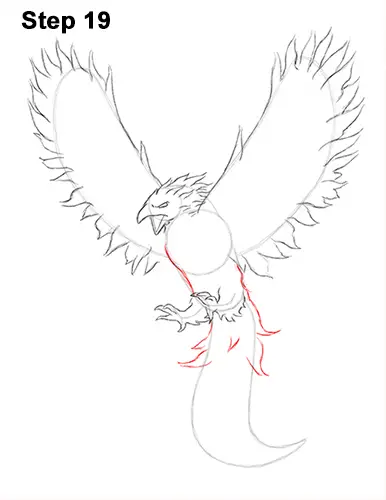
Step 19: Follow the path of the initial guides as you darken the lines to create the shape of the torso. Add a few wavy spikes under the feet as you follow the guides to create the top part of the phoenix's tail feathers.
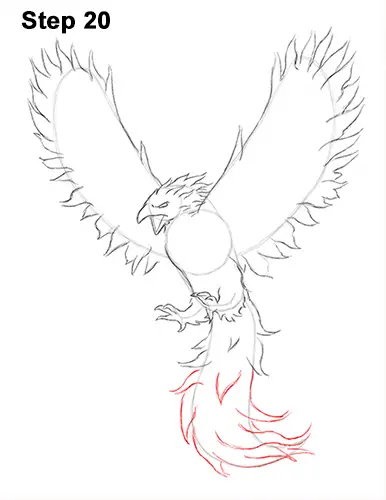
Step 20: Follow the basic path of the guide as you add the flame-like feathers to the rest of the phoenix's tail. Don't dwell too much on making the feathers perfect. Make them different sizes to make them more fire-like.
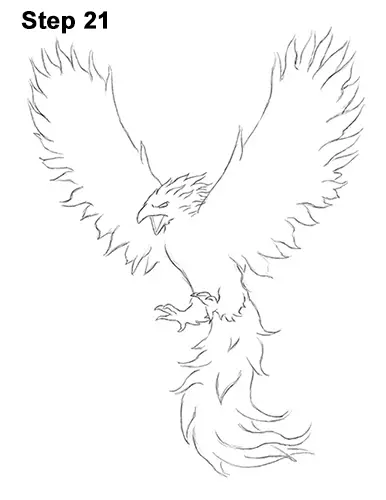
Step 21 (optional): For a cleaner look, erase as much as you can of the initial guide lines. Don't worry about erasing all of the guides. It's okay to leave some behind. Re-draw any final sketch lines you may have accidentally erased. If you're going to color your phoenix, you can also lightly erase some of the final lines so that the graphite doesn't mix with the colors.
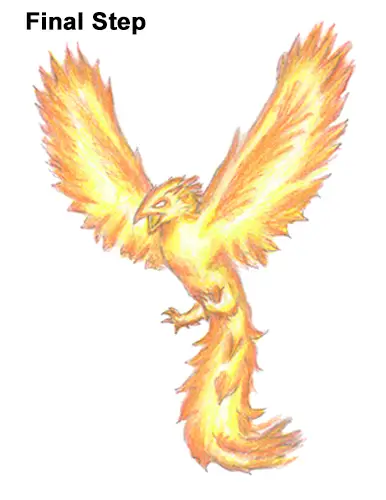
Final Step (optional): The phoenix is a mythical creature that can be colorful, so instead of the usual shading, try coloring your drawing. Start by adding red along the outer edges of the entire body. Add a bit of red inside the body and wings too. This will emphasize their shape more. Since the phoenix is a mythical bird, you can color it any way you want. These steps are more like guidelines than rules.
Now add some red-orange along the edges, making your way in toward the center a bit more. Use some regular orange on top of the previous colors and farther in toward the body. Now use yellow- orange on top of everything and color more of the inside of the body.
Using darker tones on the outside edges and lighter tones inside will give the body a fiery, glowing effect. Use yellow for the inside of the body but leave the middle sections blank. Push harder with the yellow to blend the other colors together. Continue adding the yellow until the colors are well blended.
Coloring can be time-consuming, so be patient and take breaks. Don't forget to pause the "How to Draw a Phoenix" video after each step to draw at your own pace.
Thanks for watching! Subscribe to the How2DrawAnimals YouTube Channel for a new tutorial every Tuesday.
To learn how to draw popular cartoon characters, visit EasyDrawingTutorials.com.